Contents:
Components and Components Location
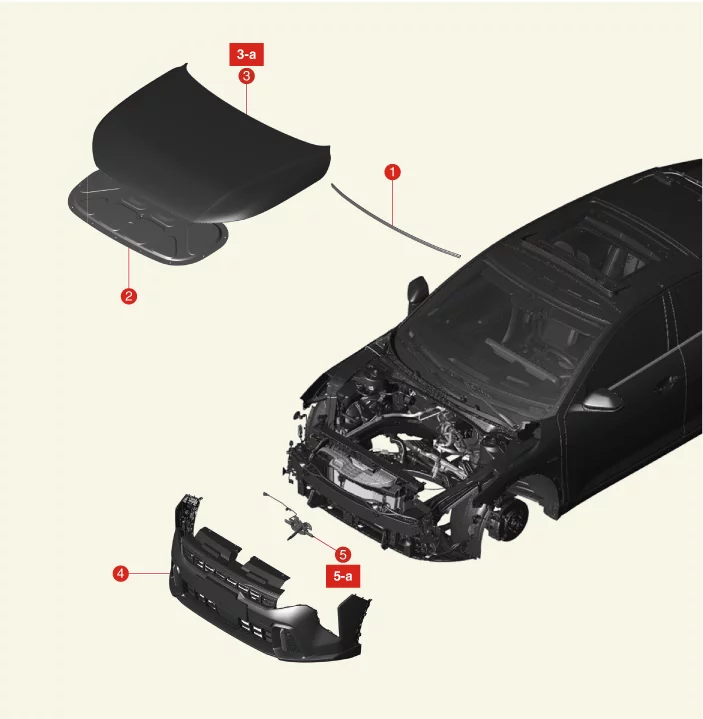
1. Hood Weather Strip
2. Hood Insulator
Pad
3.
Hood Assembly
3-a. 19.6 - 29.4 N·m (2.0 - 3.0 kgf·m, 14.5 - 21.7 lb·ft)
|
4. Front Bumper Assembly
5. Hood Latch
Assembly
5-a. 7.8 - 11.8 N·m (0.8 - 1.2 kgf·m, 5.8 - 8.7 lb·ft)
|
Adjustment
| 1.
|
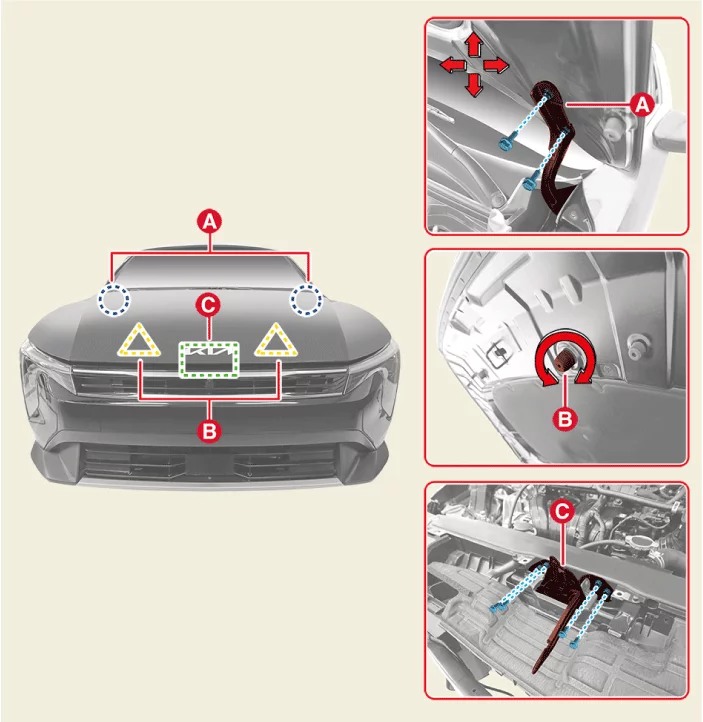
Loosening the bolts of the hood hinge (A)
|
| 2.
|
Tighten the bolts after adjusting the hood by moving it in all directions.
|
| 3.
|
Adjust the height of the hood by turning the overslam bumper (B) in clockwise and
counterclockwise.
|
| 4.
|
Loosen the hood latch (C) bolts, adjust the hood latch by moving it up, down, left and right,
and then
tighten the bolts.
|
| 5.
|
After completing the adjustment, check that the hood closes well.
|
•
|
If the hood does not close well at once or does not close completely when
pressing the hood
emblem part.
|
| 1) |
Reduce the amount of overlap by adjusting the two hood overslam bumpers (B) 1/4
turn upward.
|
| 2) |
If it still does not close well, readjust the hood latch (C) upward.
|
|
| 6.
|
When the hood latch area on the front part of the hood outer panel is tapped with the hood
closed, check
whether an iron noise is generated.
|
•
|
When an iron noise is generated
|
| 1) |
Increase the amount of overlap by adjusting the two hood overslam bumpers (B)
1/4 to 1/2 turn
downward.
|
| 2) |
After increasing the overlap, recheck the hood closure.
|
| 3) |
If the hood does not close well even after increasing the overlap, leave the
overlap of the
overslam bumper (B) as it is and adjust the hood latch (C) upward to check if
the hood closes well.
|
|
Hood Assembly Removal and Installation
| 1.
|
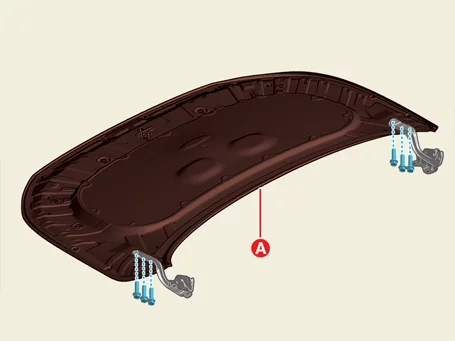
Remove the hood assembly (A) after removing the bolts.
|
Tightening torque :
19.6 - 29.4 N·m (2.0 - 3.0 kgf·m, 14.5 - 21.7 lb·ft)
|
|
| 1.
|
Install in the reverse order of removal.
|
Hood Insulator Pad Removal and Installation
| 1.
|
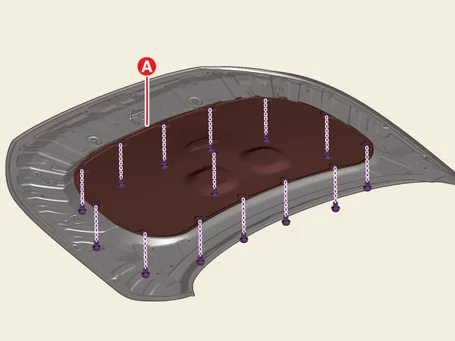
Remove the hood insulator pad (A) after removing the fasteners.
|
| 1.
|
Install in the reverse order of removal.
|
Hood Latch Removal and Installation
|
The indication below represents the location of a clip or fastener.

|
| 1.
|
Remove the front bumper assembly.
(Refer to Front & Rear Bumper - "Front Bumper
Assembly")
|
| 2.
|
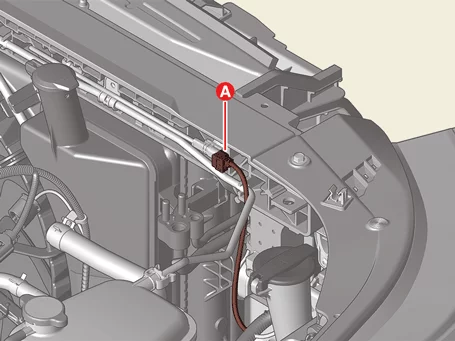
Disconnect the hood latch connector (A).
|
| 3.
|
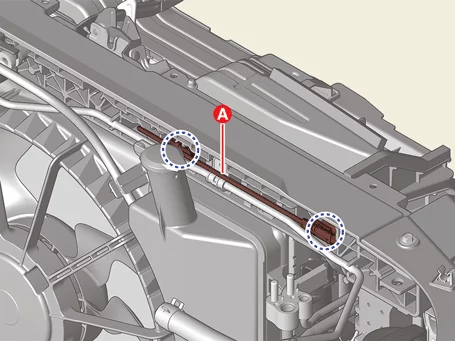
Separate the connector wiring (A) after removing the fasteners.
|
| 4.
|
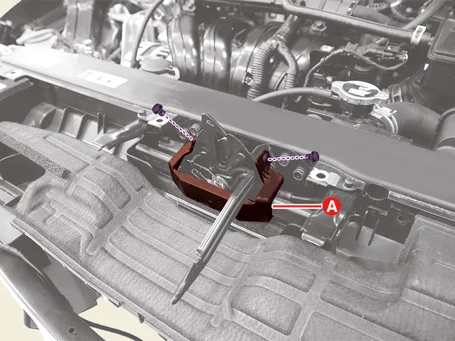
Remove the hood latch cover (A) after removing the fasteners.
|
| 5.
|
Remove the hood latch (A) after removing the bolts.
|
Tightening torque:
7.8 - 11.8 N·m (0.8 - 1.2 kgf·m, 5.8 - 8.7 lb·ft)
|
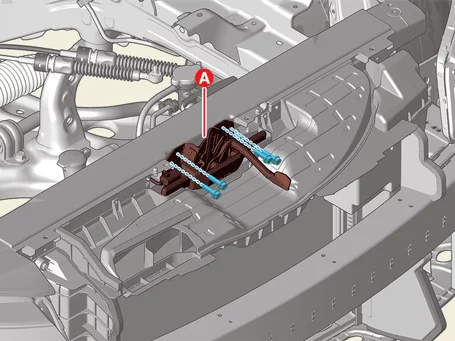
|
| 6.
|
Separate the hood latch cable (A).
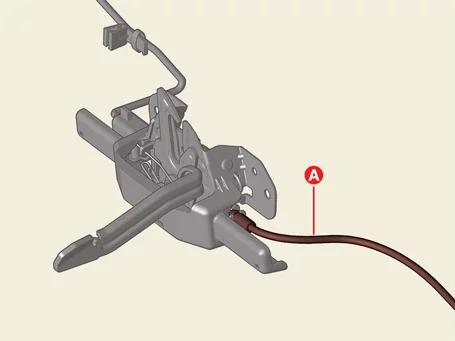
|
| 1.
|
Install in the reverse order of removal.
|
Hood Latch Release Handle Removal and Installation
| 1.
|
Separate the hood latch release handle cable (A).
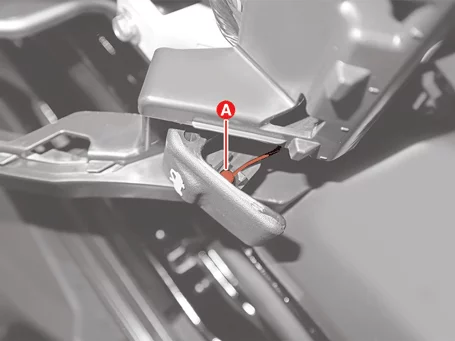
|
| 2.
|
Remove the handle (A).
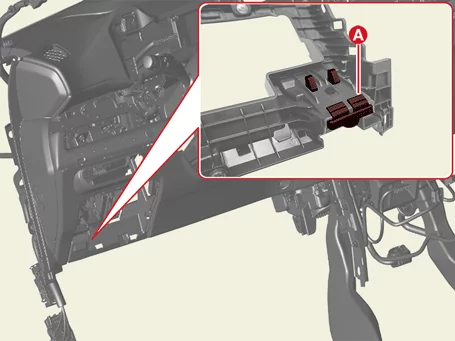
|
| 1.
|
Install in the reverse order of removal.
|
Hood Weather Strip Removal and Installation
| 1.
|
Remove the hood weather strip (A).
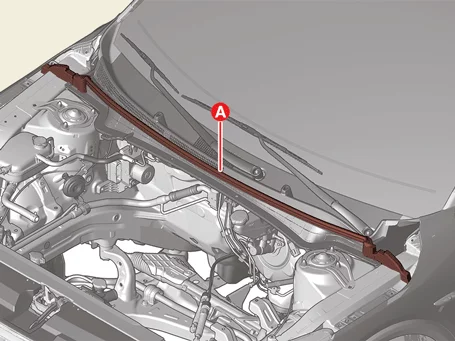
|
| 1.
|
Install in the reverse order of removal.
|
Other information:
Kia K4 (CL4) 2025-2026 Service Manual: Closing the fuel filler door
To install the fuel tank cap, place it onto the filler neck and rotate it in a clockwise direction until you hear a distinct clicking sound, indicating it is properly sealed for your Kia K4.
Close the exterior fuel filler door by pressing firmly on its rear center edge until the locking mechanism engages and sits flush with the body panel of your Kia K4.