Contents:
Components and Components Location
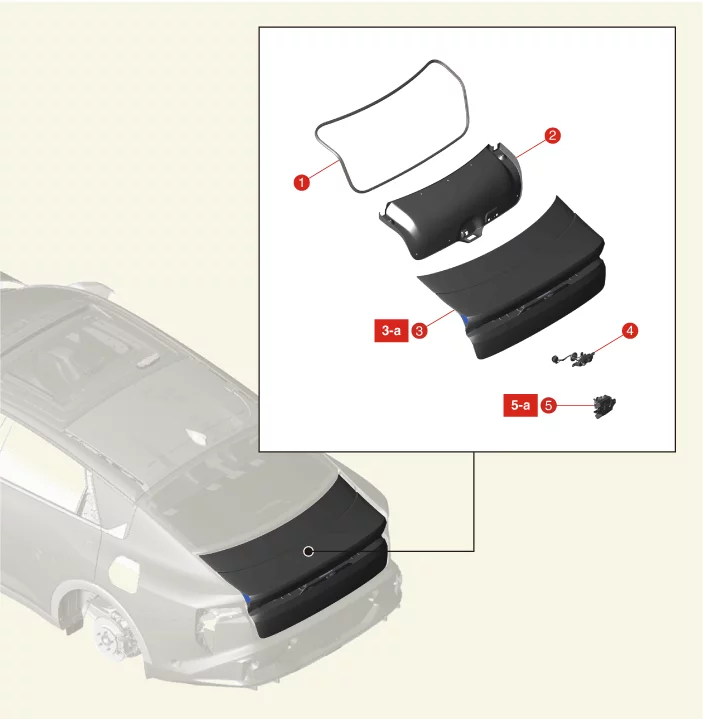
1. Trunk Lid Weather Strip
2. Trunk
Lid
Trim
3. Trunk Lid Assembly
3-a. 21.6 - 26.5 N·m (2.2 - 2.7 kgf·m, 15.9 - 19.5 lb·ft)
|
4. Trunk Lid Switch
5. Trunk Lid
Latch
5-a. 6.9 - 8.8 N·m (0.7 - 0.9 kgf·m, 5.1 - 6.5 lb·ft)
|
Adjustment
| 1.
|
After parking the vehicle on the flat surface, check that the distance between the trunk lid
and the body
is even.
|
| 2.
|
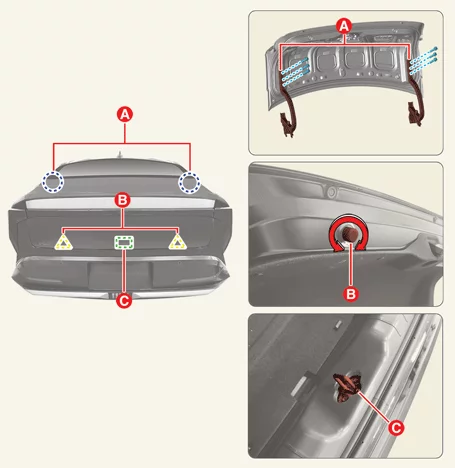
Loosen the trunk lid hinge (A) bolts, adjust the gap by moving the trunk lid back and forth,
left and
right, and then tighten the bolts.
|
| 3.
|
Adjust the gap between the trunk lid and body by turning the overslam bumpers (B).
|
| 4.
|
Loosen the striker (C) screws, adjust the striker by moving the striker back and forth, left
and right,
and then tighten the screws.
|
| 5.
|
Check that the trunk lid opens and closes properly.
|
Trunk Lid Assembly Removal and Installation
|
The indication below represents the location of a clip or fastener.

|
| 1.
|
Disconnect the battery negative (-) terminal.
|
| 2.
|
Remove the trunk lid trim.
(Refer to Trunk Lid - "Trunk Lid Trim")
|
| 3.
|
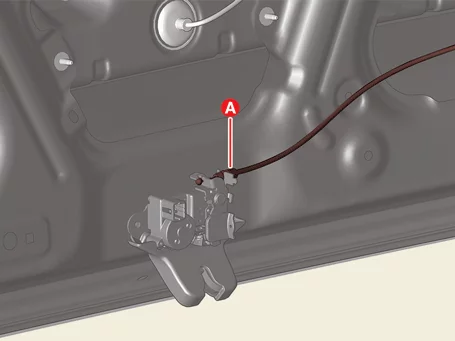
Separate the trunk lid latch cable (A).
|
| 4.
|
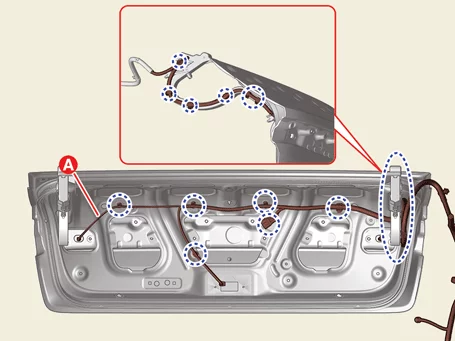
Separate the wiring harness (A) after disconnecting the connectors.
|
| 5.
|
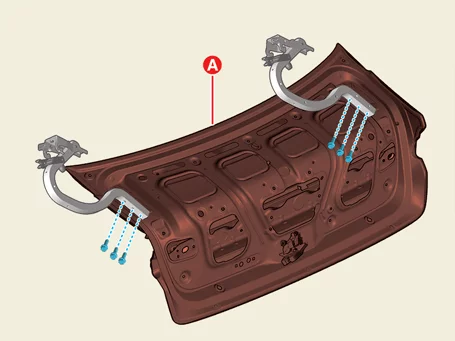
Remove the trunk lid assembly (A) after removing the bolts.
|
Tightening torque :
21.6 - 26.5 N·m (2.2 - 2.7 kgf·m, 15.9 - 19.5 lb·ft)
|
|
| 1.
|
Install in the reverse order of removal.
|
Trunk Lid Latch Removal and Installation
| 1.
|
Disconnect the battery negative (-) terminal.
|
| 2.
|
Remove the trunk lid trim.
(Refer to Trunk Lid - "Trunk Lid Trim")
|
| 3.
|
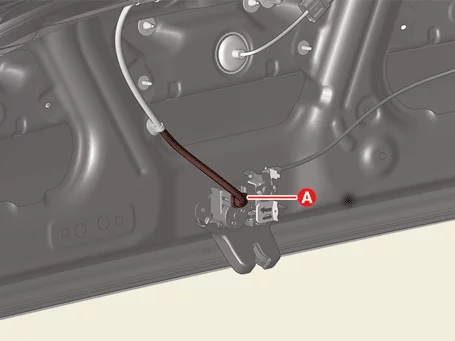
Disconnect the trunk lid latch connector (A).
|
| 4.
|
Separate the latch cable (A).
|
| 5.
|
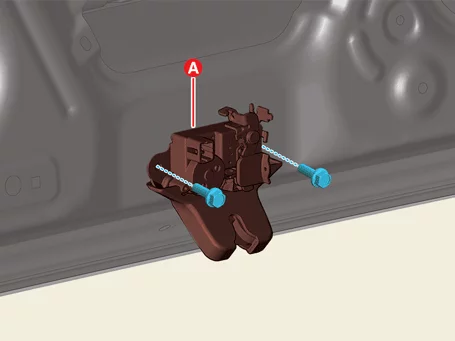
Remove the latch (A) after removing the bolts.
|
Tightening torque
6.9 - 8.8 N·m (0.7 - 0.9 kgf·m, 5.1 - 6.5 lb·ft)
|
|
| 1.
|
Install in the reverse order of removal.
|
Trunk Lid Trim Removal and Installation
| 1.
|
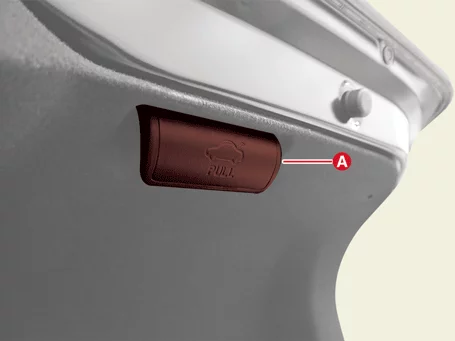
Separate the trunk lid handle cover (A).
|
| 2.
|
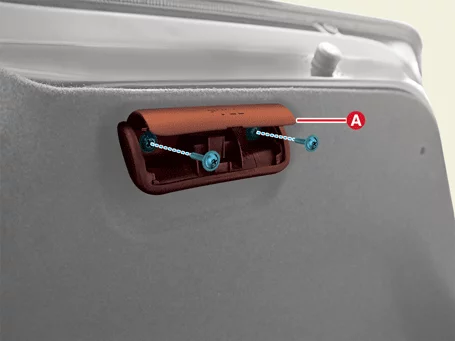
Remove the handle (A) after removing the screws.
|
| 3.
|
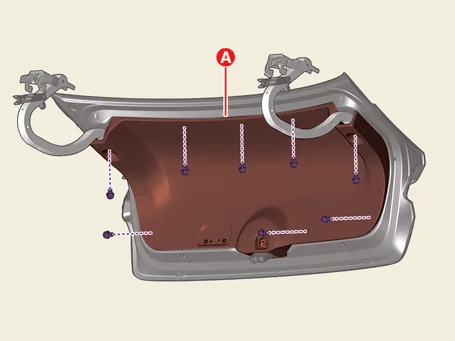
Remove the trunk lid trim (A) after removing the fasteners.
|
| 1.
|
Install in the reverse order of removal.
|
Trunk Lid Weather Strip Removal and Installation
|
Be careful not to get sealant on the body surface.
|
| 1.
|
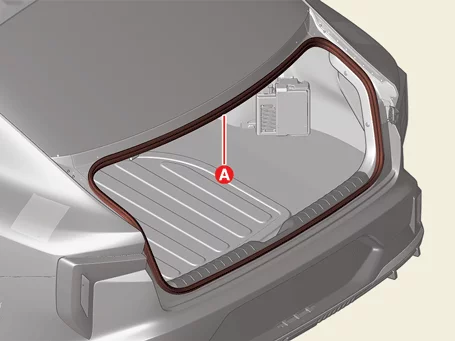
Remove the trunk lid weather strip (A).
|
| 1.
|
Install in the reverse order of removal.
|
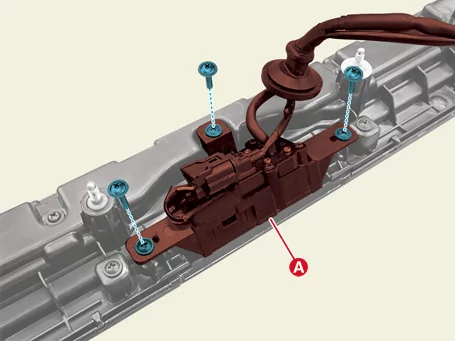
Trunk Switch Removal and Installation
Trunk Lid Outside Handle Switch
| 1.
|
Remove the inside rear combination lamp.
(Refer to Light & Vision System - "Rear Combination
Lamp")
|
| 2.
|
Remove the switch (A) after removing the screws.
|
| 1.
|
Install in the reverse order of removal.
|
Other information:
Kia K4 (CL4) 2025-2026 Service Manual: Digital Key 2
The innovative Kia Digital Key 2 technology offers unparalleled convenience and security, transforming your compatible mobile device into a fully operational virtual key fob. This system allows you to lock or unlock the driver and passenger side doors, pop open or close the rear liftgate, and completely initialize the ignition sequence to start your Kia K4 using only a certified smartphone or dedicated NFC card key.
Kia K4 (CL4) 2025-2026 Service Manual: Light switch settings
Setting
Result
Figure 1. Position lamp and taillight
Front position lamp, taillights, and license plate lamp are ON.
TIP
The Kia K4 must be in the ON position to turn on these headlights.