Contents:
Components and Components Location
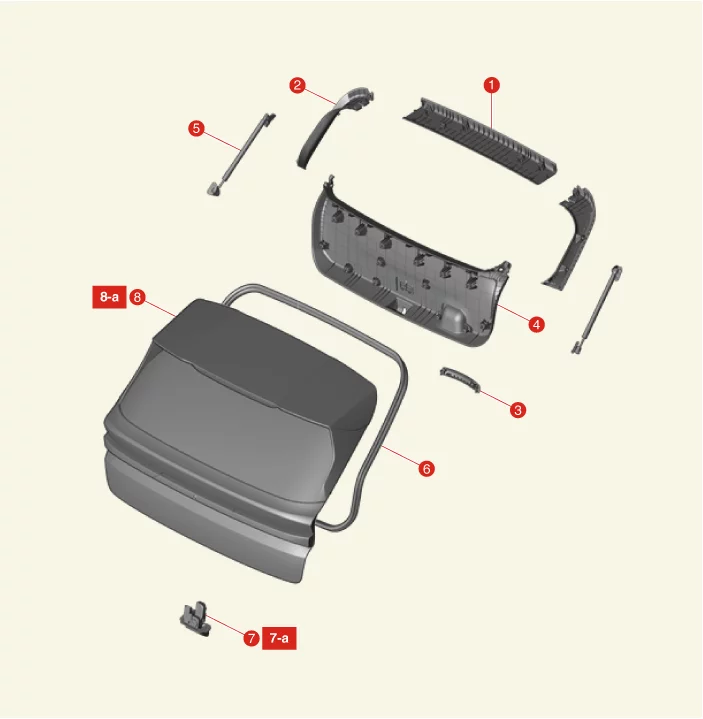
1. Tailgate Upper Trim
2. Tailgate Side
Trim
3.
Tailgate Handle Cover
4. Tailgate Lower Trim
5. Tailgate Lifter
|
6. Tailgate Weather Strip
7. Tailgate
Latch
7-a.
6.9 - 10.8 N·m (0.7 - 1.1 kgf·m, 5.1 - 8.0 lb·ft)
8. Tailgate Assembly
8-a. 21.6 - 26.5 N·m
(2.2 - 2.7
kgf·m, 15.9 - 19.5 lb·ft)
|
Adjustment
| 1.
|
After parking the vehicle on the flat surface, check that the distance between the tailgate and
the body
is even.
|
| 2.
|
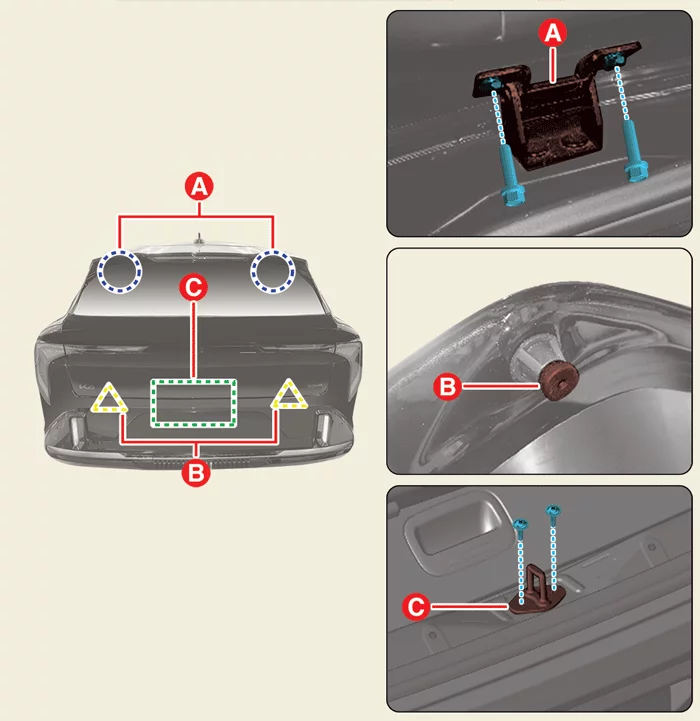
Loosen the tailgate hinge (A) bolts, adjust the gap by moving the tailgate back and forth, left
and
right, and then tighten the bolts.
|
| 3.
|
Adjust the gap between the tailgate and body by turning the overslam bumpers (B).
|
| 4.
|
Loosen the striker (C) screws, adjust the striker by moving the striker back and forth, left
and right,
and then tighten the screws.
|
| 5.
|
Check that the tailgate opens and closes properly.
|
Tailgate Assembly Removal and Installation
|
The procedure below requires at least two people.
|
|
The indication below represents the location of a clip or fastener.

|
| 1.
|
Remove the rear spoiler.
(Refer to Body Side Molding - "Rear Spoiler")
|
| 2.
|
Remove the rear wiper motor.
(Refer to Exterior Green House - "Wiper Motor")
|
| 3.
|
Remove the inside rear combination lamp.
(Refer to Light and Vision System - "Rear Combination
Lamp")
|
| 4.
|
Remove the tailgate lifter.
(Refer to Tailgate - "Tailgate Lifter")
|
| 5.
|
Remove the tailgate latch.
(Refer to Tailgate - "Tailgate Latch")
|
| 6.
|
Remove the tailgate garnish.
(Refer to Body Side Molding - "Tailgate Garnish")
|
| 7.
|
Remove the tailgate switch.
(Refer to Tailgate - "Tailgate Switch")
|
| 8.
|
Remove the license lamp. [Both side]
(Refer to Light and Vision System - "License Lamp")
|
| 9.
|
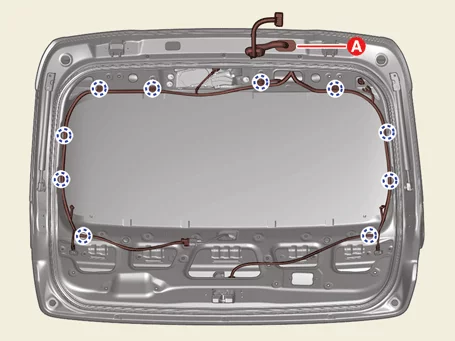
Separate the tailgate wiring harness (A) after removing the fasteners.
|
| 10.
|
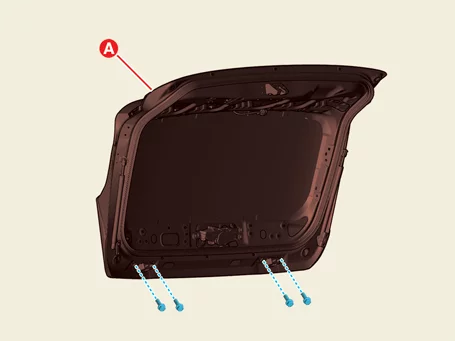
Remove the tailgate assembly (A) after removing the bolts.
|
Tightening torque:
21.6 - 26.5 N·m (2.2 - 2.7 kgf·m, 15.9 - 19.5 lb·ft)
|
|
| 1.
|
Install in the reverse order of removal.
|
Tailgate Latch Removal and Installation
| 1.
|
Disconnect the battery negative (-) terminal.
|
| 2.
|
Remove the tailgate lower trim.
(Refer to Tailgate - "Tailgate Trim")
|
| 3.
|
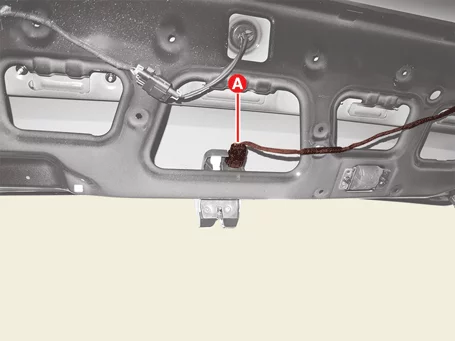
Disconnect the latch connector (A).
|
| 4.
|
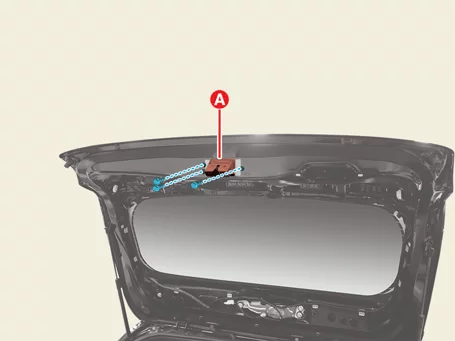
Remove the latch (A) after removing the bolts.
|
Tightening torque:
6.9 - 10.8 N·m (0.7 - 1.1 kgf·m, 5.1 - 8.0 lb·ft)
|
|
| 1.
|
Install in the reverse order of removal.
|
Tailgate Latch Inspection
| 1.
|
Remove the tailgate latch.
(Refer to Tailgate Latch - "Removal and Installation")
|
| 2.
|
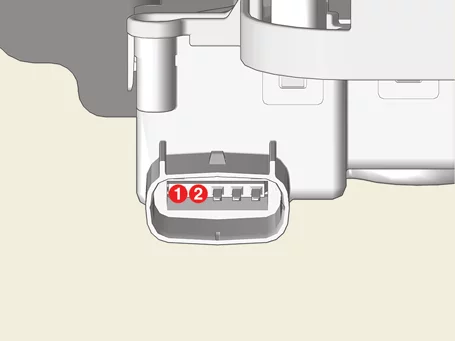
Apply voltage to connector terminal and check that the tailgate latch operates properly.
Location
|
Terminal
|
Motor negative (-)
|
1
|
Motor positive (+)
|
2
|
|
Tailgate Lifter Removal and Installation
| 1.
|
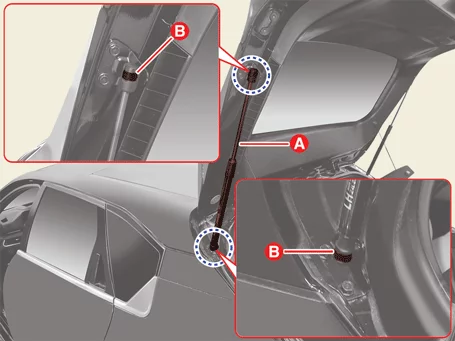
Remove the tailgate lifter (A) after removing the clips (B).
|
| 1.
|
Install in the reverse order of removal.
|
Tailgate Switch Removal and Installation
|
The indication below represents the location of a clip or fastener.
|
| 1.
|
Disconnect the battery negative (-) terminal.
|
| 2.
|
Remove the wide angle camera. [Rear side]
(Refer to Advanced Driver Assistance System (ADAS) - "Wide
Angle
Camera")
|
| 3.
|
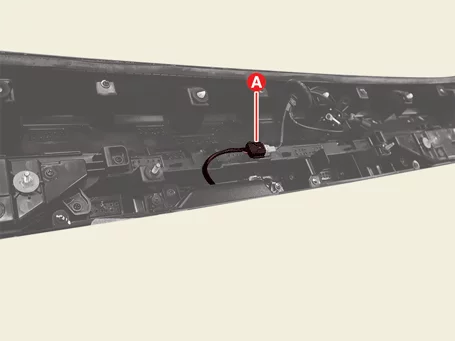
Disconnect the switch connector (A).
|
| 4.
|
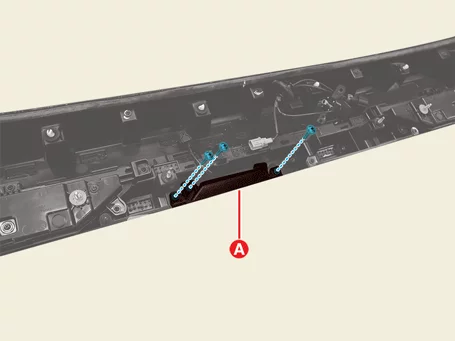
Remove the switch (A) after removing the screws.
|
| 1.
|
Install in the reverse order of removal.
|
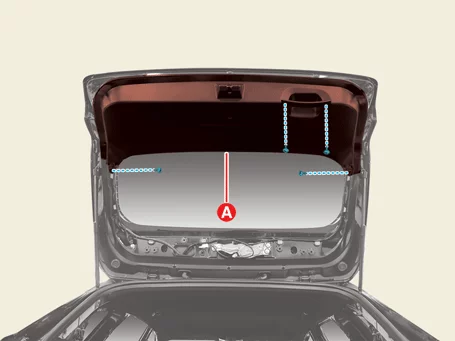
Tailgate Trim Removal and Installation
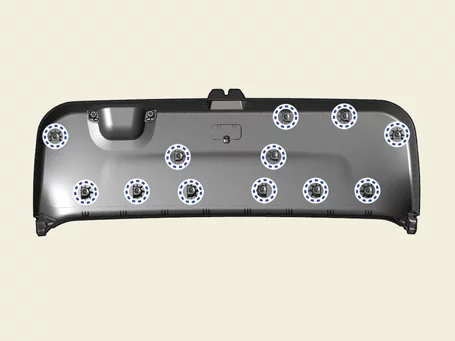
|
The indication below represents the location of a clip or fastener.
|
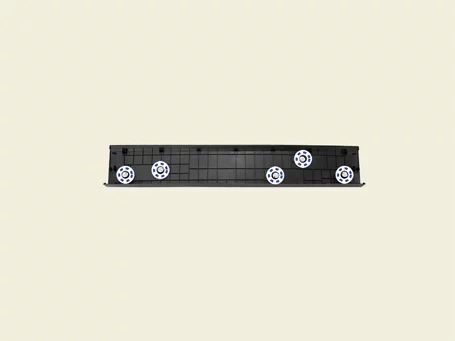
Tailgate Upper Trim
| 1.
|
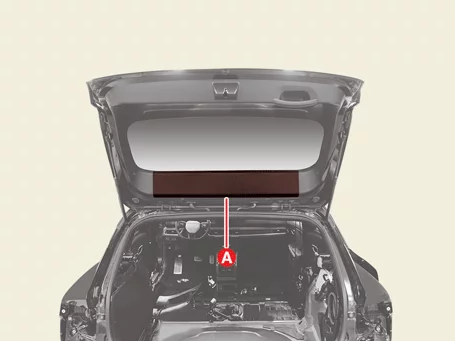
Remove the trim (A).
|
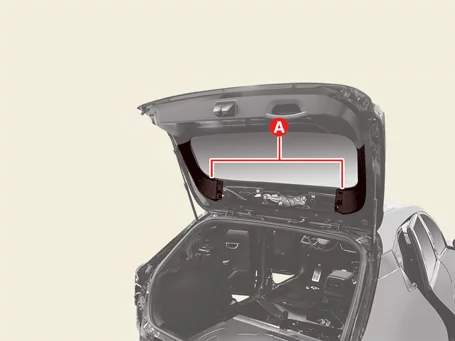
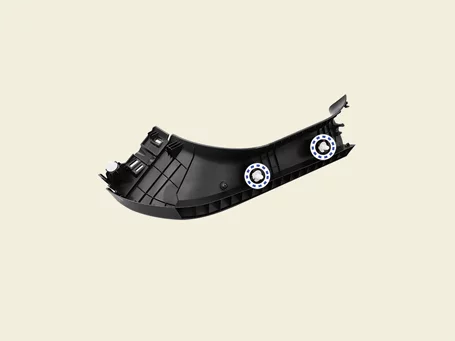
Tailgate Side Trim
| 1.
|
Remove the tailgate upper trim.
|
| 2.
|
Remove the trim (A).
|
Tailgate lower Trim
| 1.
|
Remove the tailgate side trim.
|
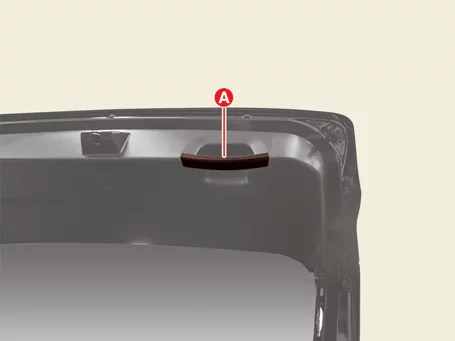
| 2.
|
Remove the tailgate handle cover (A).
|
| 3.
|
Remove the trim (A) after removing the screws.
|
| 1.
|
Install in the reverse order of removal.
|
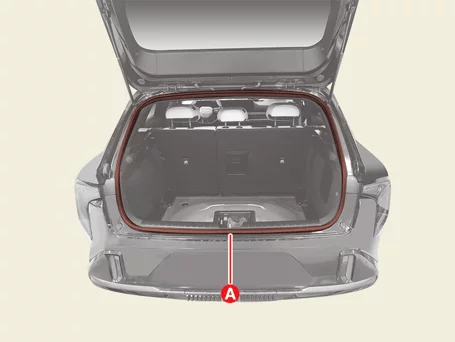
Tailgate Weather Strip Removal and Installation
|
Be careful not to get sealant on the body surface.
|
| 1.
|
Remove the tailgate weather strip (A).
|
| 1.
|
Install in the reverse order of removal.
|
Other information:
Kia K4 (CL4) 2025-2026 Service Manual: Parking Distance Warning (PDW):
The Forward, Side, and Reverse Parking Distance Warning (PDW) system in your Kia K4 utilizes sophisticated front, side, and rear ultrasonic sensors. This system is engineered to detect and alert you if a person, animal, or object enters a specific proximity zone while your Kia K4 is either stationary or moving at low speeds, providing added confidence during parking maneuvers.
Kia K4 (CL4) 2025-2026 Service Manual: Manual heating and air conditioning (A/C) operation
The heating and cooling system in the Kia K4 provides manual control over the cabin environment, allowing you to bypass the automatic settings. By pressing any of the climate control buttons, you can manually tailor the system to your immediate comfort preferences within your Kia K4.
To manually operate the heating and A/C system in your Kia K4, follow these steps:
Start the engine of your Kia K4.