Contents:
Components and Components Location
|
•
|
This video was created using 3D graphics to help understand the vehicle
maintenance manual.
|
|
•
|
There may be some differences from actual vehicles.
|
|
•
|
The location and repair procedures of the parts may vary depending on vehicle
model, model year,
region, and specifications.
|
|
•
|
Check the KDS Guide for detailed information on how to use the KDS.
|
|
•
|
Check the manual for detailed maintenance procedures.
|
|
•
|
Unauthorized reproduction, distribution, or sharing of this video is
prohibited.
|
|
Advanced Driver Assistance System (Parking) Components
(Click to play)

Video: Advanced Driver Assistance System
(Parking)
Components
1. Wide Angle Camera [Front]
|
5. Ultrasonic Sensor [Rear]
|
2. Wide Angle Camera [Side]
|
6. Driver Parking Assistance Switch
|
3. Wide Angle Camera [Rear]
|
7. ADAS Parking ECU
|
4. Ultrasonic Sensor [Front]
|
|
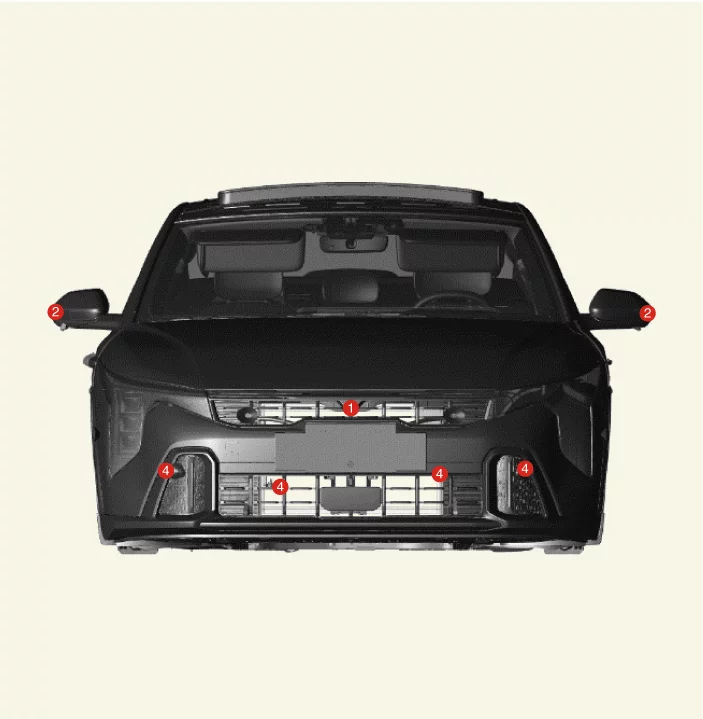
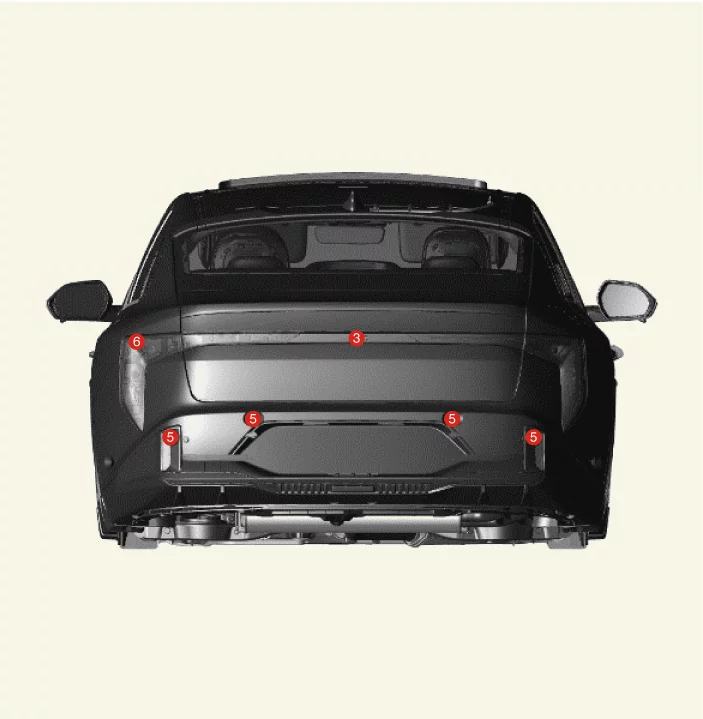
1. Wide Angle Camera [Front]
2. Wide Angle
Camera
[Side]
3. Wide Angle Camera [Rear]
|
4. Ultrasonic Sensor [Front]
5. Ultrasonic
Sensor
[Rear]
|
ADAS Parking ECU (ADAS_PRK) Specification
Item
|
Specification
|
Rated voltage (V)
|
12.0
|
Operation voltage (V)
|
9.0 - 16.0
|
Rated Current (A)
|
2.5
|
Operating temperature [°C (°F)]
|
-40 to 85 (-40 to 185)
|
ADAS Parking ECU (ADAS_PRK) On Vehicle Inspection
Diagnosis with KDS
| 1.
|
The ADAS parking ECU can be more quickly diagnosed for problems with the KDS. (Refer to "DTC
guide")
| (1)
|
Self diagnosis : Inspect the Diagnostic Trouble Code (DTC) with the KDS.
(Refer to DTC guide when fault code is found)
|
| (2)
|
S/W Management : Controlling other features including system option setting and
zero point
adjustment.
(S/W Management → Advanced Driver Assistance System_Parking → System
Identification)
(S/W Management → Advanced Driver Assistance System_Parking → Variant Coding)
|
|
Refer to the KDS screen for operating conditions and details.
|
|
ADAS Parking ECU (ADAS_PRK) Removal and Installation - 4DR
|
The indication below represents the location of a clip or fastener.

|
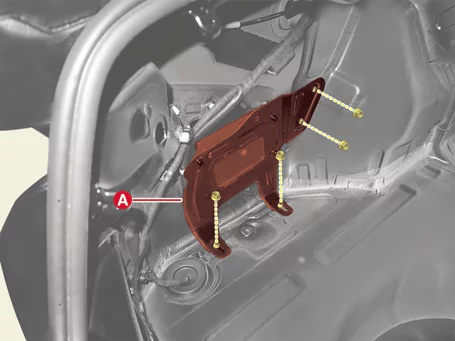
ADAS parking ECU
| 1.
|
Perform in the order below with the KDS before replacing the ADAS parking ECU.
(S/W Management → Advanced Driver Assistance System_Parking → System Identification)
|
Refer to the KDS screen for operating conditions and details.
|
|
| 2.
|
Remove the luggage side trim. [Driver's side]
(Refer to Body - "Luggage Side Trim")
|
| 3.
|
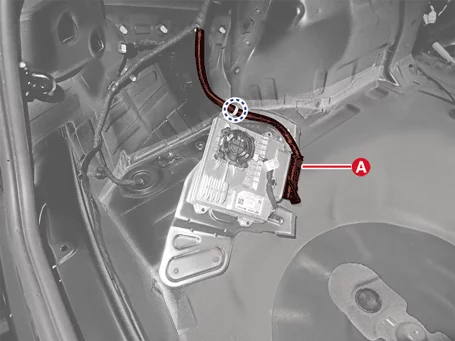
Remove the unit (A) after removing the nuts.
|
Tightening torque:
6.9 - 9.8 N·m (0.7 - 1.0 kgf·m, 5.1 - 7.2 lb·ft)
|
|
| 4.
|
Disconnect the ADAS parking ECU connector (A).
|
| 1.
|
Install in the reverse order of removal.
|
| 2.
|
Perform in the order below with the KDS when replacing the ADAS parking ECU.
(S/W Management → Advanced Driver Assistance System_Parking → Variant Coding)
|
Refer to the KDS screen for operating conditions and details.
|
|
| 3.
|
Perform the wide angle camera tolerance calibration when replacing the ADAS parking ECU.
(Refer to Advanced Driver Assistance System (Parking) - "Wide
Angle
Camera")
|
| 4.
|
Perform Over The Air (OTA) controller S/W update with KDS.
(Refer to Body - "Over The Air (OTA)")
|
ADAS Parking ECU (ADAS_PRK) Removal and Installation - 5DR
|
The indication below represents the location of a clip or fastener.
|
ADAS parking ECU
| 1.
|
Perform in the order below with the KDS before replacing the ADAS parking ECU.
(S/W Management → Advanced Driver Assistance System_Parking → System Identification)
|
Refer to the KDS screen for operating conditions and details.
|
|
| 2.
|
Remove the luggage side trim. [Driver's side]
(Refer to Body - "Luggage Side Trim")
|
| 3.
|
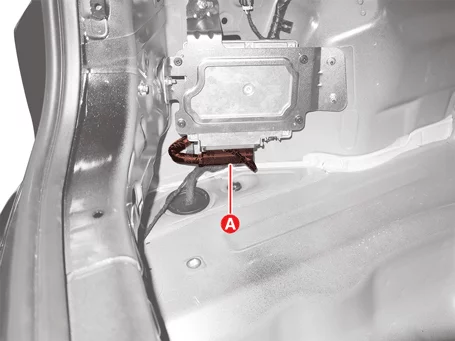
Disconnect the unit connector (A).
|
| 4.
|
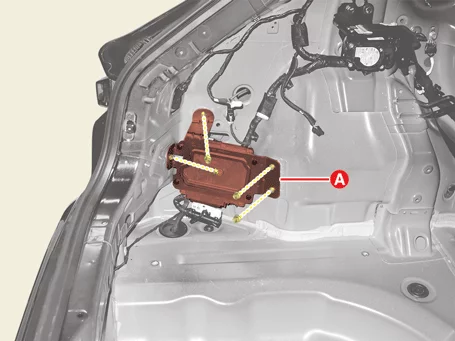
Remove the unit (A) after removing the nuts.
|
Tightening torque:
6.9 - 9.8 N·m (0.7 - 1.0 kgf·m, 5.1 - 7.2 lb·ft)
|
|
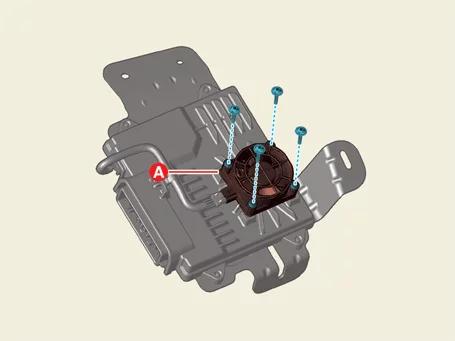
Cooling Fan
| 1.
|
Remove the ADAS parking ECU.
|
| 2.
|
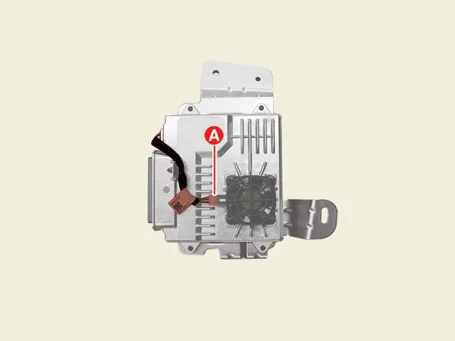
Disconnect the cooling fan connector (A).
|
| 3.
|
Remove the cooling fan (A) after removing the screws.
|
| 1.
|
Install in the reverse order of removal.
|
| 2.
|
Perform in the order below with the KDS when replacing the ADAS parking ECU.
(S/W Management → Advanced Driver Assistance System_Parking → Variant Coding)
|
Refer to the KDS screen for operating conditions and details.
|
|
| 3.
|
Perform the wide angle camera tolerance calibration when replacing the ADAS parking ECU.
(Refer to Advanced Driver Assistance System (Parking) - "Wide
Angle
Camera")
|
| 4.
|
Perform Over The Air (OTA) controller S/W update with KDS.
(Refer to Body - "Over The Air (OTA)")
|
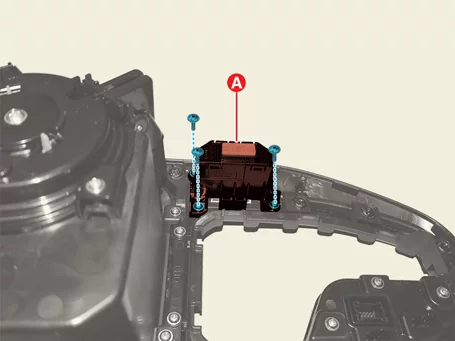
Driver Parking Assistance Switch Removal and Installation
| 1.
|
Remove the floor console upper cover garnish.
(Refer to Body - "Floor Console Upper Cover")
|
| 2.
|
Remove the driver parking assistance switch (A) after removing the screws.
|
| 1.
|
Install in the reverse order of removal.
|
Ultrasonic Sensor Specification
Item
|
Specification
|
Rated voltage (V)
|
12.0
|
Operation voltage (V)
|
9.0 - 16.0
|
Quantity
|
8
|
Ultrasonic Sensor Description and Operation
| Description and Operation |
Item
|
Name
|
Function
|
Parking Safety
|
Parking Distance Warning-Forward/Reverse (PDW-F/R)
|
Detects the front/rear objects and chimes the warning while going forward/reverse.
|
Parking Distance Warning-Forward/Side/Reverse (PDW-F/R/S)
|
Detects the front/side/rear objects and chimes the warning while going forward/reverse.
|
Parking Collision-Avoidance Assist-Reverse (PCA-R)
|
Detects pedestrians and objects around the vehicle when driving backward and assists in collision
avoidance
with warning or braking.
|
Parking Collision-Avoidance Assist-Forward/Side/Reverse (PCA-F/S/R)
|
Detects the front/lateral/rear objects, chimes the warning and engages the brake to avoid collision
while
going forward/reverse.
|
Parking Convenience
|
Remote Smart Parking Assist (RSPA)
|
Remote smart parking/exit assistance using the smart key, and parking space detection.
|
Ultrasonic Sensor On Vehicle Inspection
Visual inspection
If there is a problem with PDW, PCA or RSPA check the items below.
| 1.
|
Checking bumper cleanliness
|
•
|
If snow or water droplets freeze on the ultrasonic sensor surface, the
performance may
deteriorate.
|
|
•
|
If there are foreign substances such as mud on the surface of the ultrasonic
sensor, the
performance may deteriorate.
|
|
| 2.
|
Check the condition around the bumper
|
•
|
If an object generating ultrasonic waves is nearby, the performance may
deteriorate.
|
|
•
|
If decorations are attached around the ultrasonic sensor, the performance may
deteriorate.
|
|
| 3.
|
Checking bumper geometry or mounting status
|
•
|
If the ultrasonic sensor and the peripheral part are arbitrarily separated, the
performance may
deteriorate.
|
|
•
|
If an impact is applied to the surface of the ultrasonic sensor or if it is
damaged by scratches,
the performance may deteriorate.
|
|
•
|
If the installation state of the ultrasonic sensor is different from that at
the time of shipment
of the vehicle, the performance may deteriorate.
|
|
•
|
If decorations are attached around the ultrasonic sensor, the performance may
deteriorate.
|
|
| 4.
|
Check the ultrasonic sensor installation status when a trouble code occurs
|
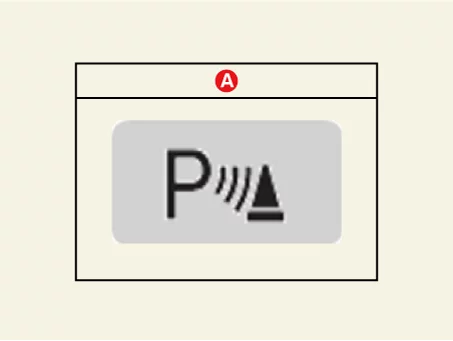
| 5.
|
Check the button operation
|
•
|
For PDW specification, press the parking safety button (A) briefly (less than 1
second) to
confirm PDW On/Off.
|
|
•
|
For PCA specification, press the parking safety button (A) briefly (more than 1
second) to
confirm PCA On/Off.
|
|
Diagnosis with KDS
| 1.
|
The ultrasonic sensor can be more quickly diagnosed for problems with the KDS. (Refer to "DTC
guide")
| (1)
|
Self diagnosis : Inspect the Diagnostic Trouble Code (DTC) with the KDS.
(Refer to DTC guide when fault code is found)
|
|
Refer to the KDS screen for operating conditions and details.
|
|
Ultrasonic Sensor Removal and Installation
|
•
|
For failures such as PDW false warnings or non-warning, first check the surface
condition of the
ultrasonic sensor and contamination by foreign substances.
|
|
•
|
The indication below represents the location of a clip or fastener.
|
|
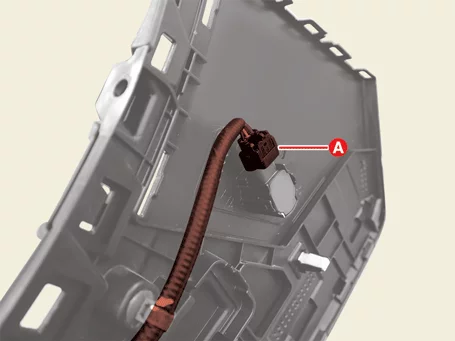
Ultrasonic Sensor [Front]
| 1.
|
Remove the front bumper assembly.
(Refer to Body - "Front Bumper Assembly")
|
| 2.
|
Disconnect the sensor connector (A).
|
| 3.
|
Remove the sensor (A).
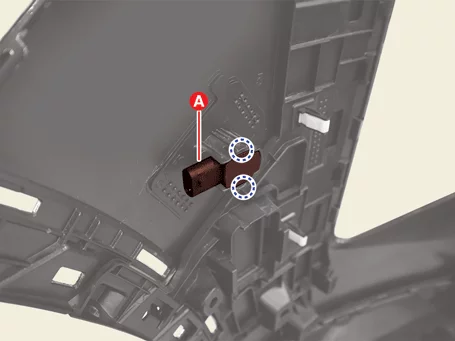
|
Clip position :
|
|
Ultrasonic Sensor [Rear]
| 1.
|
Remove the rear bumper assembly.
(Refer to Body - "Rear Bumper Assembly")
|
| 2.
|
Disconnect the sensor connector (A).
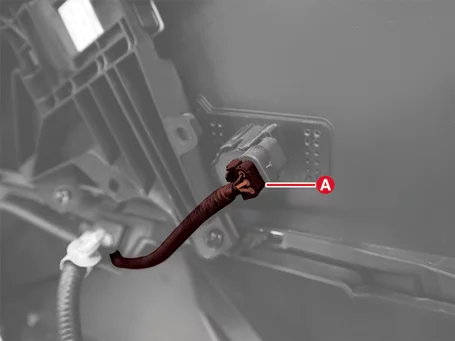
|
| 3.
|
Remove the sensor (A).
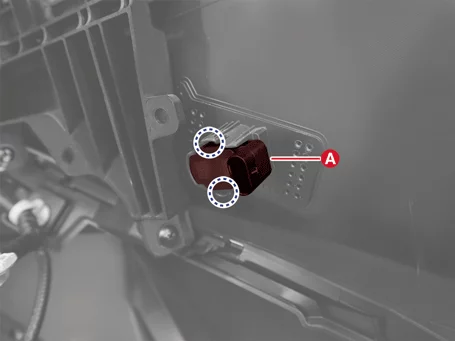
|
Clip position :
|
|
| 1.
|
Install in the reverse order of removal.
|
Wide Angle Camera Specification
Item
|
Specification
|
Rated voltage (V)
|
6.7
|
Operating voltage (V)
|
6.2 - 7.2
|
Quantity
|
RVM
|
1
|
BVM, SVM
|
4
|
Wide Angle Camera Description and Operation
| Description and Operation |
Item
|
Name
|
Function
|
Driving Safety
|
Blind Spot View Monitor (BVM)
|
When operating the turn signal switch, the rear side view is displayed on the
cluster.
|
Parking Safety
|
Rear View Monitor (RVM)
|
RVM displays the rear view during driving and parking.
|
Surround View Monitor (SVM)
|
SVM displays the surrounding view during driving and parking.
|
Wide Angle Camera On Vehicle Inspection
Visual Inspection
If the function of RVM, SVM, PCA, or RSPA is not operable or DTC occurs, check the following below.
| 1.
|
Check the cleanliness of the wide angle camera mounting location.
|
•
|
If the wide angle camera lens is contaminated with snow, dust, or stickers, the
performance may
deteriorate.
|
|
•
|
If the wide angle camera lens glass is damaged, the performance may
deteriorate.
|
|
| 2.
|
Check the condition around the wide angle camera
|
•
|
If a door or trunk (tailgate) equipped with a wide angle camera is opened, an
abnormal screen may
be displayed.
|
|
| 3.
|
Check the shape and condition of the wide angle camera mounting location
|
•
|
If the vehicle is tilted due to cargo loading, etc. the accuracy of parking
guidelines and SVM
top view may be reduced.
|
|
•
|
If moisture enters the wide angle camera lens, performance may deteriorate.
|
|
| 4.
|
Check the wide angle camera and ADAS parking ECU in case of a trouble code.
|
•
|
Check for damage to the wide angle camera, ADAS parking ECU and integrated
monitor.
|
|
•
|
SVM : Check connection status to the wide angle camera, ADAS parking ECU
connector and wiring.
|
|
•
|
RVM Check connection status to the wide angle camera, integrated monitor
connector and wiring.
|
|
| 5.
|
Check the button operation
|
•
|
For RVM/SVM specification, press the parking view button (A) below 1 second to
check RVM/SVM
screen is properly displayed.
|
|
•
|
For RSPA specification, press the parking view button (A) 1 second or above to
confirm RSPA
operating status.
|
|
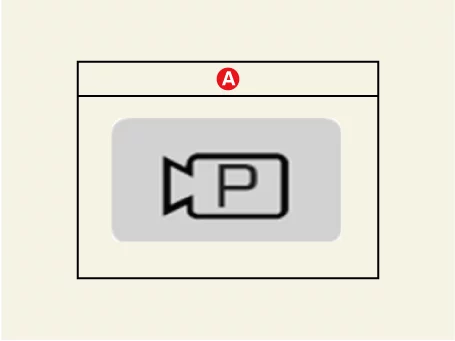
Check for poor picture image quality of wide angle camera
Symptom
|
Suspected Cause
|
Dirty lens
|
Damaged lens
|
Airtightness failure
|
|
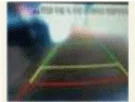
Blurry and display quality trouble
|
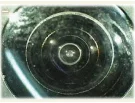
Exterior stain
|
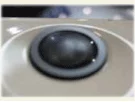
Lens coating peeled
|
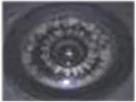
Inflow of water in lens
|
Countermeasure
|
Clean the exterior of wide angle camera
|
Replace the wide angle camera
|
Replace the wide angle camera
|
Symptom
|
Suspected Cause
|
Dirty lens
|
Damaged lens
|
Airtightness failure
|
|
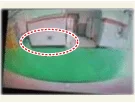
Any object or line on monitor
|
Exterior stain
|
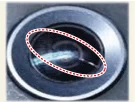
Lens crack
|
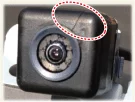
Crack and inflow of water
|
Countermeasure
|
Clean the exterior of wide angle camera
|
Replace the wide angle camera
|
Replace the wide angle camera
|
|
•
|
Check whether the vehicle is equipped with a genuine wide angle camera or not.
|
|
–
|
If the vehicle is not equipped with a genuine wide angle camera, it will result
in low-quality
images or malfunction.
|
|
•
|
Warranty repair is not available for the replacement of the wide angle camera
in case of
malfunction due to negligence in use (cleaning with detergent, impact from
foreign substances) or
non-genuine installation.
|
|
•
|
Be sure to clean it with water or a clean cloth when cleaning the exterior of
the wide-angle
camera lens.
|
|
•
|
Check whether the same defect occurs after checking the surface condition of
the wide-angle
camera lens and removing foreign substances.
|
|
•
|
The coating of the wide angle camera lens may be peeled off when washing the
car with a strong
acid cleaner.
|
|
•
|
The wide angle camera lens can be damaged by objects such as stones flying from
outside while
driving.
|
|
Diagnosis with KDS
| 1.
|
The wide angle camera can be more quickly diagnosed for problems with the KDS. (Refer to "DTC
guide")
| (1)
|
Self diagnosis : Inspect the Diagnostic Trouble Code (DTC) with the KDS.
(Refer to DTC guide when fault code is found)
|
| (2)
|
S/W Management : Controlling other features including system option setting and
zero point
adjustment.
(S/W Management → Advanced Driver Assistance System_Parking → System
Identification)
(S/W Management → Advanced Driver Assistance System Parking → SVM Calibration
Mode)
(S/W Management → Advanced Driver Assistance System Parking → SVM - Calibration
Mode)
(S/W Management → Advanced Driver Assistance System Parking → SVM
Self-calibration mode)
|
|
Refer to the KDS screen for operating conditions and details.
|
|
Wide Angle Camera Removal and Installation
|
In the case of poor image quality or poor focus, first check the surface condition of the
wide-angle
camera lens and contamination by foreign substances.
|
Wide Angle Camera [Front]
| 1.
|
Perform the order below with the KDS before replacing the wide angle camera.
(S/W Management → Advanced Driver Assistance System_Parking → System Identification)
|
Refer to the KDS screen for operating conditions and details.
|
|
| 2.
|
Remove the front bumper assembly.
(Refer to Body - "Front Bumper Assembly")
|
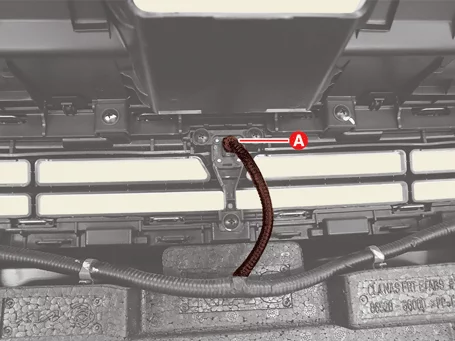
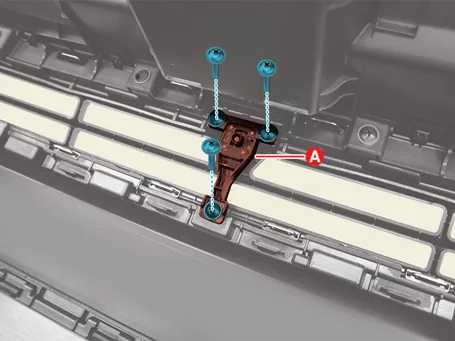
| 3.
|
Disconnect the camera connector (A).
|
| 4.
|
Remove the camera (A) after removing the screws.
|
Wide Angle Camera [Side]
| 1.
|
Perform the order below with the KDS before replacing the wide angle camera.
(S/W Management → Advanced Driver Assistance System_Parking → System Identification)
|
Refer to the KDS screen for operating conditions and details.
|
|
| 2.
|
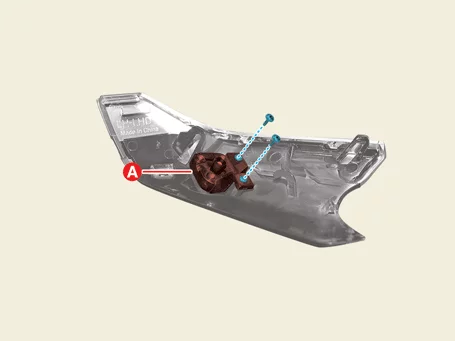
Remove the outside mirror lower cover.
(Refer to Body - "Outside Mirror Assembly")
|
| 3.
|
Remove the camera (A) after removing the screws.
|
Wide Angle camera [Rear - 4DR]
| 1.
|
Perform the order below with the KDS before replacing the wide angle camera.
(S/W Management → Advanced Driver Assistance System_Parking → System Identification)
|
Refer to the KDS screen for operating conditions and details.
|
|
| 2.
|
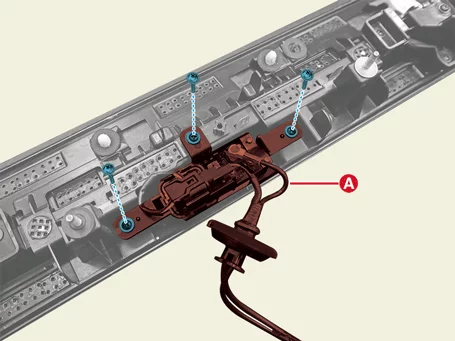
Remove the trunk lid garnish.
(Refer to Body - "Trunk Lid Garnish")
|
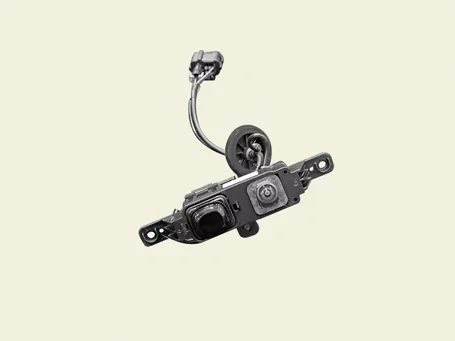
| 3.
|
Remove the camera (A) after removing the screws.
|
Wide Angle camera [Rear - 5DR]
| 1.
|
Perform the order below with the KDS before replacing the wide angle camera.
(S/W Management → Advanced Driver Assistance System_Parking → System Identification)
|
Refer to the KDS screen for operating conditions and details.
|
|
| 2.
|
Remove the tailgate garnish.
(Refer to Body - "Tailgate Garnish")
|
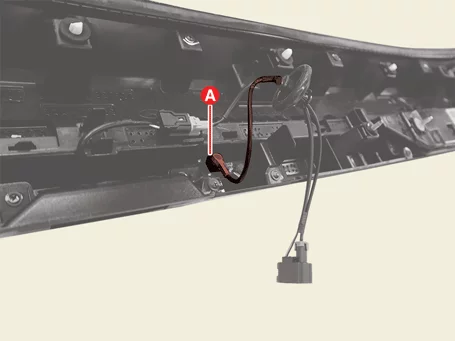
| 3.
|
Disconnect the camera connector (A).
|
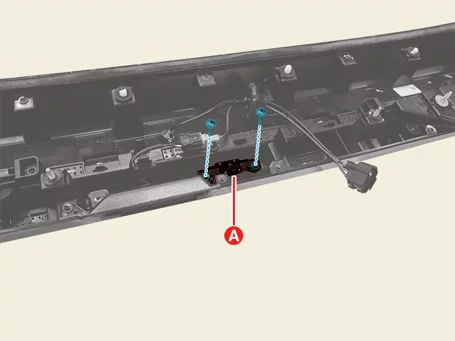
| 4.
|
Remove the camera (A) after removing the screws.
|
| 1.
|
Install in the reverse order of removal.
|
| 2.
|
Perform the wide angle camera tolerance calibration.
(Refer to Wide Angle Camera - "Adjustment")
|
•
|
If there is any abnormality after replacing the wide angle
camera, replace the ADAS
parking ECU and check the normal operation.
|
|
•
|
If the fault persists after replacing the ADAS parking ECU, do
not replace the ADAS
parking ECU.
|
|
|
Other information:
Kia K4 (CL4) 2025-2026 Service Manual: Wireless smartphone charging system
The Kia K4 features an advanced wireless smartphone charging system conveniently located at the front of the center console, allowing you to power your mobile devices without the clutter of cables.
Charging indicator light
Wireless charging pad surface
To ensure proper operation, firmly close all vehicle doors and start the Kia K4 engine or set the ignition to the ON position.
Kia K4 (CL4) 2025-2026 Service Manual: Smart trunk with auto open:
On vehicle configurations equipped with an advanced factory smart key system, you can seamlessly initiate a hands-free cargo entry sequence using the highly intuitive Smart Liftgate with AUTO Open system. This premium convenience package utilizes proximity sensors to grant access when your hands are full of luggage or groceries, ensuring effortless operation of your Kia K4.