|
•
|
This video was created using 3D graphics to help understand the vehicle
maintenance manual.
|
|
•
|
There may be some differences from actual vehicles.
|
|
•
|
The location and repair procedures of the parts may vary depending on vehicle
model, model year,
region, and specifications.
|
|
•
|
Check the KDS Guide for detailed information on how to use the KDS.
|
|
•
|
Check the manual for detailed maintenance procedures.
|
|
•
|
Unauthorized reproduction, distribution, or sharing of this video is
prohibited.
|
|
Engine Oil and Filter Replacement
(Click to play)

Video: Engine Oil and Filter Replacement
| 1.
|
Check the engine oil quality.
Check the oil deterioration, entry of water, discoloring of thinning. If the quality is visibly
poor,
replace the oil.
|
| 2.
|
Check the engine oil level.
After engine warm up stop the engine wait 15 minutes then check the oil level. Oil level should
be
between the "L" and "F" marks on the dipstick.
If low check for leakage and add oil up to the "F" mark.
|
Do not fill with engine oil above the "F" mark.
|
|
|
•
|
Prolonged and repeated contact with mineral oil will result in the removal of
natural fats from
the skin, leading to dryness, irritation and dermatitis. In addition, used
engine oil contains
potentially harmful contaminants which may cause skin cancer.
|
|
•
|
Exercise caution in order to minimize the length and frequency of contact of
your skin to used
oil. Wear protective clothing and gloves. Wash your skin thoroughly with soap
and water, or use
water-less hand cleaner, to remove any used engine oil. Do not use gasoline,
thinners, or solvents.
|
|
•
|
In order to preserve the environment, used oil and used oil filter must be
disposed of only at
designated disposal sites.
|
|
|
Never use any additives to engine oil, as they can change the properties of engine oil which
can cause
serious engine failure.
|
| 1.
|
Park the car on level ground.
|
| 2.
|
Remove the engine room under cover.
(Refer to Engine and Transaxle Assembly - "Engine Room Under
Cover")
|
| 3.
|
Drain engine oil.
| (1)
|
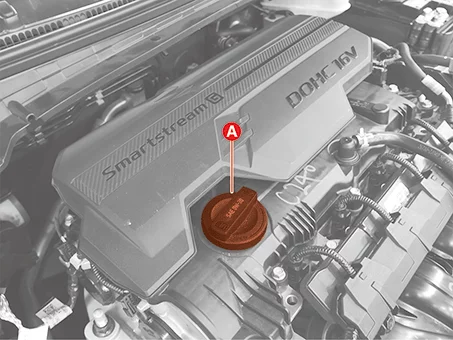
Remove the oil filler cap (A).
|
| (2)
|
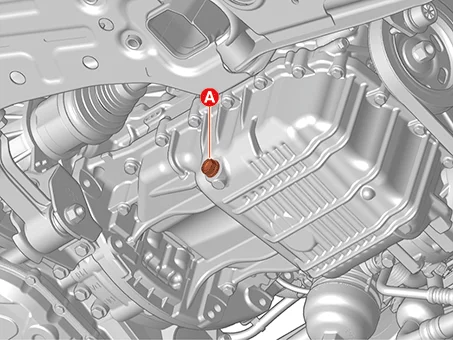
After lifting the car, remove the oil drain plug (A) and drain oil into a
container.
|
|
| 4.
|
Replace the oil filter.
| (1)
|
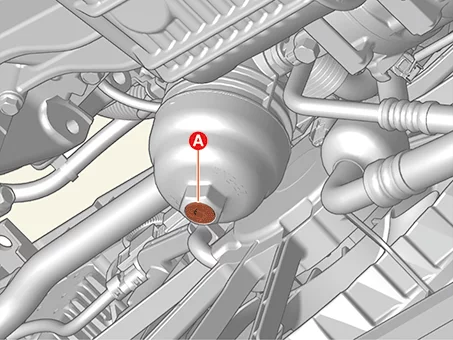
Drain oil in the oil filter by loosening the drain plug (A) located at the
bottom of oil filter
cap.
|
| (2)
|
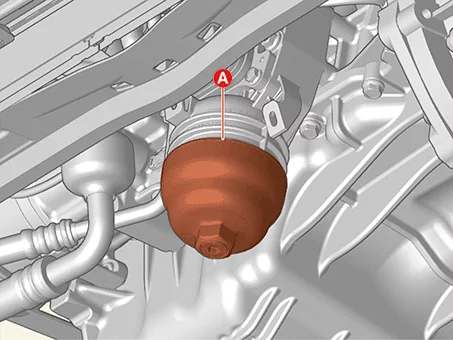
Remove the oil filter cap (A) using a socket wrench.
|
| (3)
|
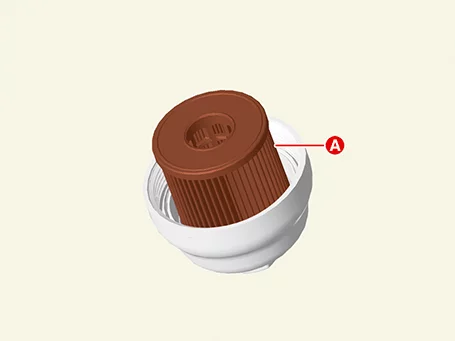
Replace the new oil filter (A).
|
| (4)
|
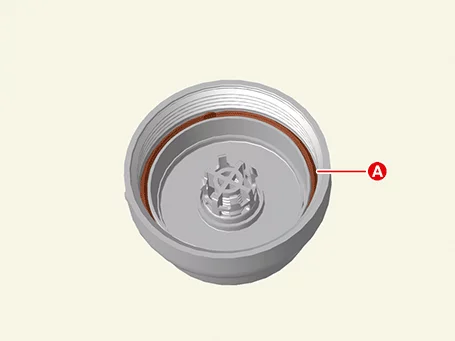
Replace the new oil filter cap O-ring (A).
|
•
|
Do not reuse the oil filter cap O-ring.
|
|
•
|
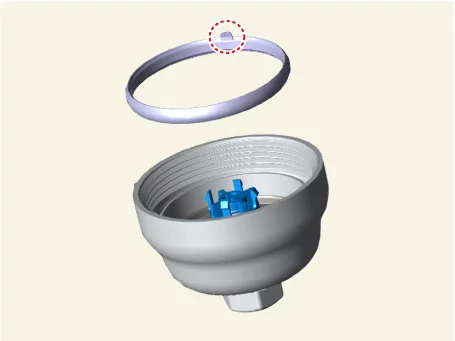
When installing the oil filter cap O-ring,
install it with the protrusion part
(A) facing upward.
|
|
•
|
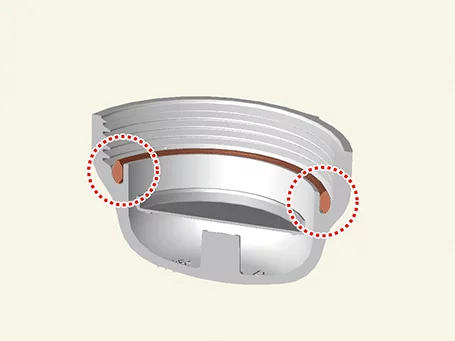
When installing the oil filter cap O-ring,
press it sufficiently so that the
entire O-ring mounting part is seated.
|
|
|
| (5)
|
Install the oil filler cap (A) using a socket wrench.
Lightly tighten the oil filter cap into place, and tighten it until the O-ring
contacts the
seating surface.
|
Tightening torque :
25.0 - 30.0 N·m (2.5 - 3.0 kg·m, 18.4 - 22.1 lb·ft)
|
|
•
|
When installing the oil filter cap, clean the
oil filter mounting surface and
then apply engine oil to new O-ring.
|
|
•
|
Wipe off the oil remaining on the threads of
oil filter cap and then install the
oil filter cap.
|
|
|
| (6)
|
Install the new drain plug (A).
|
Tightening torque :
3.9 - 4.9 N·m (0.4 - 0.5 kgf·m, 2.9 - 3.6 lb·ft, 34.7 - 43.4
lb·in)
|
|
Do not reuse the drain plug.
|
|
|
| 5.
|
Install the oil drain plug (A) with a new gasket.
| (1)
|
Install the oil drain plug (A) with a new gasket.
|
Tightening torque :
34.3 - 44.1 N·m (3.5 - 4.5 kgf·m, 25.3 - 32.5 lb·ft)
|
|
|
| 6.
|
Fill the new engine oil, after removing the engine oil level gauge.
|
Capacity
Total :
4.5 ℓ (1.19 U.S.gal. , 4.76 U.S.qt. , 3.96 lmp.qt.)
Oil pan :
4.0 ℓ (1.06 U.S.gal. , 4.23 U.S.qt. , 3.52 lmp.qt.)
Drain and refill including oil filter :
4.3 ℓ (1.14 U.S.gal. , 4.54 U.S.qt. , 3.78 lmp.qt.)
|
|
| 7.
|
Install the oil filler cap (A).
|
| 8.
|
Start engine and check for oil leaks.
|
| 9.
|
Recheck the engine oil level.
|
| 10.
|
To reset the service interval to the recommended mileage, refer to the service mode section in
the
owner's manual for procedure (if applicable).
|
|
•
|
Prolonged and repeated contact with mineral oil will result in the removal of
natural fats from
the skin, leading to dryness, irritation and dermatitis. In addition, used
engine oil contains
potentially harmful contaminants which may cause skin cancer.
|
|
•
|
Exercise caution in order to minimize the length and frequency of contact of
your skin to used
oil. Wear protective clothing and gloves. Wash your skin thoroughly with soap
and water, or use
water-less hand cleaner, to remove any used engine oil. Do not use gasoline,
thinners, or solvents.
|
|
•
|
In order to preserve the environment, used oil and used oil filter must be
disposed of only at
designated disposal sites.
|
|
|
Never use any additives to engine oil, as they can change the properties of engine oil which
can cause
serious engine failure.
|
| 1.
|
Drain the engine oil.
| (1)
|
Open the oil filler cap (A).
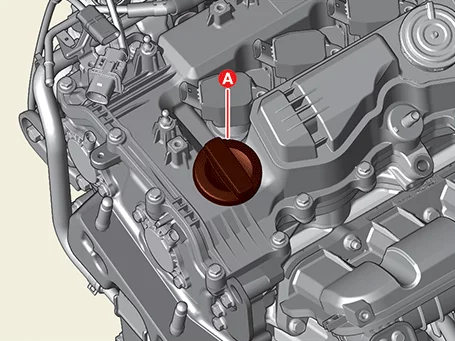
|
| (2)
|
Remove the drain plug (A) and then drain the oil.
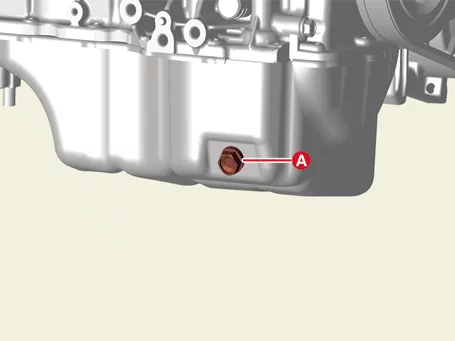
|
|
| 2.
|
Replace the oil filter.
| (1)
|
Remove the safety pin (A).
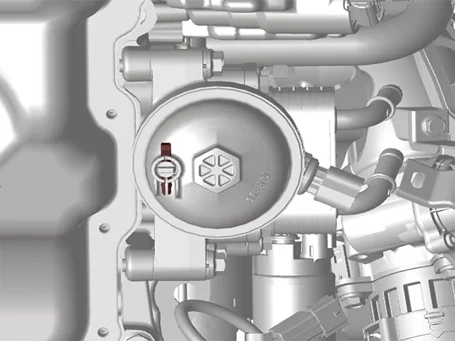
|
| (2)
|
Remove the free drain plug (A) by rotating it 90° and drain the engine oil from
the oil filter.
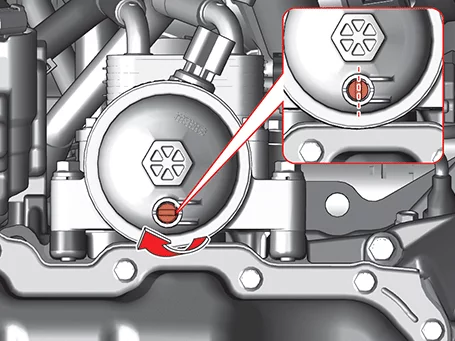
|
| (3)
|
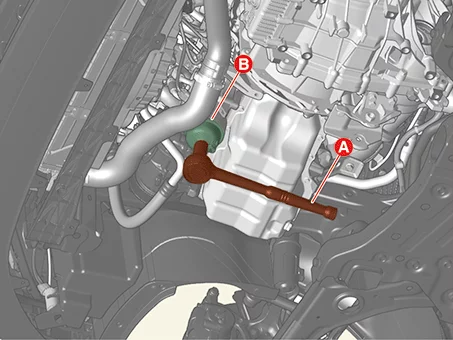
Remove the oil filler cap (B) using a socket wrench (A).
|
| (4)
|
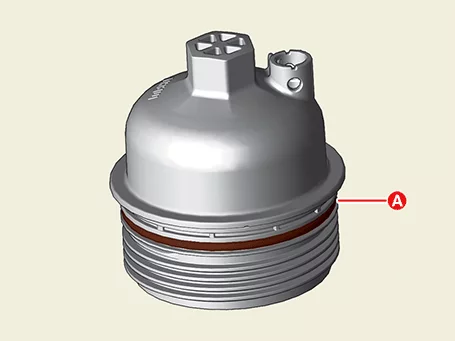
Install the new O-ring (A) on the oil filter cap.
|
| (5)
|
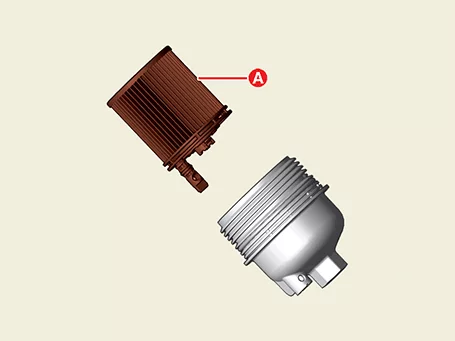
Install a new oil filter (A).
|
•
|
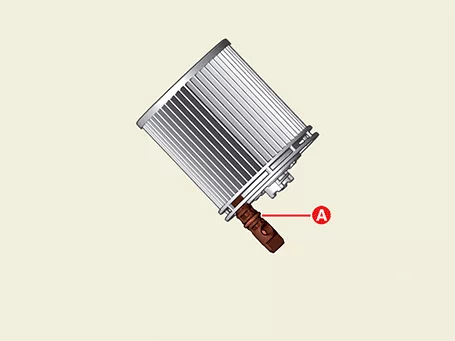
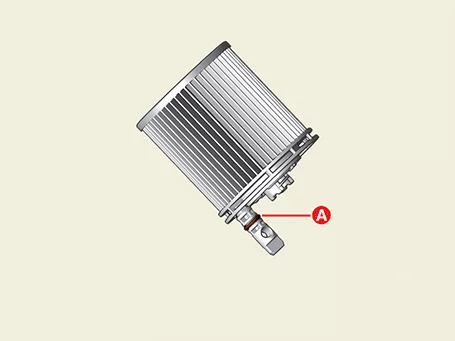
Must use the drain plug (A) which is installed
on a new oil filter.
|
|
•
|
Apply engine oil on drain plug O-ring (A) when
the installation of oil filter.
|
|
|
| (6)
|
Rotate the free drain plug (A) 90° so that the drain pin is in the locked
position.
|
| (7)
|
Install the new safety pin (A).
|
Do not reuse the safety pin.
|
|
| (8)
|
Install the oil filter cap (B) using the socket wrench (A).
|
Tightening torque :
34.3 N·m (3.5 kgf·m, 25.3 lb·ft)
|
|
•
|
When installing the oil filter cap, check that
the new O-ring is seated in place
of the cap.
|
|
•
|
When installing the oil filter cap, and then
apply engine oil to new O-ring.
|
|
|
|
| 3.
|
Fill the engine with oil.
| (1)
|
Install the oil drain plug (A) with the new gasket.
|
Tightening torque :
34.3 - 44.1 N·m (3.5 - 4.5 kgf·m, 25.3 - 32.5 lb·ft)
|
|
| (2)
|
Fill new engine oil through the oil filler hole.
Remove the oil level gauge before adding oil.
|
Oil capacity
Total :
5.0 ℓ (1.32 U.S.gal., 5.28 U.S.qt., 4.40 lmp.qt.)
Oil pan :
4.4 ℓ (1.16 U.S.gal., 4.65 U.S.qt., 3.87 lmp.qt.)
Drain and refill (include oil
filter) :
4.8 ℓ (1.27 U.S.gal., 5.07 U.S.qt., 4.22 lmp.qt.)
|
|
Inject 1/2 of the total capacity first and then the remaining
1/2 after approximately 1
minute.
|
|
| (3)
|
Install the oil filler cap (A).
|
| (4)
|
Install the oil level gauge.
|
|
| 4.
|
Start engine and check for leaks.
|
| 5.
|
Recheck the engine oil level.
|
•
|
Before rechecking the engine oil level, sufficiently warm up
the engine.
|
|
•
|
If engine is not sufficiently warmed up, engine oil level could
be checked below the
specified value.
|
|
|
Other information:
Kia K4 (CL4) 2025-2026 Service Manual: Navigation-based Smart Cruise Control limitations
The Navigation-based Smart Cruise Control (NSCC) system is a highly advanced convenience feature; however, its performance relies heavily on accurate real-time data. The system may exhibit abnormal or unexpected behavior under the following circumstances:
The navigation system is experiencing a technical malfunction.
Map data fails to transmit correctly due to glitches in the infotainment system screen.
Kia K4 (CL4) 2025-2026 Service Manual: Wiper blades
If you notice the windshield wipers on your Kia K4 are no longer cleaning the glass adequately—leaving streaks or skipping—the blades are likely worn or cracked and require immediate replacement.
To prevent mechanical damage to the wiper motor, arms, or windshield surface, never attempt to move the wipers manually while they are powered or if they are in a locked position.