Contents:
Components and Components Location
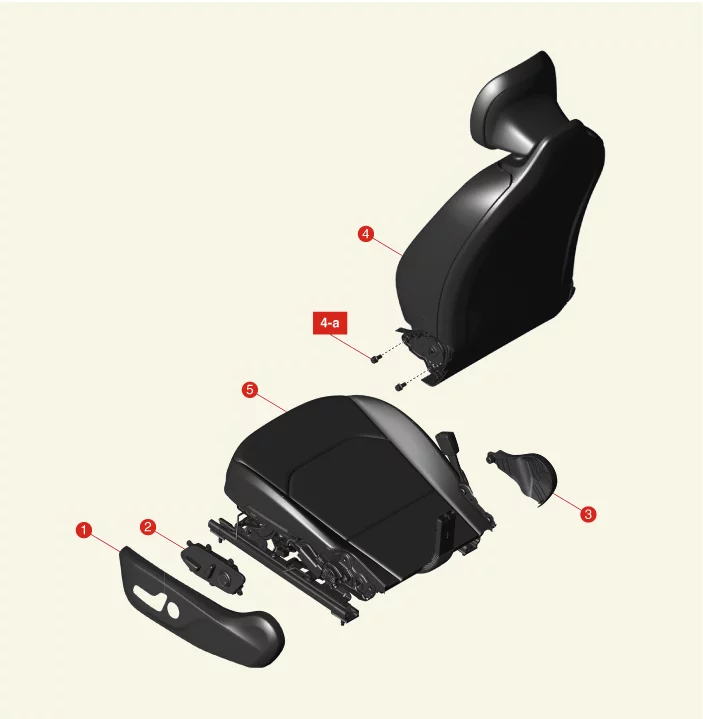
1. Outer Shield
Cover
2.
Power Seat Switch
3. Inner Shield Cover
|
4. Seat Back Cover
Assembly
4-a. 44.1 - 53.9 N·m (4.5 - 5.5 kgf·m, 32.5 - 39.8 lb·ft)
5. Seat Cushion Cover
Assembly
|
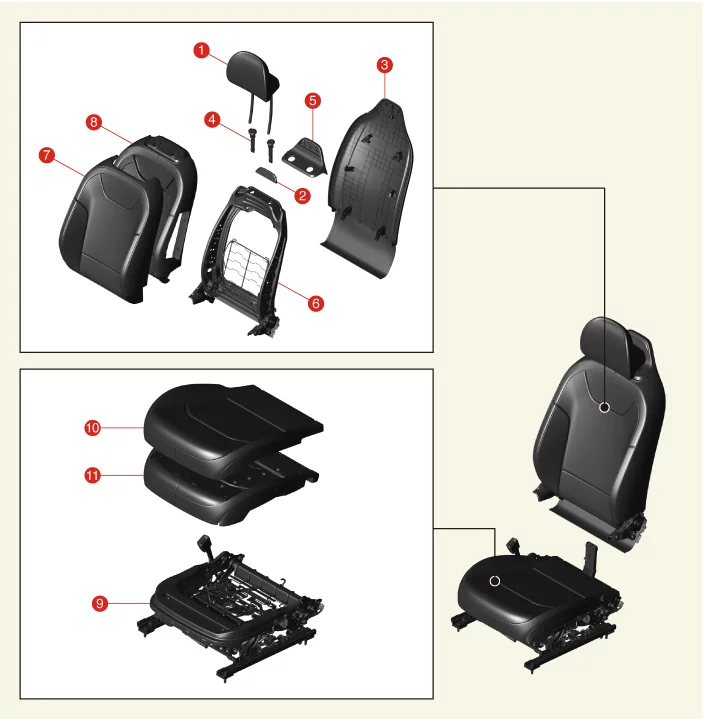
1. Headrest
2. Seat
Back
Garnish
3. Seat Back Board
4. Headrest Guides
5. Seat Back Upper Cover
6. Seat Back
Frame
|
7. Seat Back
Cover
8. Seat
Back Pad
9. Seat Cushion Frame
10. Seat Cushion Cover
11. Seat Cushion Pad
|
Front Seat Assembly Removal and Installation
| 1.
|
Disconnect the battery negative (-) terminal.
|
| 2.
|
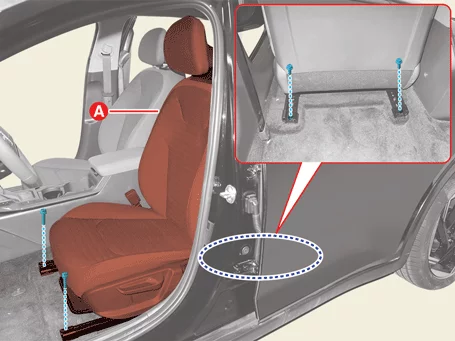
Remove the seat assembly (A) after removing the bolts.
|
Tightening torque :
49.0 - 58.8 N·m (5.0 - 6.0 kgf·m, 36.2 - 43.4 lb·ft)
|
|
| 3.
|
Disconnect the connectors (A, B, C, D).
Driver's Side
A : Seat belt buckle connector
B : Center Side AirBag (CSAB) connector
C : Seat extension connector
D : Side Airbag (SAB) connector
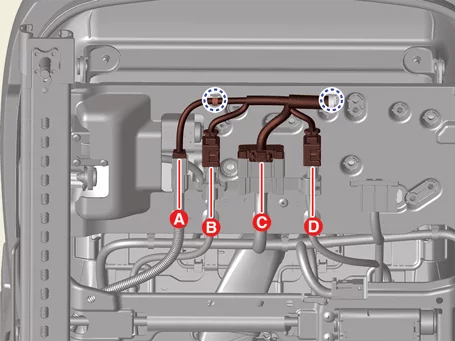
Passenger's Side
A : Occupant Detecting System (ODS) connector
B : Side Airbag (SAB) connector
C : Seat extension connector
D : Seat belt buckle connector
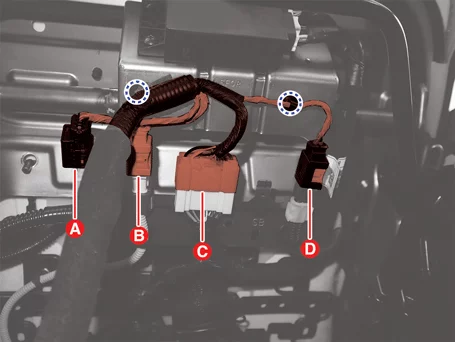
|
| 1.
|
Install in the reverse order of removal.
|
Front Seat Back Cover Removal and Installation
| 1.
|
Remove the front seat back cover assembly.
(Refer to Front Seat - "Front Seat Back Cover Assembly")
|
| 2.
|
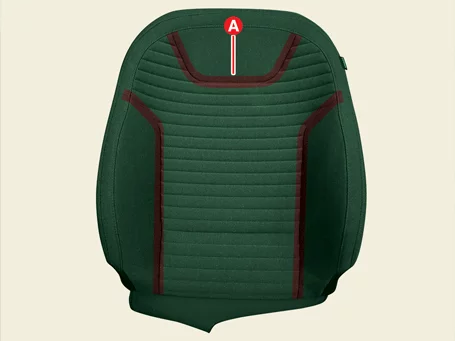
Remove the hog-ring clips (A).
|
| 3.
|
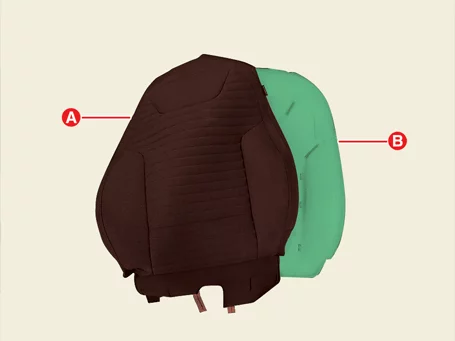
Remove the seat back cover (A) from the pad (B).
|
| 1.
|
Install in the reverse order of removal.
|
Front Seat Back Cover Assembly Removal and Installation
|
•
|
This video was created using 3D graphics to help understand the vehicle
maintenance manual.
|
|
•
|
There may be some differences from actual vehicles.
|
|
•
|
The location and repair procedures of the parts may vary depending on vehicle
model, model year,
region, and specifications.
|
|
•
|
Check the KDS Guide for detailed information on how to use the KDS.
|
|
•
|
Check the manual for detailed maintenance procedures.
|
|
•
|
Unauthorized reproduction, distribution, or sharing of this video is
prohibited.
|
|
Front Seat Back Cover Assembly Removal
(Click to play)

Video: Front Seat Back Cover Assembly
Removal
|
The indication below represents the location of a clip or fastener.

|
| 1.
|
Remove the seat inner and outer shield cover.
(Refer to Front Seat - "Front Seat Shield Cover")
|
| 2.
|
Remove the headrest (A) by pulling it in the direction of the arrow.
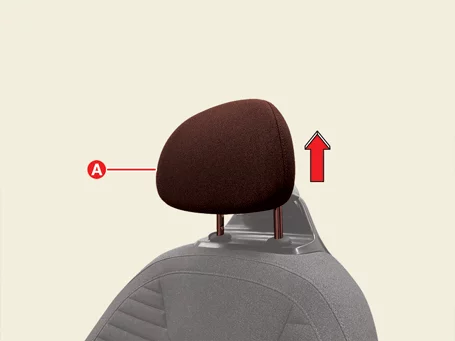
|
| 3.
|
Remove the seat back garnish (A).
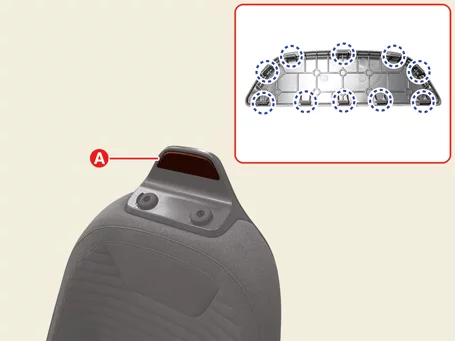
|
| 4.
|
Separate the seat back (A) after removing the seat back protector.
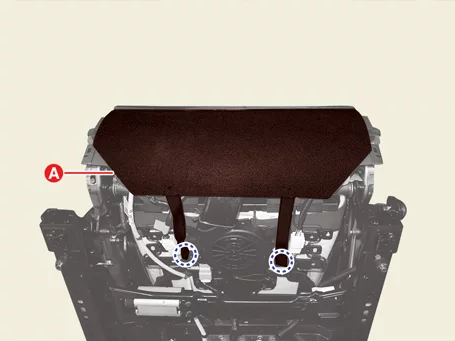
|
| 5.
|
Separate the seat back (A) after removing the seat back protector.
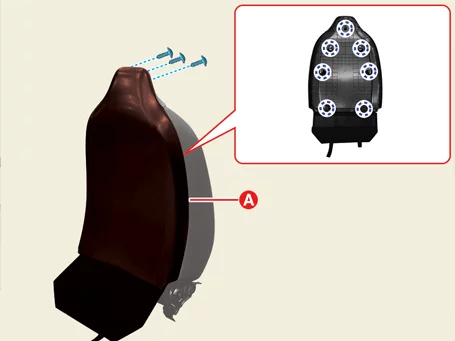
|
| 6.
|
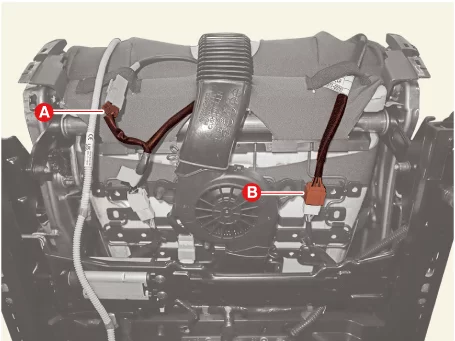
Disconnect the connectors (A, B).
A : Seat back heated wire connector
B : Lumbar support connector
|
| 7.
|
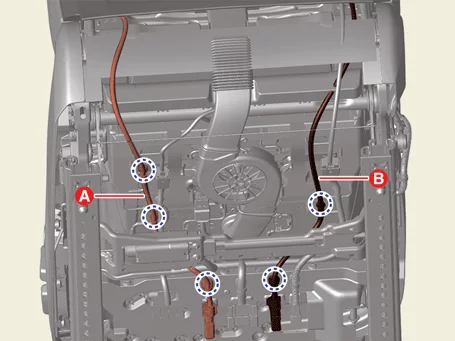
Separate the connector wiring (A, B) after removing the fasteners.
A : Side Airbag (SAB) connector wiring
B : Center Side AirBag (CSAB) connector wiring
|
| 8.
|
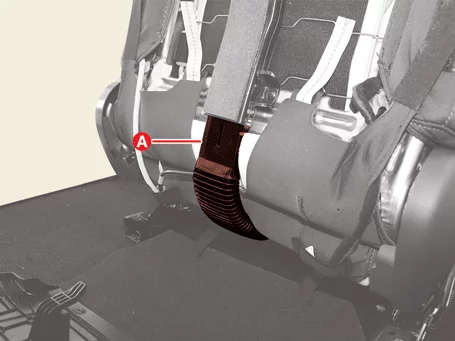
Separate the blower unit duct (A).
|
| 9.
|
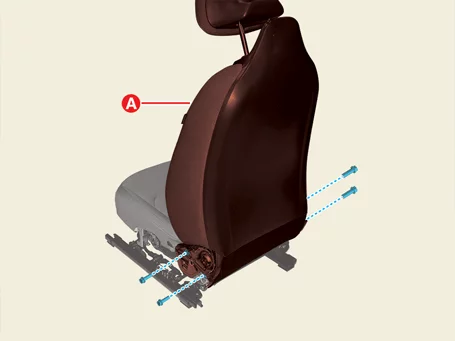
Separate the seat back assembly (A) after removing the bolts.
|
Tightening torque:
44.1 - 53.9 N·m (4.5 - 5.5 kgf·m, 32.5 - 39.8 lb·ft)
|
|
| 10.
|
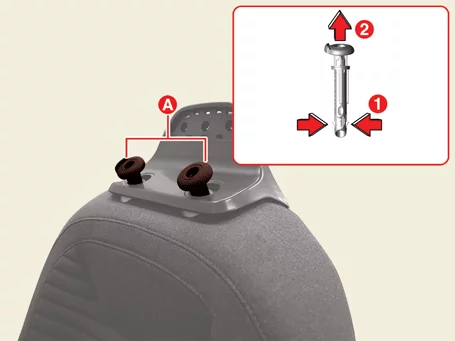
Remove the headrest guides (A).
|
| 11.
|
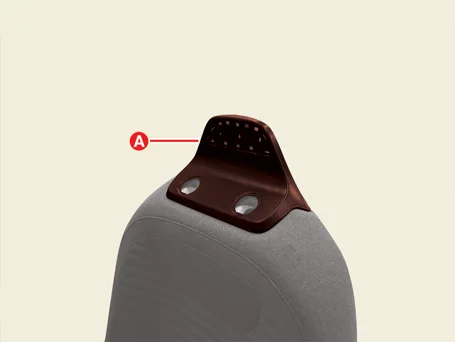
Remove the seat back upper cover (A).
|
| 12.
|
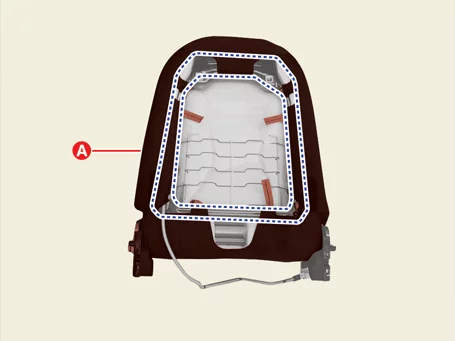
Separate the seat back cover (A).
|
| 13.
|
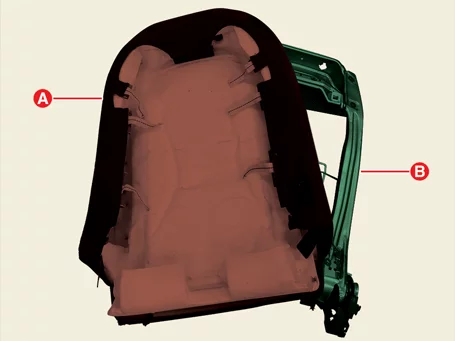
Remove the seat back cover assembly (A) from the frame (B).
|
| 1.
|
Install in the reverse order of removal.
|
Front Seat Cushion Cover Removal and Installation
| 1.
|
Remove the front seat cushion cover assembly.
(Refer to Front Seat - "Front Seat Cushion Cover
Assembly")
|
| 2.
|
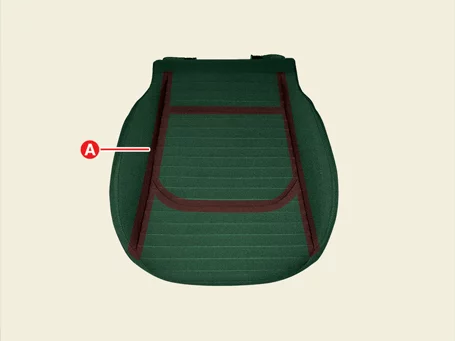
Remove the hog-ring clips (A).
|
| 3.
|
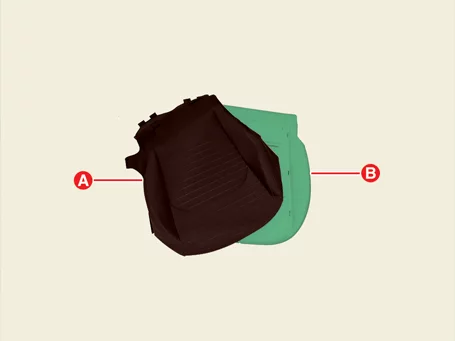
Remove the seat cushion cover (A) from the pad (B).
|
| 1.
|
Install in the reverse order of removal.
|
Front Seat Cushion Cover Assembly Removal and Installation
|
•
|
This video was created using 3D graphics to help understand the vehicle
maintenance manual.
|
|
•
|
There may be some differences from actual vehicles.
|
|
•
|
The location and repair procedures of the parts may vary depending on vehicle
model, model year,
region, and specifications.
|
|
•
|
Check the KDS Guide for detailed information on how to use the KDS.
|
|
•
|
Check the manual for detailed maintenance procedures.
|
|
•
|
Unauthorized reproduction, distribution, or sharing of this video is
prohibited.
|
|
Front Seat Cushion Cover Assembly Removal
(Click to play)
Video: Front Seat Cushion Cover Assembly
Removal
|
The indication below represents the location of a clip or fastener.
|
| 1.
|
Remove the seat inner and outer shield cover.
(Refer to Front Seat - "Front Seat Shield Cover")
|
| 2.
|
Separate the seat back (A) after removing the seat back protector.
|
| 3.
|
Disconnect the connectors (A, B).
A : Seat back heated wire connector
B : Lumbar support connector
|
| 4.
|
Separate the connector wiring (A, B) after removing the fasteners.
A : Side Airbag (SAB) connector wiring
B : Center Side AirBag (CSAB) connector wiring
|
| 5.
|
Separate the blower unit duct (A).
|
| 6.
|
Separate the seat back assembly (A) after removing the bolts.
|
Tightening torque:
44.1 - 53.9 N·m (4.5 - 5.5 kgf·m, 32.5 - 39.8 lb·ft)
|
|
| 7.
|
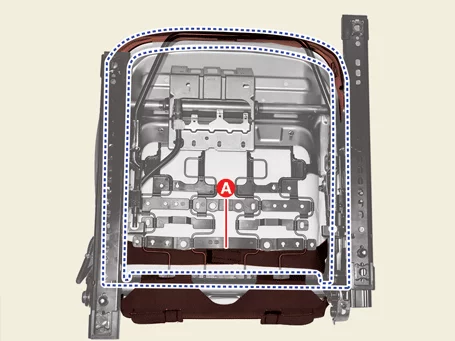
Separate the seat cushion cover (A).
|
| 8.
|
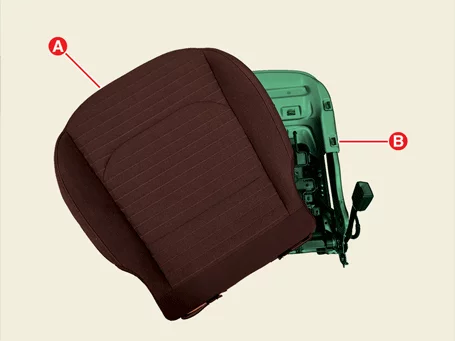
Remove the seat cushion cover assembly (A) from the frame (B).
|
| 1.
|
Install in the reverse order of removal.
|
Front Seat Frame Assembly Removal and Installation
Seat Back Frame Assembly
| 1.
|
Remove the front seat back cover assembly.
(Refer to Front Seat - "Front Seat Back Cover Assembly")
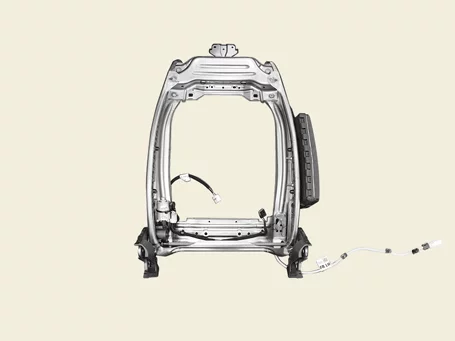
|
Seat Cushion Frame Assembly
| 1.
|
Remove the front seat cushion cover assembly.
(Refer to Front Seat - "Front Seat Cushion Cover
Assembly")
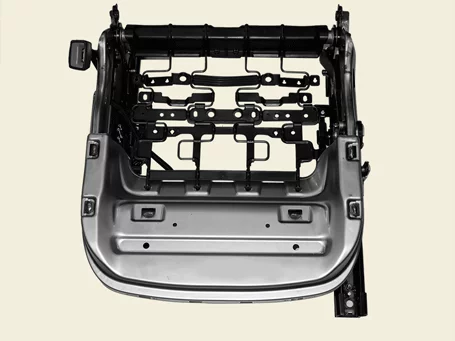
|
| 1.
|
Install in the reverse order of removal.
|
Front Seat Shield Cover Removal and Installation
|
•
|
This video was created using 3D graphics to help understand the vehicle
maintenance manual.
|
|
•
|
There may be some differences from actual vehicles.
|
|
•
|
The location and repair procedures of the parts may vary depending on vehicle
model, model year,
region, and specifications.
|
|
•
|
Check the KDS Guide for detailed information on how to use the KDS.
|
|
•
|
Check the manual for detailed maintenance procedures.
|
|
•
|
Unauthorized reproduction, distribution, or sharing of this video is
prohibited.
|
|
Front Seat Shield Cover Removal
(Click to play)
Video: Front Seat Shield Cover Removal
|
The indication below represents the location of a clip or fastener.
|
Outer Shield Cover
| 1.
|
Remove the front seat assembly.
(Refer to Front Seat - "Front Seat Assembly")
|
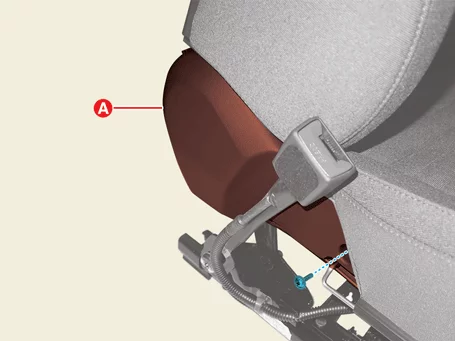
| 2.
|
Remove the cover (A).
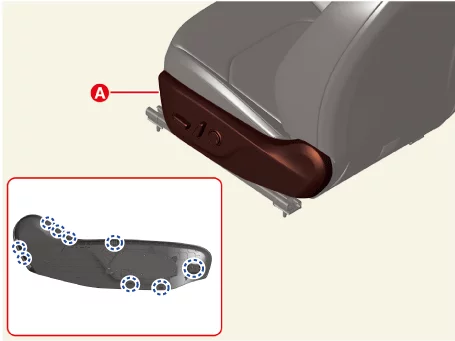
|
| 3.
|
Disconnect the power seat switch connector (A).
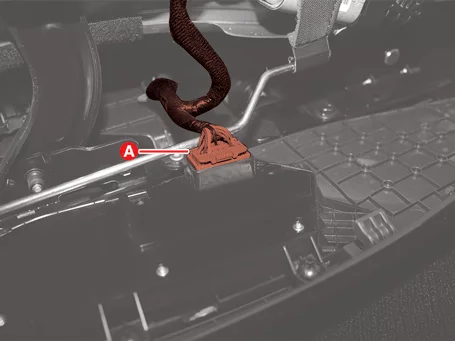
|
Inner Shield Cover
| 1.
|
Remove the front seat assembly.
(Refer to Front Seat - "Front Seat Assembly")
|
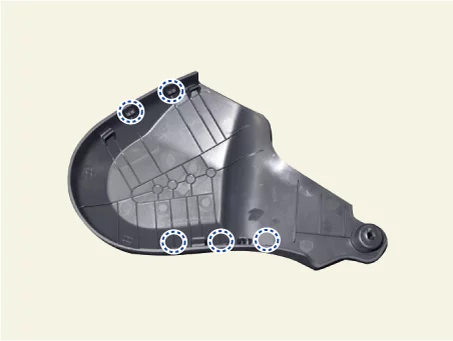
| 2.
|
Remove the cover (A) after removing the screw.
|
| 1.
|
Install in the reverse order of removal.
|
Front Seat Switch Removal and Installation
Power Seat Switch
| 1.
|
Remove the front seat outer shield cover.
(Refer to Front Seat - "Front Seat Shield Cover")
|
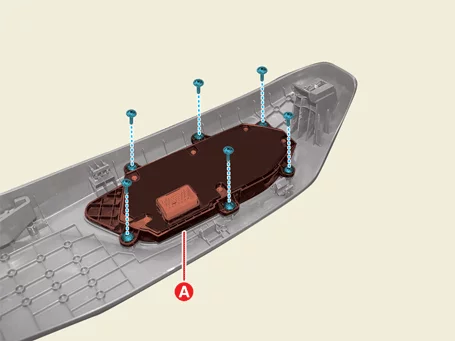
| 2.
|
Remove the switch (A) after removing the screws.
|
Integrated Memory Seat (IMS) Switch
| 1.
|
Remove the front door trim.
(Refer to Front Door - "Front Door Trim")
|
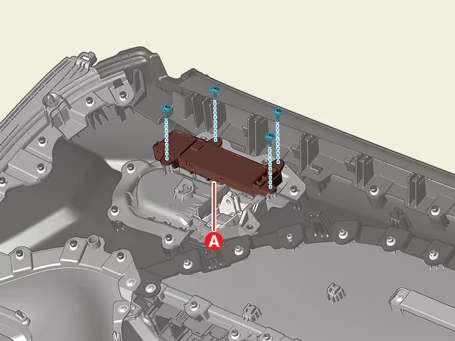
| 2.
|
Remove the switch (A) after removing the screws.
|
| 1.
|
Install in the reverse order of removal.
|
Front Seat Unit Removal and Installation
|
The indication below represents the location of a clip or fastener.
|
Ventilation Control Unit
| 1.
|
Remove the front seat assembly. [Passenger's side]
(Refer to Front Seat - "Front Seat Assembly")
|
| 2.
|
Disconnect the unit connectors (A).
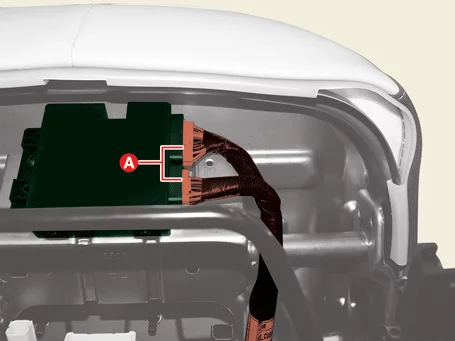
|
| 3.
|
Remove the unit (A) after removing the screws.
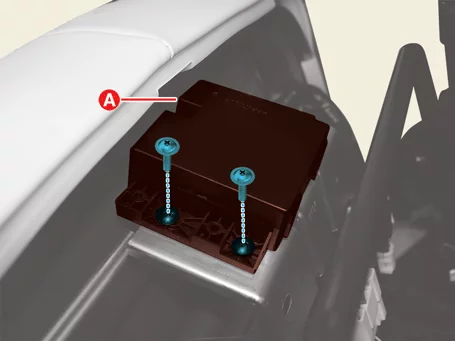
|
Blower Unit
| 1.
|
Remove the front seat assembly.
(Refer to Front Seat - "Front Seat Assembly")
|
| 2.
|
Separate the seat back protector (A).
|
| 3.
|
Separate the blower unit duct (A).
|
| 4.
|
Disconnect the unit connector (A).
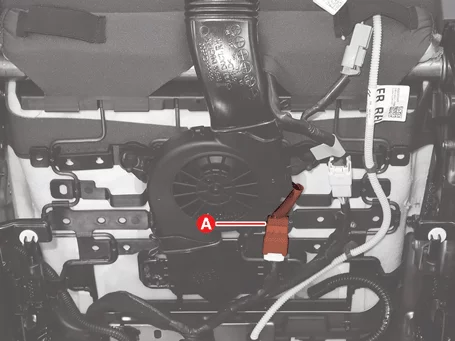
|
| 5.
|
Remove the unit (A) .
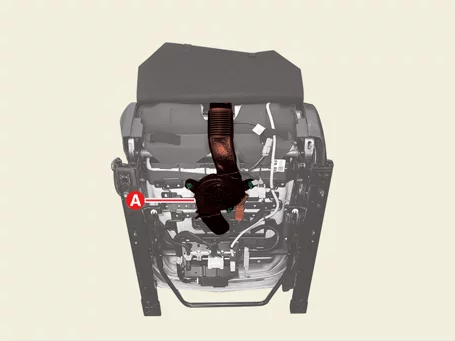
|
Integrated Memory Seat (IMS) Unit
| 1.
|
Remove the front sear assembly. [Driver's side]
(Refer to Front Seat - "Front seat Assembly")
|
| 2.
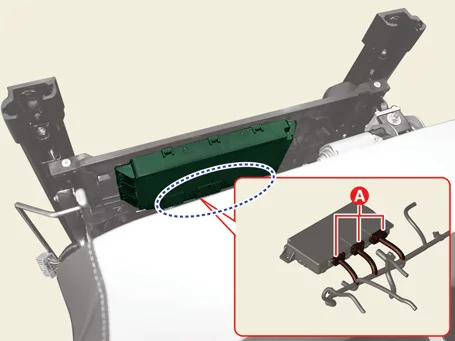
|
Disconnect the unit connectors (A).
|
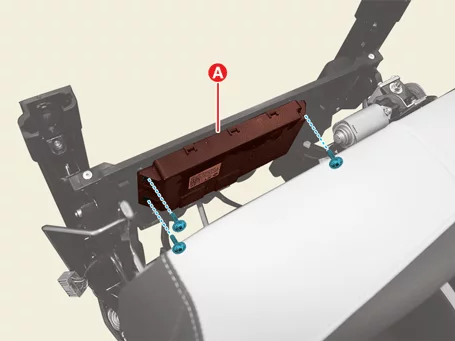
| 3.
|
Remove the unit (A) after removing the screws.
|
| 1.
|
Install in the reverse order of removal.
|
| 2.
|
Perform Over The Air (OTA) controller S/W update with KDS. [Ventilation
control unit & Integrated Memory Seat (IMS) unit]
(Refer to Security & Vehicle Ignition System - "Over The
Air
(OTA)")
|
Lumbar Support Removal and Installation
|
•
|
This video was created using 3D graphics to help understand the vehicle
maintenance manual.
|
|
•
|
There may be some differences from actual vehicles.
|
|
•
|
The location and repair procedures of the parts may vary depending on vehicle
model, model year,
region, and specifications.
|
|
•
|
Check the KDS Guide for detailed information on how to use the KDS.
|
|
•
|
Check the manual for detailed maintenance procedures.
|
|
•
|
Unauthorized reproduction, distribution, or sharing of this video is
prohibited.
|
|
Lumbar Support Removal
(Click to play)
Video: Lumbar Support Removal
|
The indication below represents the location of a clip or fastener.
|
| 1.
|
Remove the front seat back cover assembly.
(Refer to Front Seat - "Front Seat Back Cover Assembly")
|
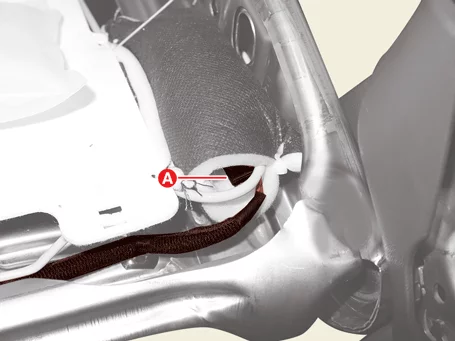
| 2.
|
Disconnect the lumbar support connector (A).
|
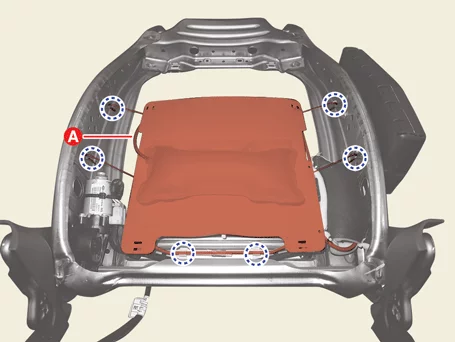
| 3.
|
Remove the lumbar support (A).
|
| 1.
|
Install in the reverse order of removal.
|
Other information:
Kia K4 (CL4) 2025-2026 Service Manual: Shift lock system
For your protection, the Kia K4 is equipped with a shift lock system. This safety mechanism is designed to prevent the transmission from being shifted out of P (Park) and into R (Reverse) or D (Drive) unless the brake pedal is firmly engaged.
To safely shift your Kia K4 from P (Park):
Engage and hold the brake pedal firmly.
Ensure the ignition is in the ON position.
Kia K4 (CL4) 2025-2026 Service Manual: Immobilizer system
The advanced electronic immobilizer system integrated into your vehicle serves as a primary layer of security, designed to protect your vehicle from unauthorized use and potential theft. This anti-theft configuration relies on an encrypted transponder chip embedded within your official smart key. If an improperly coded key, cloned fob, or any unauthorized bypass device is detected during an ignition sequence, the system immediately cuts off fuel delivery and ignition signals, ensuring that the vehicle's powertrain and electrical power system are completely disabled.