Contents:
Components and Components Location
Luggage Trim [4DR - 6:4 Seat]
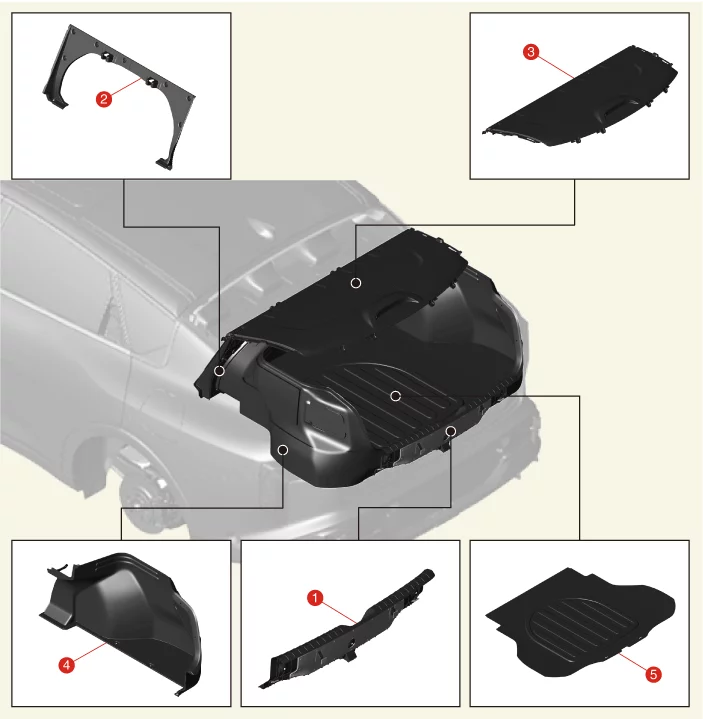
1. Rear Transvers Trim
2. Side Partition
Trim
3.
Rear Package Tray Trim
|
4. Luggage Side Trim
5. Luggage Covering
Mat
|
Luggage Trim [4DR - Bench Seat]
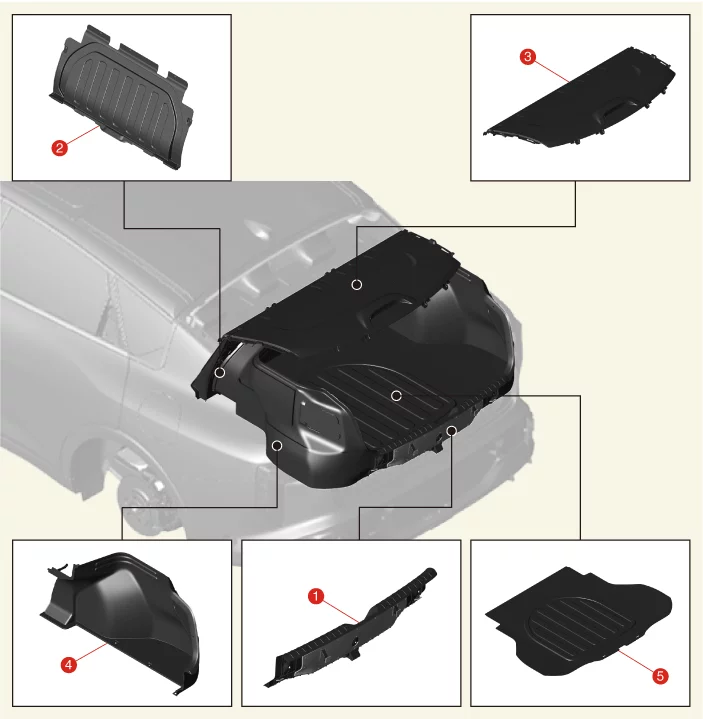
1. Rear Transvers Trim
2. Lower Partition
Trim
3. Rear Package Tray Trim
|
4. Luggage Side Trim
5. Luggage Covering
Mat
|
Luggage Trim [5DR]
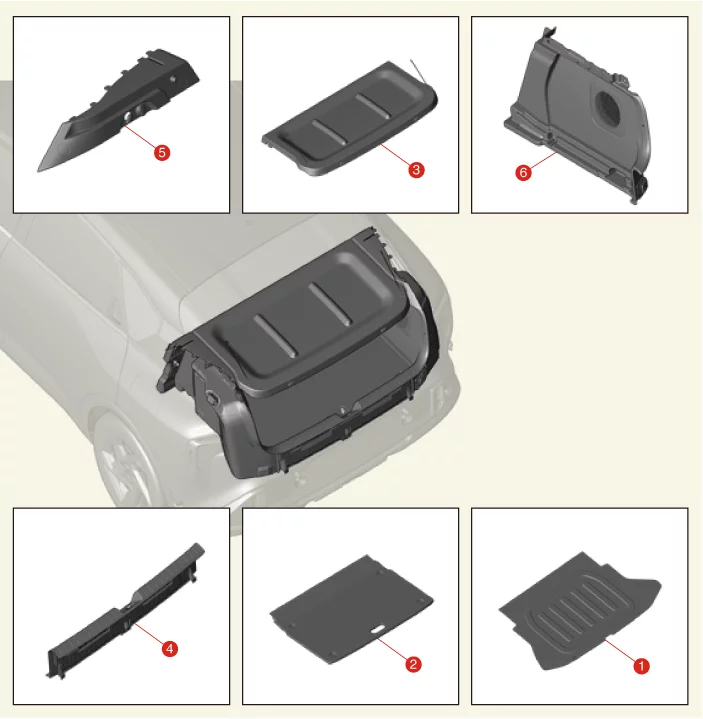
1. Luggage Covering Mat
2. Luggage Floor
Board
3. Center Shelf Covering Trim
|
4. Rear Transverse Trim
5. C Shelf
Trim
6.
Luggage Side Trim
|
Luggage Partition Trim Removal and Installation
6:4 Seat
| 1.
|
Remove the rear seat back assembly.
(Refer to Rear Seat - "Rear Seat Assembly")
|
| 2.
|
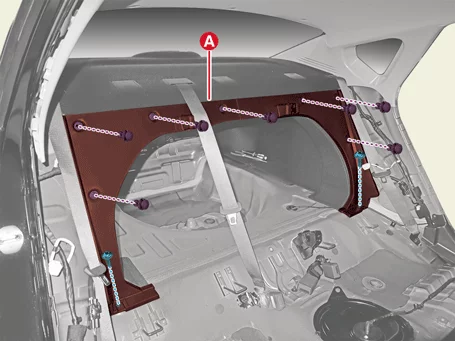
Remove the luggage partition trim (A) after removing the screws and fasteners.
|
Bench Seat
| 1.
|
Remove the rear seat assembly.
(Refer to Rear Seat - "Rear Seat Assembly")
|
| 2.
|
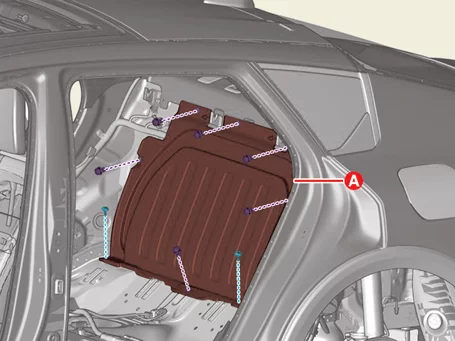
Remove the luggage partition side trim (A) after removing the screws and fasteners.
|
| 1.
|
Install in the reverse order of removal.
|
Luggage Side Trim Removal and Installation - 4DR
|
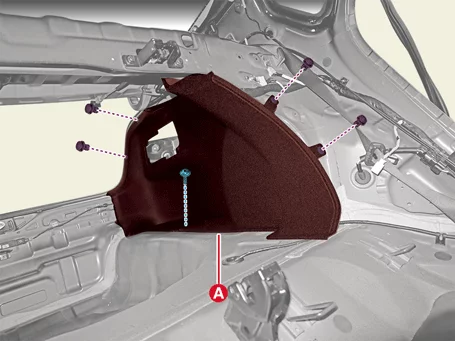
The indication below represents the location of a clip or fastener.

|
| 1.
|
Remove the rear transverse trim.
(Refer to Luggage Trim - "Rear Transverse Trim")
|
| 2.
|
Remove the luggage partition side trim.
(Refer to Luggage Trim - "Luggage Partition Trim")
|
| 3.
|
Remove the luggage side trim (A) after removing the screw and fasteners.
|
| 1.
|
Install in the reverse order of removal.
|
Luggage Side Trim Removal and Installation - 5DR
| 1.
|
Remove the rear transverse trim.
(Refer to Luggage Trim - "Rear Transverse Trim")
|
| 2.
|
Remove the C shelf side trim.
(Refer to Luggage Trim - "C Shelf Side Trim")
|
| 3.
|
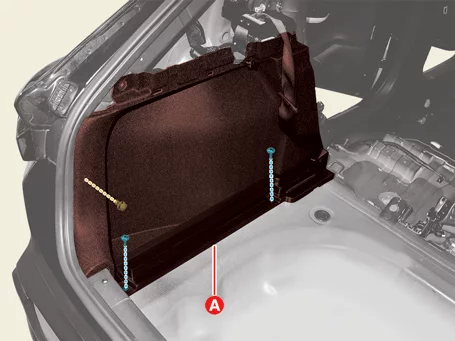
Remove the luggage side trim (A) after removing the screws and fastener.
|
| 4.
|
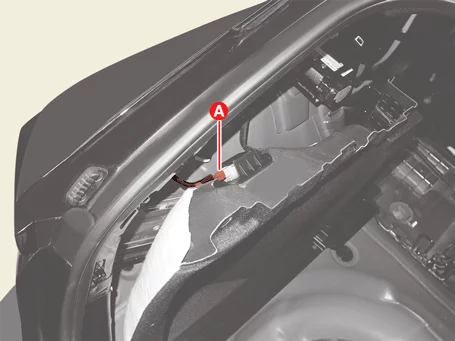
Disconnect the luggage lamp connector (A). [Driver's side
only]
|
| 1.
|
Install in the reverse order of removal.
|
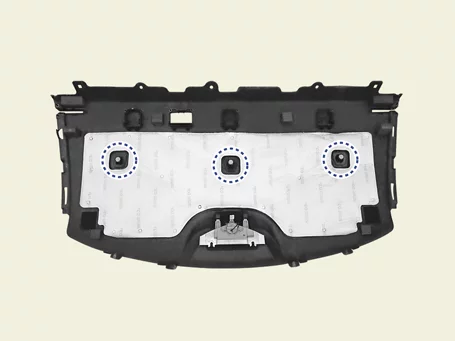
Package Tray Trim Removal and Installation
|
The indication below represents the location of a clip or fastener.
|
| 1.
|
Remove the luggage partition trim.
(Refer to Luggage Trim - "Luggage Partition Trim")
|
| 2.
|
Remove the rear pillar trim.
(Refer to Interior Trim - "Rear Pillar Trim")
|
| 3.
|
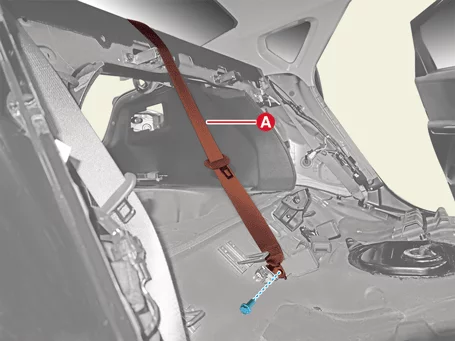
Separate the seat belt (A) after removing the bolt.
|
Tightening torque:
39.2 - 53.9 N·m (4.0 - 5.5 kgf·m, 28.9 - 39.8 lb·ft)
|
|
| 4.
|
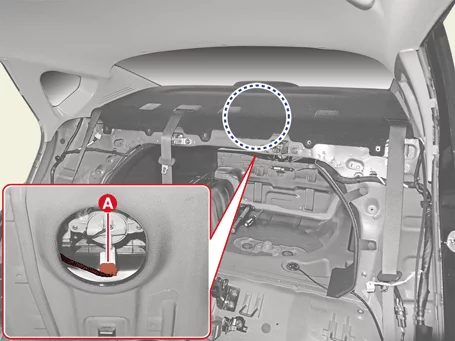
Disconnect the high mounted lamp connector (A).
|
| 5.
|
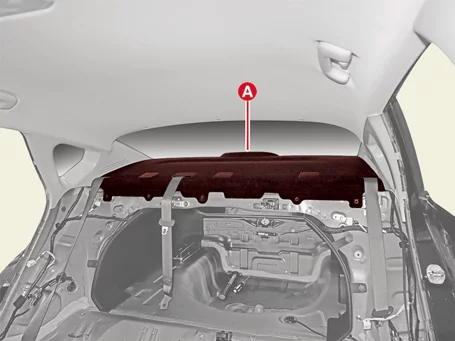
Remove the package tray trim (A).
|
| 1.
|
Install in the reverse order of removal.
|
Rear Transverse Trim Removal and Installation - 4DR
|
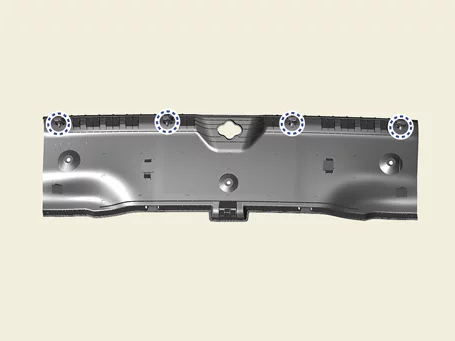
The indication below represents the location of a clip or fastener.
|
| 1.
|
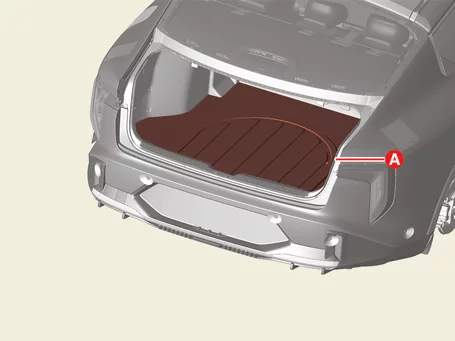
Remove the luggage covering mat (A).
|
| 2.
|
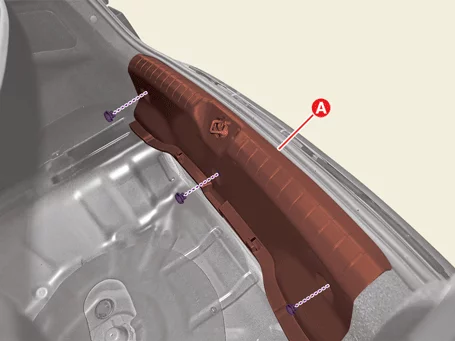
Remove the rear transverse trim (A) after removing the fasteners.
|
| 1.
|
Install in the reverse order of removal.
|
Rear Transverse Trim Removal and Installation - 5DR
|
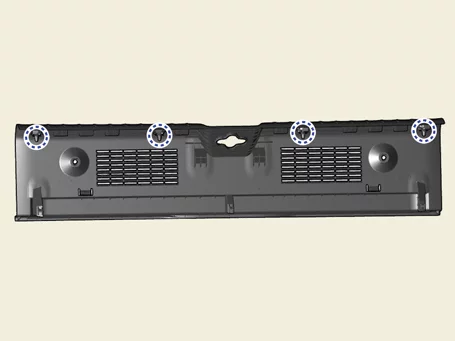
The indication below represents the location of a clip or fastener.
|
| 1.
|
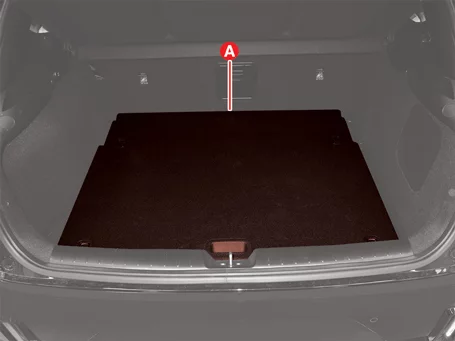
Remove the luggage floor board (A).
|
| 2.
|
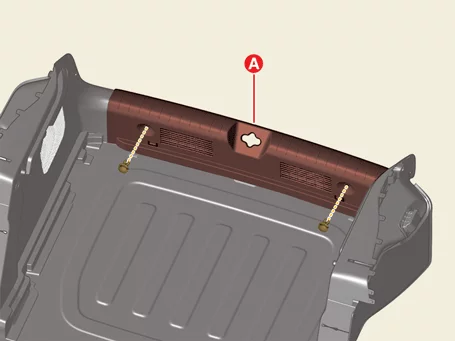
Remove the rear transverse trim (A) after removing the fasteners.
|
| 1.
|
Install in the reverse order of removal.
|
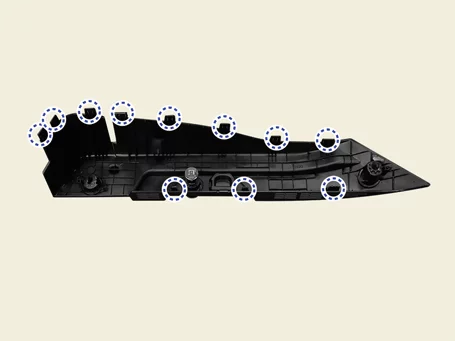
C Shelf Side Trim Removal and Installation
|
The indication below represents the location of a clip or fastener.
|
C Shelf Side Trim
| 1.
|
Remove the side rear seat back assembly.
(Refer to Rear Seat - "Rear Seat Assembly")
|
| 2.
|
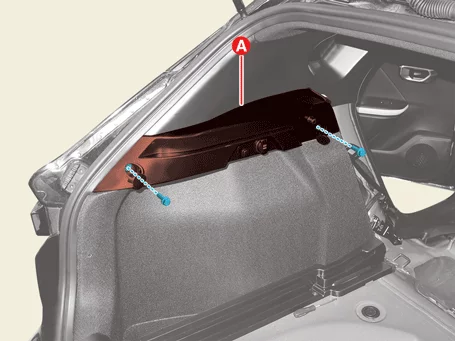
Remove the trim (A) after removing the bolts.
|
Tightening torque:
6.9 - 10.8 N·m (0.7 - 1.1 kgf·m, 5.1 - 8.0 lb·ft)
|
|
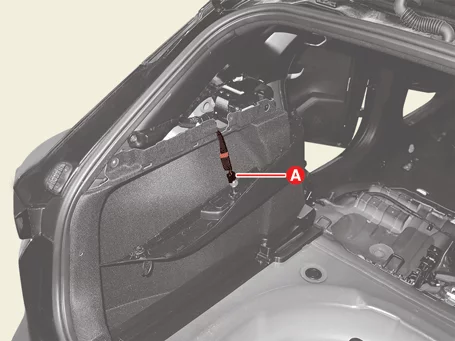
| 3.
|
Disconnect the accessory socket connector (A). [Driver's side
only]
|
| 1.
|
Install in the reverse order of removal.
|
Other information:
Kia K4 (CL4) 2025-2026 Service Manual: Brake system
Your Kia K4 is equipped with a sophisticated, high-performance power-assisted braking system, an electronic parking brake, and a suite of advanced active safety braking technologies designed to ensure your confidence and safety in all driving conditions.
Power-assisted brakes
In the event that the power-assisted brakes lose power—for instance, due to an unexpected engine stall—you can still bring the Kia K4 to a stop by applying significantly more force to the brake pedal than usual.
Kia K4 (CL4) 2025-2026 Service Manual: Wireless smartphone charging system
The Kia K4 features an advanced wireless smartphone charging system conveniently located at the front of the center console, allowing you to power your mobile devices without the clutter of cables.
Charging indicator light
Wireless charging pad surface
To ensure proper operation, firmly close all vehicle doors and start the Kia K4 engine or set the ignition to the ON position.