Contents:
Components and Components Location
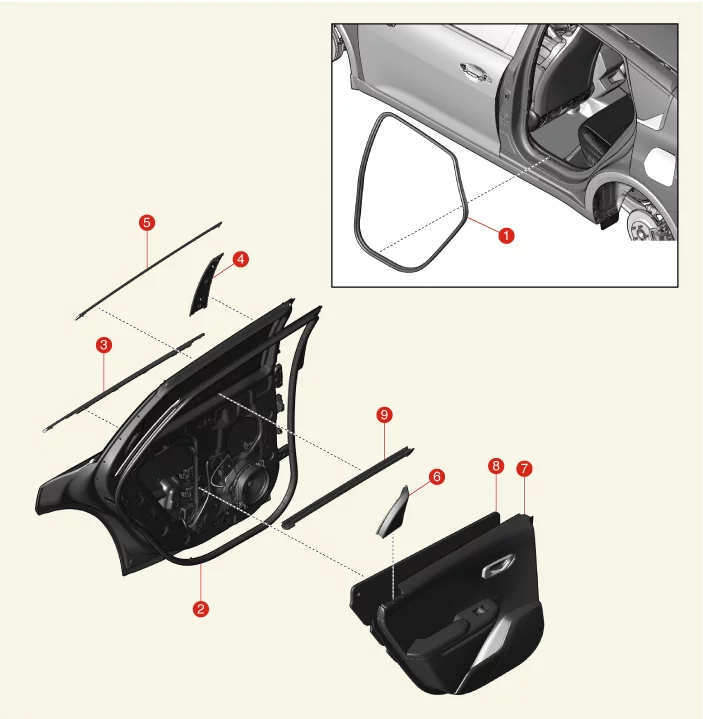
1. Body Side Weather Strip
2. Door Side
Weather
Strip
3. Outside Door Belt Weather Strip
4. Door Garnish
5. Door Molding
|
6. Delta Inner Cover
7. Door Trim
8.
Door Trim
Seal
9. Inside Door Belt Weather Strip
|
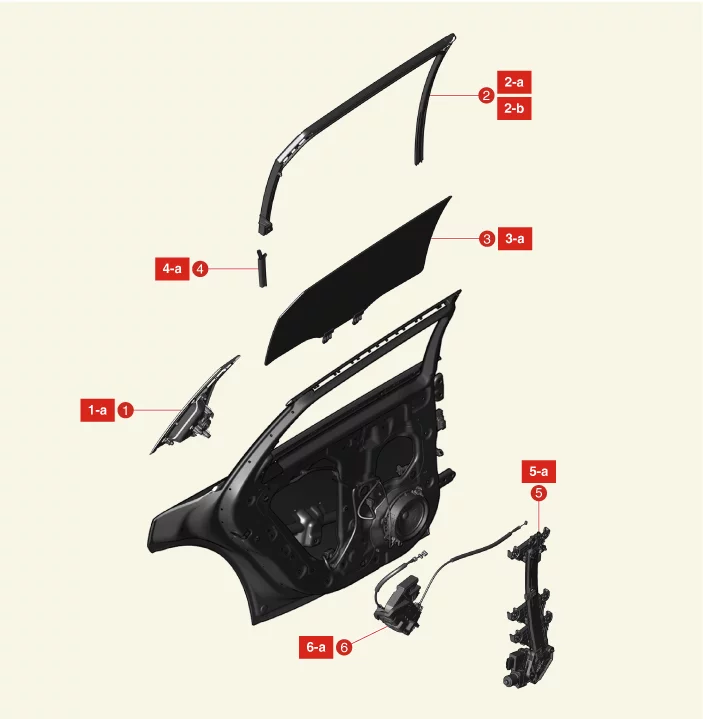
1. Door Outside Handle
2. Door Glass
Run
3. Door
Glass
|
4. Door Channel
5. Power Window
Regulator
6.
Door Latch
|
Adjustment
Glass Adjustment
| 1.
|
Remove the rear door trim seal.
(Refer Rear Door - "Rear Door Trim")
|
| 2.
|
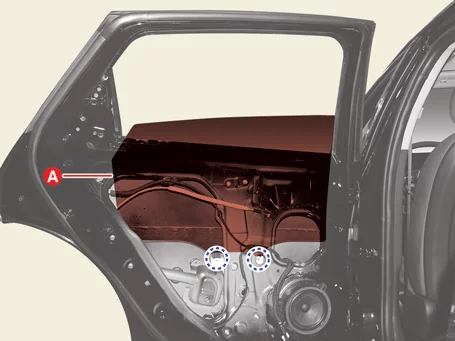
Operate the power window switch to lower the window glass until the window glass bolt is
visible in the
service hole.
|
| 3.
|
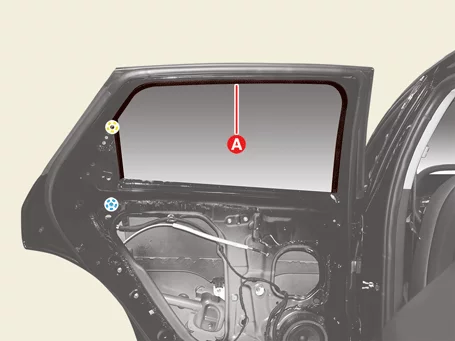
Adjust the gap by moving the rear door window glass (A) up, down, left and right, and then
tighten the
bolts.
|
Tightening torque :
7.8 - 11.8 N·m (0.8 - 1.2 kgf·m, 5.8 - 8.7 lb·ft)
|
|
| 4.
|
Check that the glass operates properly.
|
Striker Adjustment
| 1.
|
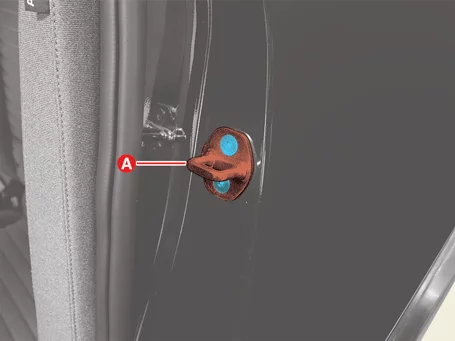
Loosen the screws and adjust the striker (A) by moving it back and forth, left and right, and
then
tighten the screws.
|
Tightening torque :
18.2 - 33.7 N·m (1.86 - 3.44 kgf·m, 13.5 - 24.9 lb·ft)
|
|
| 2.
|
Check that the door opens and closes properly.
|
Door Adjustment
| 1.
|
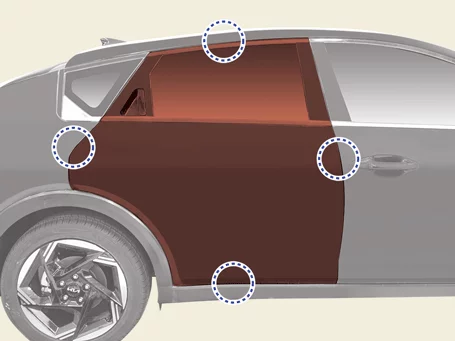
Check that the gap between the door and the body is even after parking in a flat level.
|
| 2.
|
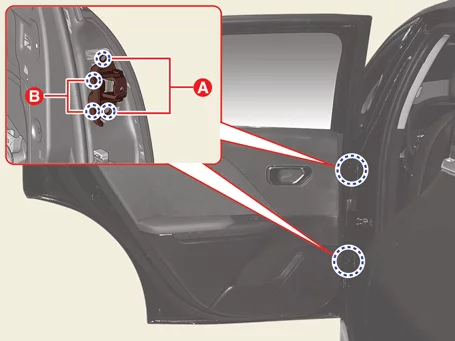
Loosen the door hinge bolts (A, B), adjust the door by moving it back and forth, left and
right, and then
tighten the bolts.
|
Tightening torque
A : 21.6 - 26.5 N·m (2.2 - 2.7 kgf·m,
15.9 - 19.5 lb·ft)
B : 23.5 - 31.4 N·m (2.4 - 3.2 kgf·m,
17.4 - 23.1 lb·ft)
|
|
| 3.
|
Check that the gap between the door and the body is even.
|
Rear Door Garnish and Molding Removal and Installation
|
The indication below represents the location of a clip or fastener.

|
Door Garnish
| 1.
|
Remove the outside door belt weather strip.
(Refer to Rear Door - "Rear Door Weather Strip")
|
| 2.
|
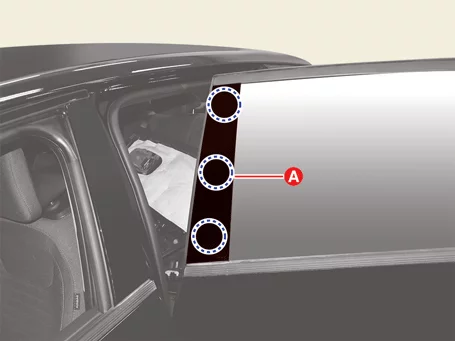
Remove the garnish (A).
|
Door Molding
| 1.
|
Remove the door garnish.
|
| 2.
|
Remove the rear door outside handle.
(Refer to Rear Door - "Rear Door Handle")
|
| 3.
|
Remove the molding (A).
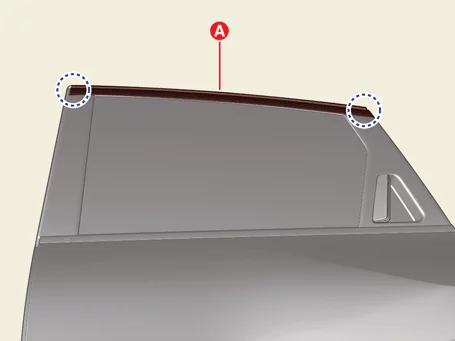
|
| 1.
|
Install in the reverse order of removal.
|
Rear Door Handle Removal and Installation
|
The indication below represents the location of a clip or fastener.
|
Door Outside Handle
| 1.
|
Remove the rear door trim.
(Refer to Rear Door - "Rear Door Trim")
|
| 2.
|
Remove the handle (A) after removing the bolts.
|
Tightening torque :
7.8 - 11.8 N·m (0.8 - 1.2 kgf·m, 5.8 - 8.7 lb·ft)
|
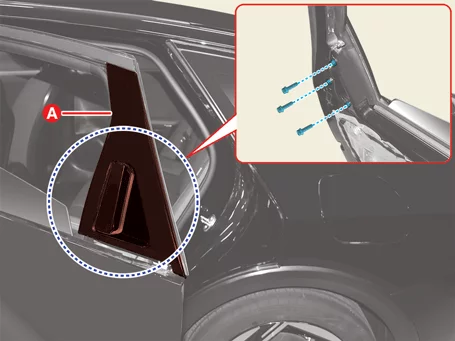
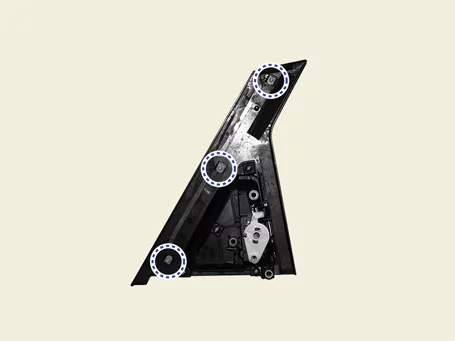
|
| 3.
|
Separate the door latch cable (A).
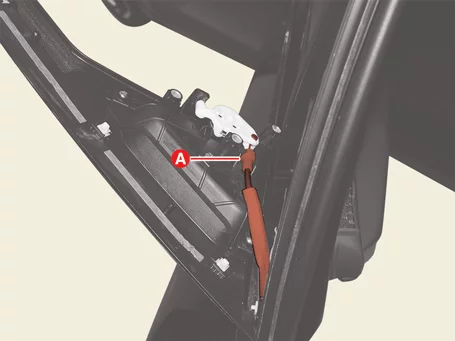
|
| 1.
|
Install in the reverse order of removal.
|
Rear Door Latch Removal and Installation
| 1.
|
Remove the door window glass.
(Refer to Rear Door - "Rear Door Window Glass")
|
| 2.
|
Disconnect the door latch connector (A).
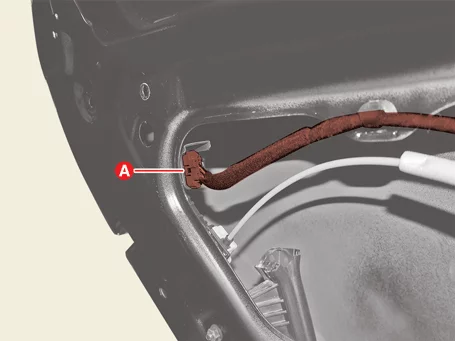
|
| 3.
|
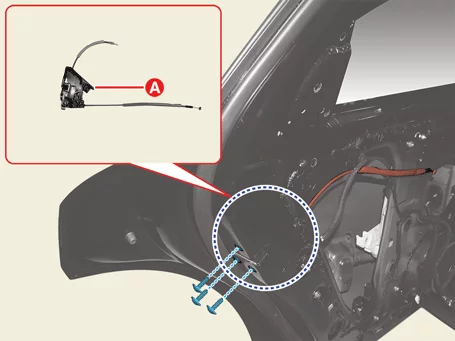
Remove the door latch (A) after removing the bolts.
|
Tightening torque:
7.8 - 10.8 N·m (0.8 - 1.1 kgf·m, 5.8 - 8.0 lb·ft)
|
|
| 1.
|
Install in the reverse order of removal.
|
Rear Door Latch Inspection
| 1.
|
Remove the rear door trim seal.
(Refer to Rear Door - "Rear Door Trim")
|
| 2.
|
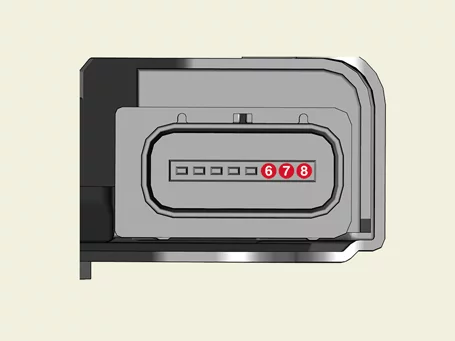
Apply voltage to connector terminal and check that the door latch operates properly.
Driver's Side
Passenger's Side
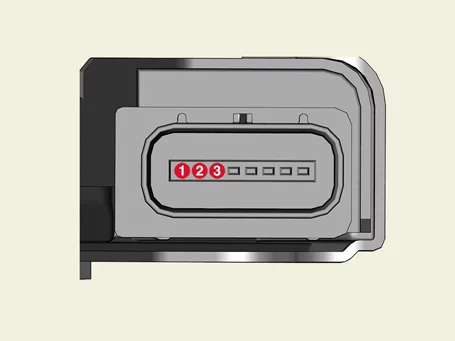
Pin number
|
Operate
|
Driver side
|
Passenger side
|
Lock
|
Unlock
|
8
|
2
|
-
|
+
|
7
|
1
|
+
|
-
|
|
Rear Door Power Window Regulator Removal and Installation
| 1.
|
Remove the door window glass.
(Refer to Rear Door - "Rear Door Window Glass")
|
| 2.
|
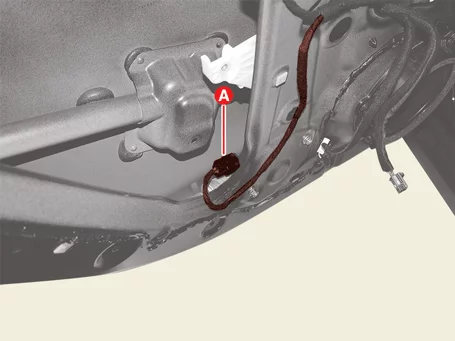
Disconnect the power window motor connector (A).
|
| 3.
|
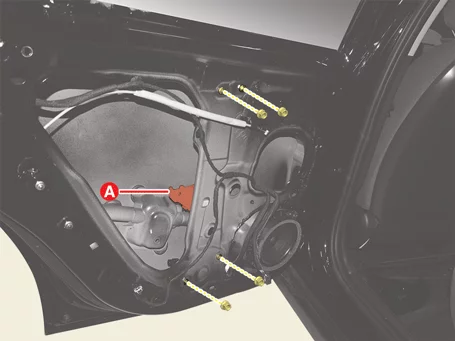
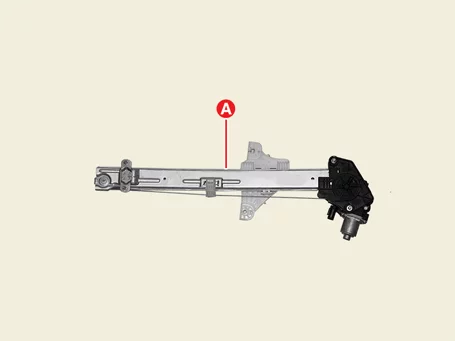
Remove the power window regulator (A) after removing the nuts.
|
Tightening torque:
3.9 - 5.9 N·m (0.4 - 0.6 kgf·m, 2.9 - 4.3 lb·ft, 34.7 - 52.1 lb·in)
|
|
| 1.
|
Install in the reverse order of removal.
|
Rear Door Speaker Removal and Installation
|
The indication below represents the location of a clip or fastener.
|
| 1.
|
Remove the door trim.
(Refer to Rear Door - "Rear Door Trim")
|
| 2.
|
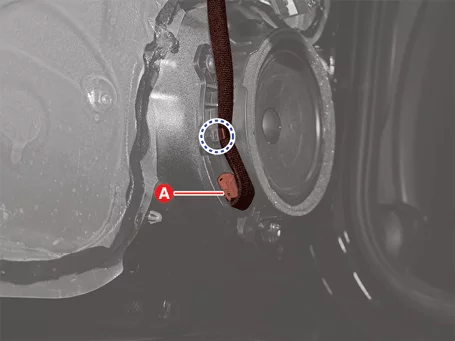
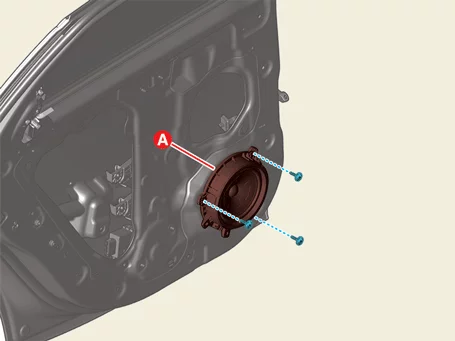
Disconnect the door speaker connector (A).
|
| 3.
|
Remove the speaker (A) after removing the screws.
|
| 1.
|
Install in the reverse order of removal.
|
Rear Door Switch Removal and Installation
|
The indication below represents the location of a clip or fastener.
|
Power Window Sub Switch
| 1.
|
Remove the door trim.
(Refer to Rear Door - "Rear Door Trim")
|
| 2.
|
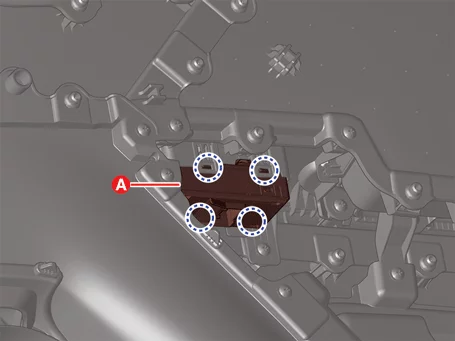
Remove the switch (A).
|
| 1.
|
Install in the reverse order of removal.
|
Rear Door Trim Removal and Installation
|
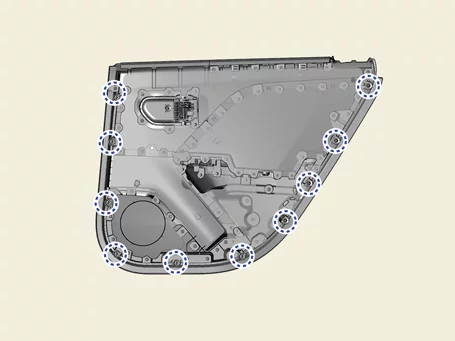
The indication below represents the location of a clip or fastener.
|
Door Trim
| 1.
|
Disconnect the battery negative (-) terminal.
|
| 2.
|
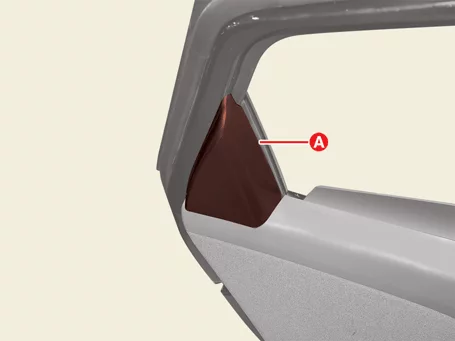
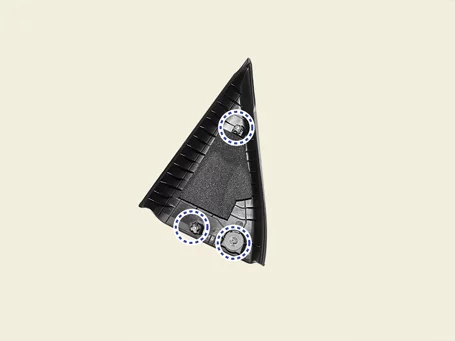
Remove the delta inner cover (A).
|
| 3.
|
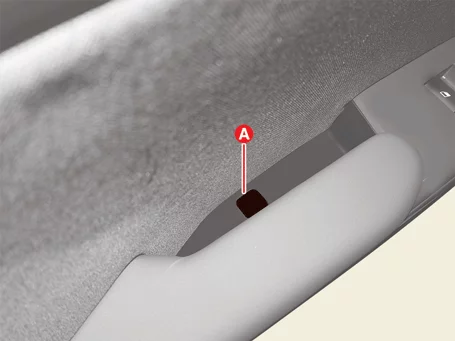
Open the screw cap (A).
|
| 4.
|
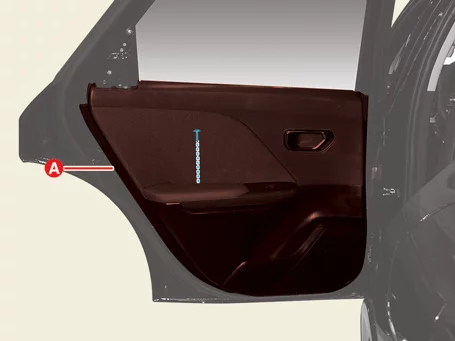
Remove the trim (A) after removing the screw.
|
| 5.
|
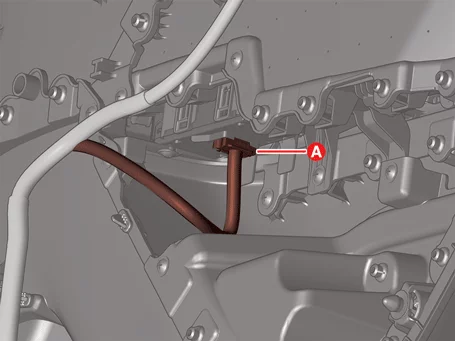
Disconnect the power window switch connector (A).
|
Door Trim Seal
| 2.
|
Disconnect the speaker connector (A).
|
| 3.
|
Remove the seal (A).
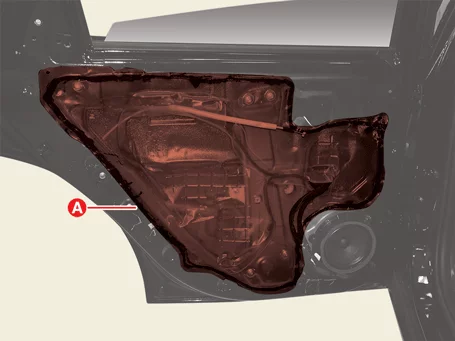
|
| 1.
|
Install in the reverse order of removal.
|
Rear Door Weather Strip Removal and Installation
|
The indication below represents the location of a clip or fastener.
|
Body Side Weather Strip
| 1.
|
Remove the weather strip (A).
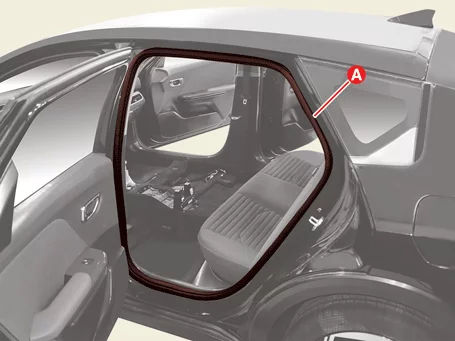
|
Door Side Weather Strip
| 1.
|
Separate the door checker (A) after removing the bolt.
|
Tightening torque :
21.6 - 32.4 N·m (2.2 - 3.3 kgf·m, 15.9 - 23.9 lb·ft)
|
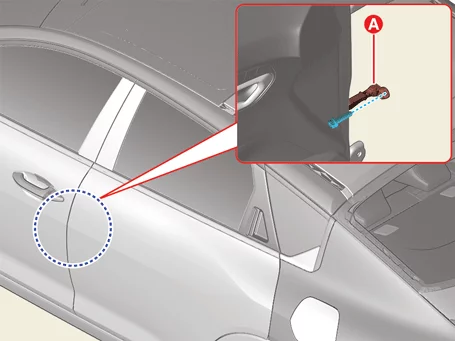
|
| 2.
|
Remove the weather strip (A).
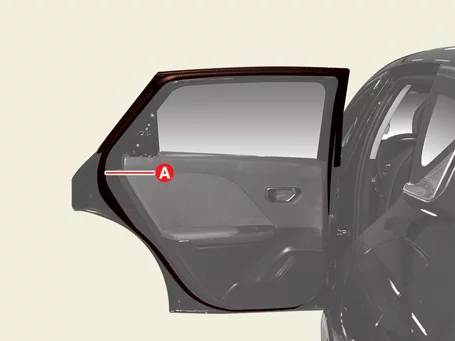
|
Outside Door Belt Weather Strip
| 1.
|
Remove the weather strip (A).
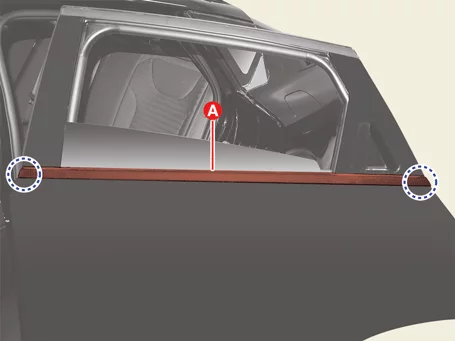
|
Inside Door Belt Weather Strip
| 1.
|
Remove the rear door trim.
(Remove the Rear Door - "Rear Door Trim")
|
| 2.
|
Remove the weather strip (A).
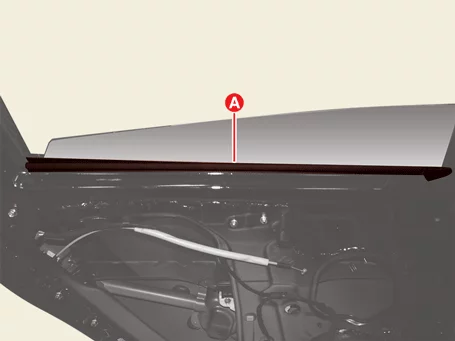
|
| 1.
|
Install in the reverse order of removal.
|
Rear Door Window Glass Removal and Installation
Door Glass Run
| 1.
|
Remove the rear door trim seal.
(Refer to Rear Door - "Rear Door Trim")
|
| 2.
|
Remove the glass run (A) after removing the bolt and nut.
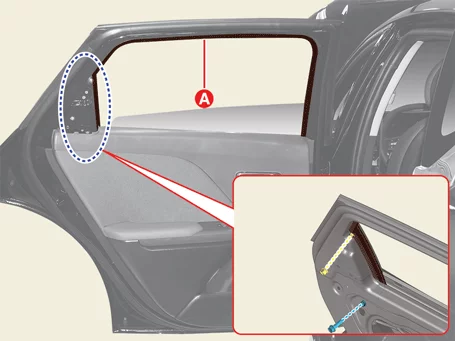
|
Door Window Glass
| 1.
|
Remove the door glass run.
|
| 2.
|
Remove the glass (A) after removing the bolts.
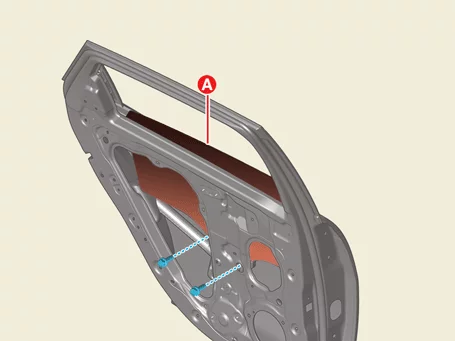
|
Door channel
| 1.
|
Remove the door window glass.
|
| 2.
|
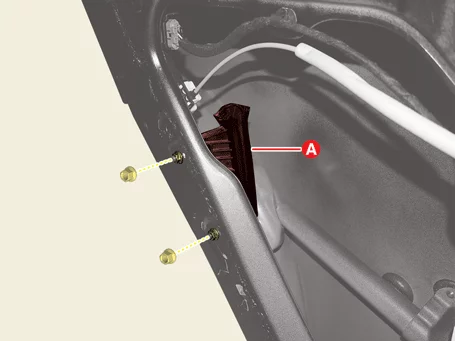
Remove the channel (A) after removing the nuts.
|
| 1.
|
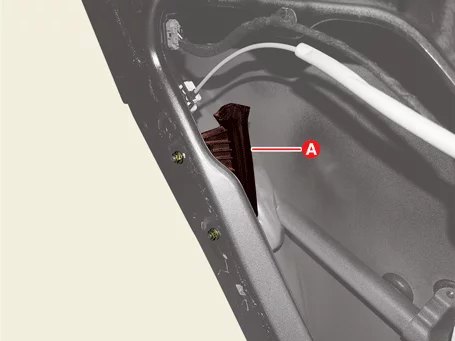
Install the door channel (A) after tightening the nuts.
|
Tightening torque:
3.9 - 5.9 N·m (0.4 - 0.6 kgf·m, 2.9 - 4.3 lb·ft, 34.7 - 52.1 lb·in)
|
|
| 2.
|
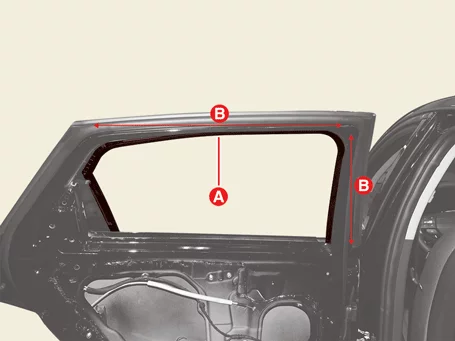
Install the door glass run (A) at the (B) position.
|
| 3.
|
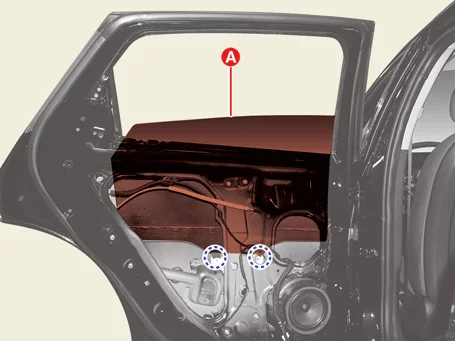
Install the door window glass (A) after tightening the bolts.
|
Tightening torque :
7.8 - 11.8 N·m (0.8 - 1.2 kgf·m, 5.8 - 8.7 lb·ft)
|
|
| 4.
|
Install the door glass run (A) after tightening the bolt and nut.
|
Tightening torque
Bolt : 7.8 - 11.8 N·m (0.8 - 1.2 kgf·m,
5.8 - 8.7 lb·ft)
Nut : 3.9 - 5.9 N·m (0.4 - 0.6 kgf·m,
2.9 - 4.3 lb·ft,
34.7 - 52.1 lb·in)
|
|
| 5.
|
Install in the reverse order of removal.
|
Other information:
Kia K4 (CL4) 2025-2026 Service Manual: Audio system
The audio system in your Kia K4 is engineered for high-fidelity performance. To ensure the longevity and proper operation of all infotainment components, please adhere to the following guidelines regarding vehicle modifications and accessories.
NOTE
We strongly advise against the installation of aftermarket High Intensity Discharge (HID) headlight kits.
Kia K4 (CL4) 2025-2026 Service Manual: High Beam Assist (HBA)
The High Beam Assist (HBA) feature in your Kia K4 provides automated convenience by switching between high and low beams based on the detection of oncoming vehicles, preceding taillights, and ambient road brightness. This helps maximize your vision without blinding other road users.
Detection sensor
The system relies on a high-resolution forward-facing camera.