Contents:
Components and Components Location
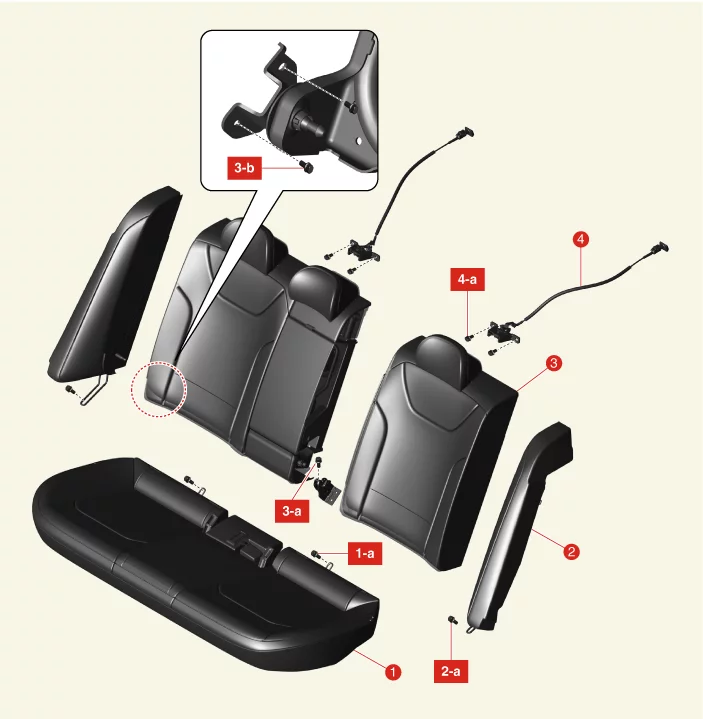
1. Seat Cushion Cover
Assembly
1-a. 16.7 - 25.5 N·m (1.7 - 2.6 kgf·m, 12.3 - 18.8 lb·ft)
2. Side Seat Back Assembly
2-a.
16.7 - 25.5 N·m (1.7 - 2.6 kgf·m, 12.3 - 18.8 lb·ft)
|
3. Seat Back Cover
Assembly
3-a. 16.7 - 25.5 N·m (1.7 - 2.6 kgf·m, 12.3 - 18.8 lb·ft)
3-b. 7.8 - 11.8 N·m (0.8 -
1.2
kgf·m, 5.8 - 8.7 lb·ft)
4. Folding Latch
4-a. 16.7 - 25.5 N·m (1.7 - 2.6 kgf·m, 12.3 - 18.8
lb·ft)
|
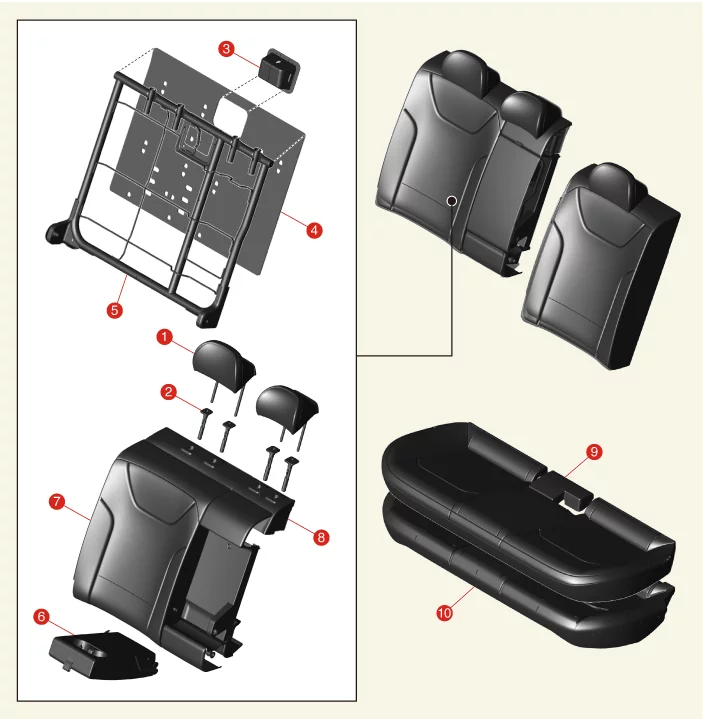
1. Headrest
2.
Headrest
Guides
3. Striker Cover
4. Seat Back Board
5. Seat Frame
|
6. Seat Back Armrest
Assembly
7. Seat Back Cover
8. Seat Back Pad
9. Seat Cushion Cover
10. Seat Cushion
Pad
|
Rear Seat Assembly Removal and Installation
|
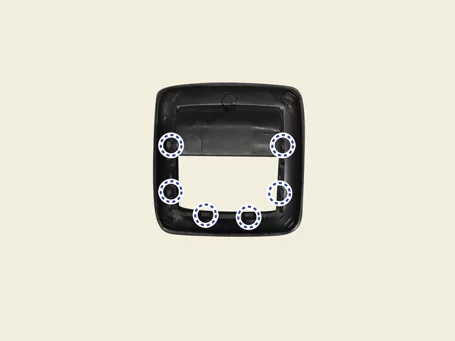
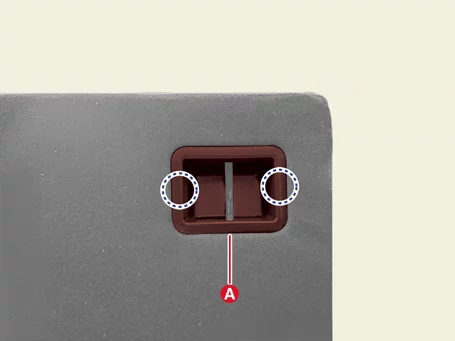
The indication below represents the location of a clip or fastener.

|
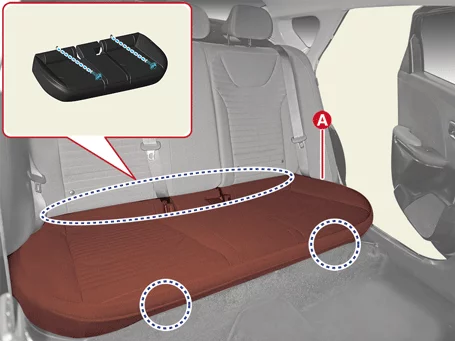
Seat Cushion Assembly
| 1.
|
Remove the seat cushion assembly (A) after removing the bolt.
|
Tightening torque :
16.7 - 25.5 N·m (1.7 - 2.6 kgf·m, 12.3 - 18.8 lb·ft)
|
|
Seat Back Assembly
| 1.
|
Disconnect the battery negative (-) terminal.
|
After disconnecting the battery negative ( - ) terminal, wait at least 3
minutes and 30 seconds.
|
|
| 2.
|
Remove the seat cushion assembly.
|
| 3.
|
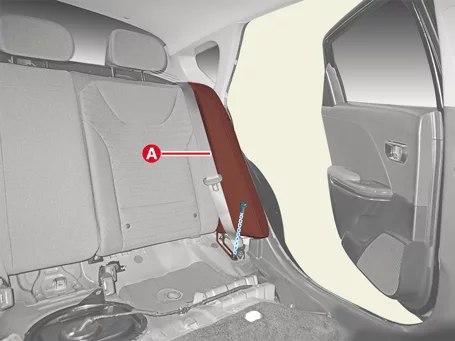
Remove the side seat back assembly (A) after removing the bolt.
|
Tightening torque :
16.7 - 25.5 N·m (1.7 - 2.6 kgf·m, 12.3 - 18.8 lb·ft)
|
|
| 4.
|
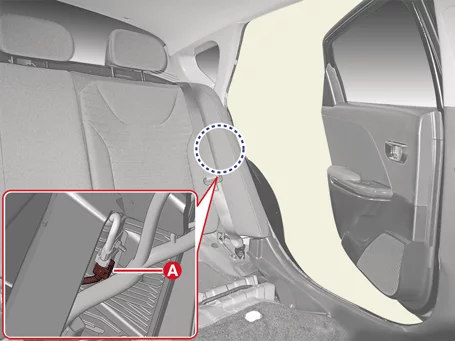
Disconnect the rear Side Airbag (SAB) connector (A).
|
| 5.
|
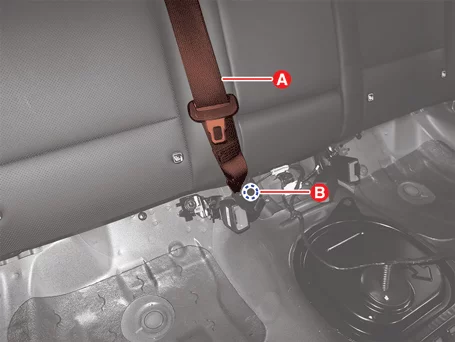
Separate the rear seat belt (A) after pushing the hole (B). [5DR
only]
|
| 6.
|
Fold the seat back assembly.
|
| 7.
|
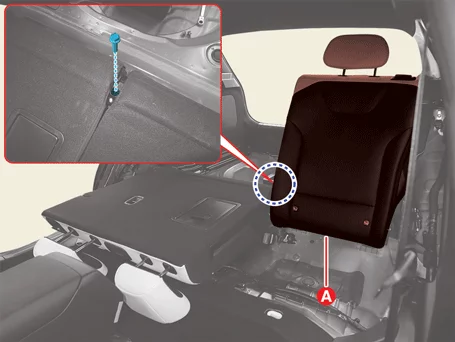
Remove the seat back assembly (A) after removing the bolt.
|
Tightening torque:
16.7 - 25.5 N·m (1.7 - 2.6 kgf·m, 12.3 - 18.8 lb·ft)
|
|
| 1.
|
Disconnect the battery negative (-) terminal.
|
After disconnecting the battery negative ( - ) terminal, wait at least 3
minutes and 30 seconds.
|
|
| 2.
|
Remove the seat cushion assembly.
|
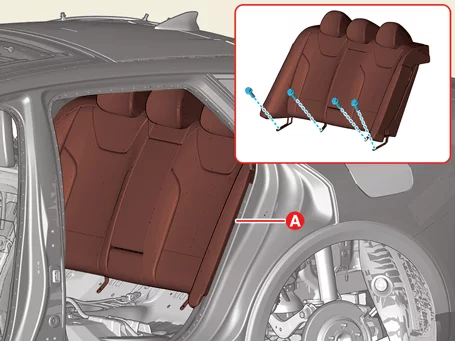
| 3.
|
Remove the seat back assembly (A) after removing the bolts.
|
Tightening torque :
16.7 - 25.5 N·m (1.7 - 2.6 kgf·m, 12.3 - 18.8 lb·ft)
|
|
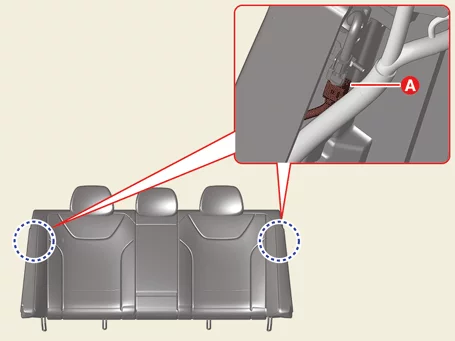
| 4.
|
Disconnect the rear Side Airbag (SAB) connectors (A).
|
| 1.
|
Install in the reverse order of removal.
|
Rear Seat Back Cover Removal and Installation
Driver's Side
| 1.
|
Remove the rear seat back cover assembly. [Driver's
side]
(Refer to Rear Seat - "Rear Seat Back Cover Assembly")
|
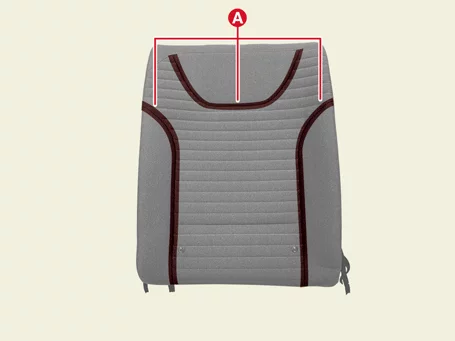
| 2.
|
Remove the hog-ring clips (A).
|
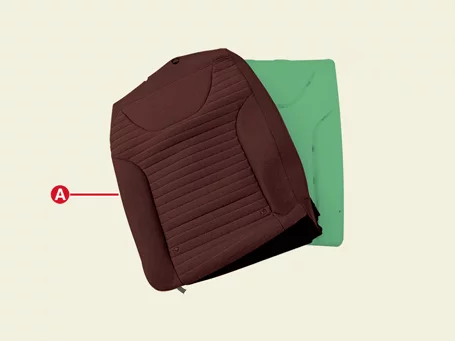
| 3.
|
Remove the rear seat back cover (A) from the pad.
|
Passenger's Side
| 1.
|
Remove the rear seat back cover assembly. [Passenger's
side]
(Refer to Rear Seat - "Rear Seat Back Cover Assembly")
|
| 2.
|
Remove the hog-ring clips (A).
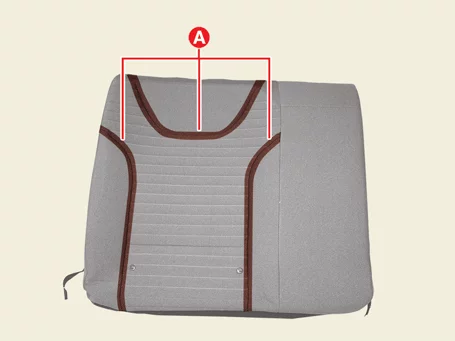
|
| 3.
|
Remove the rear seat back cover (A) from the pad.
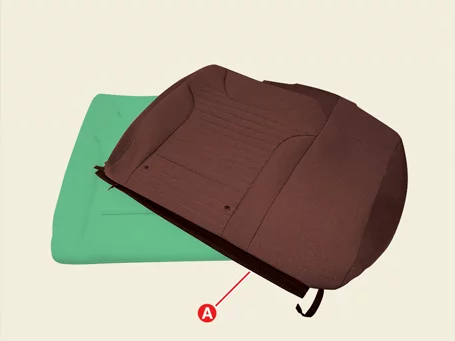
|
| 1.
|
Install in the reverse order of removal.
|
Rear Seat Back Cover Assembly Removal and Installation
|
•
|
This video was created using 3D graphics to help understand the vehicle
maintenance manual.
|
|
•
|
There may be some differences from actual vehicles.
|
|
•
|
The location and repair procedures of the parts may vary depending on vehicle
model, model year,
region, and specifications.
|
|
•
|
Check the KDS Guide for detailed information on how to use the KDS.
|
|
•
|
Check the manual for detailed maintenance procedures.
|
|
•
|
Unauthorized reproduction, distribution, or sharing of this video is
prohibited.
|
|
Rear Seat Back Cover Removal (Driver's Side)
(Click to play)

Video: Rear Seat Back Cover Removal (Driver's
Side)
Rear Seat Back Cover Removal (Passenger's Side)
(Click to play)
Video: Rear Seat Back Cover Removal
(Passenger's
Side)
|
The indication below represents the location of a clip or fastener.
|
Driver's Side
| 1.
|
Remove the rear seat back assembly. [Driver's side]
(Refer to Rear Seat - "Rear Seat Assembly")
|
| 2.
|
Remove the headrest (A).
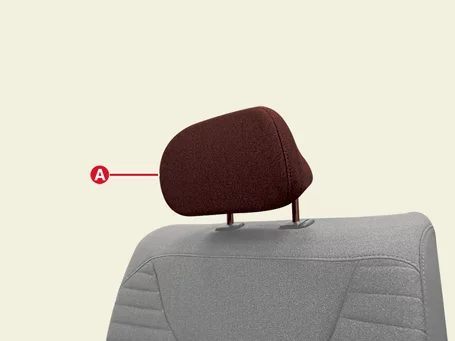
|
| 3.
|
Remove the headrest guide (A) by pulling it in the direction of the arrow.
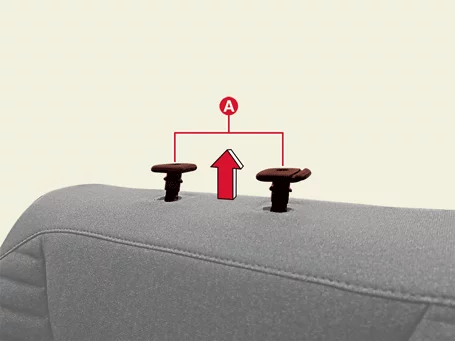
|
| 4.
|
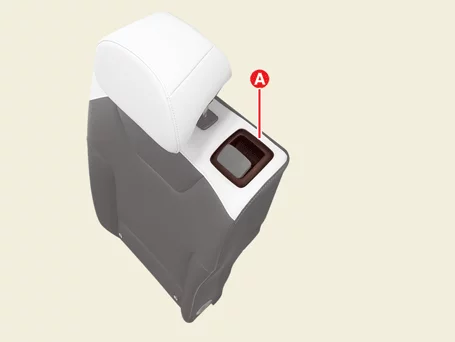
Remove the folding lever cover (A). [5DR only]
|
| 5.
|
Remove the rear seat folding bezel (A).
|
| 6.
|
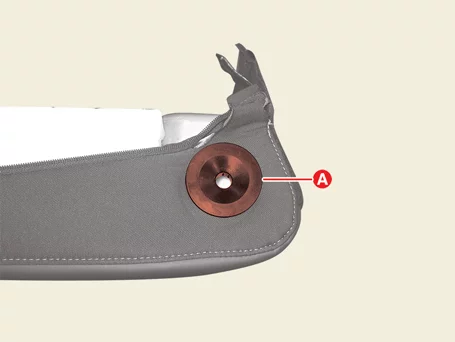
Remove the back folding bush (A).
|
| 7.
|
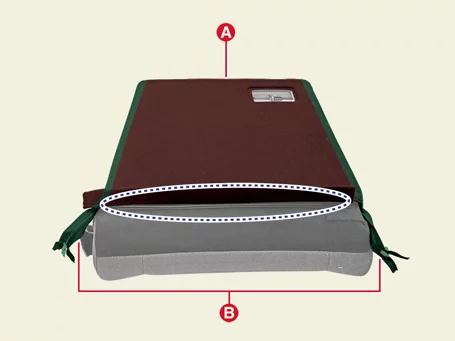
Separate the seat back cover (A) after opening the zippers (B)
|
| 8.
|
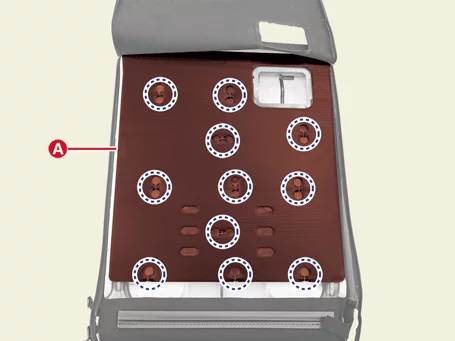
Remove the backboard (A) after removing the hog-ring clips.
|
| 9.
|
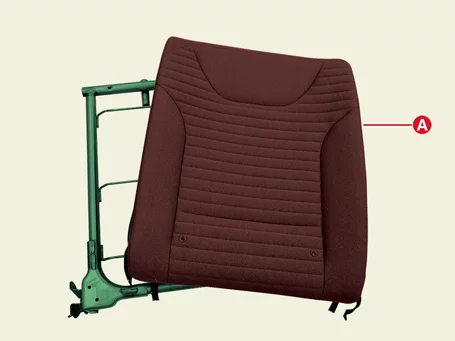
Remove the seat back cover assembly (A) from the frame.
|
Passenger's Side
| 1.
|
Remove the rear seat back assembly. [Passenger's side]
(Refer to Rear Seat - "Rear Seat Assembly")
|
| 2.
|
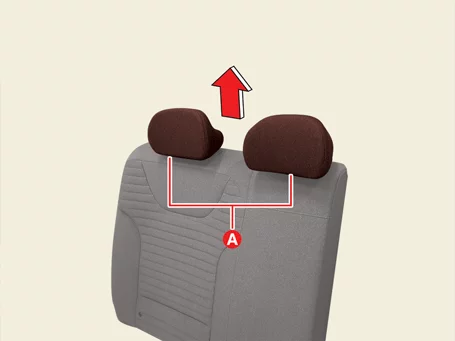
Remove the headrests (A) by pulling it in the direction of the arrow.
|
| 3.
|
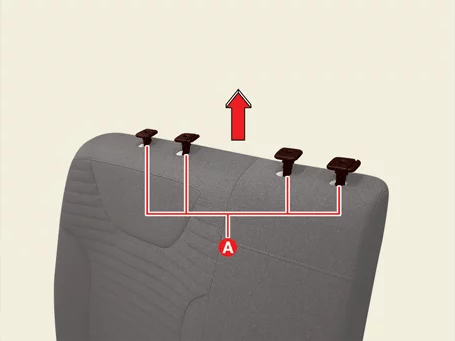
Remove the headrest guides (A) by pulling it in the direction of the arrow.
|
| 4.
|
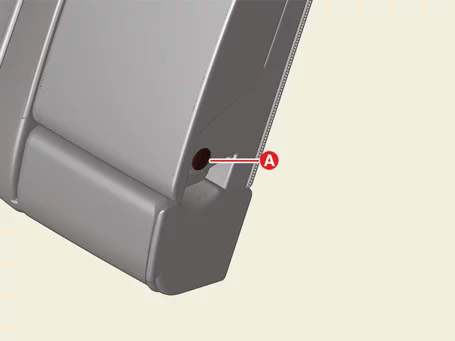
Open the armrest cap (A).
|
| 5.
|
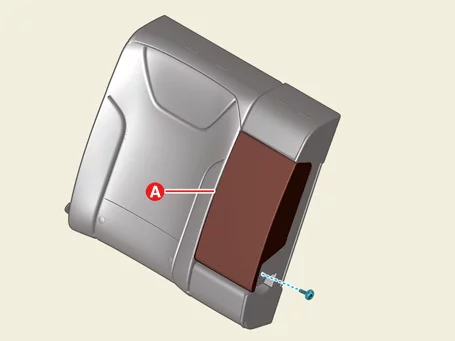
Remove the armrest (A) after removing the bolt.
|
Tightening torque:
10.8 - 16.7 N·m (1.1 - 1.7 kgf·m, 8.0 - 12.3 lb·ft)
|
|
| 6.
|
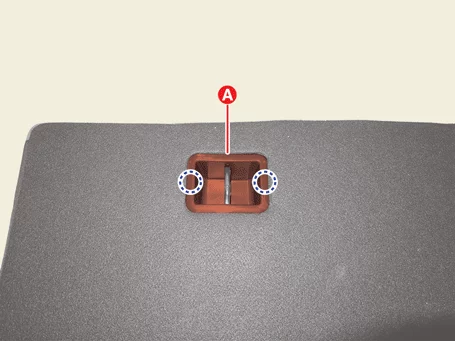
Remove the folding bezel (A).
|
| 7.
|
Remove the folding lever cover (A). [5DR only]
|
| 8.
|
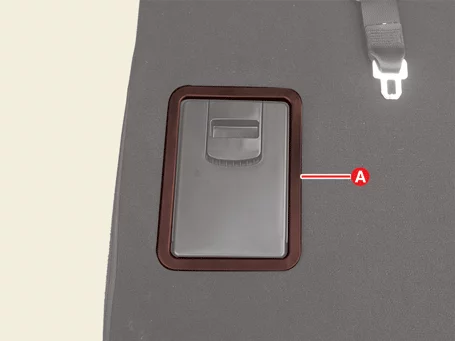
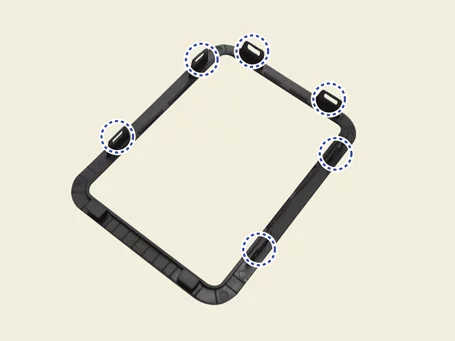
Remove the ski through bezel (A). [5DR only]
|
| 9.
|
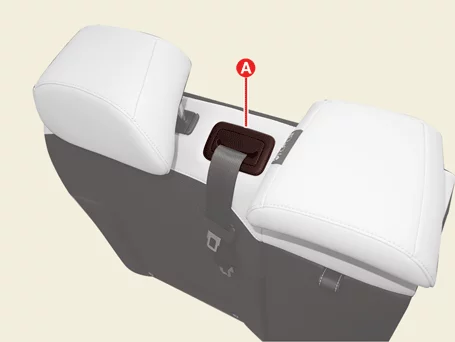
Remove the rear seat center belt cover (A). [5DR only]
|
| 10.
|
Remove the back folding bush (A).
|
| 11.
|
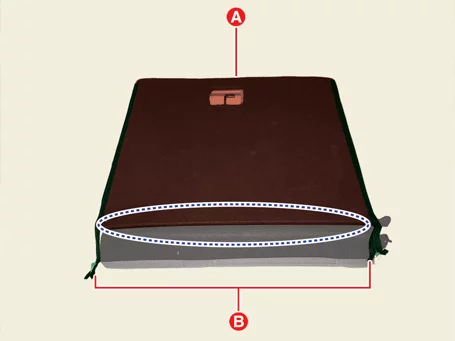
Separate the seat back cover (A) after opening the zippers (B).
|
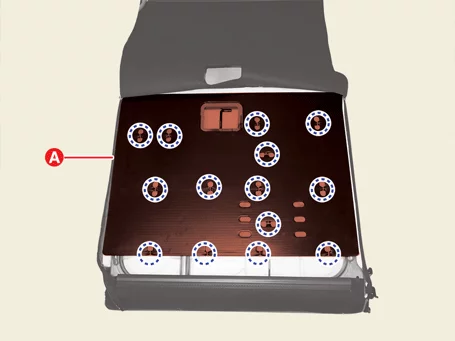
| 12.
|
Remove the back board (A) after removing the hog-ring clips.
|
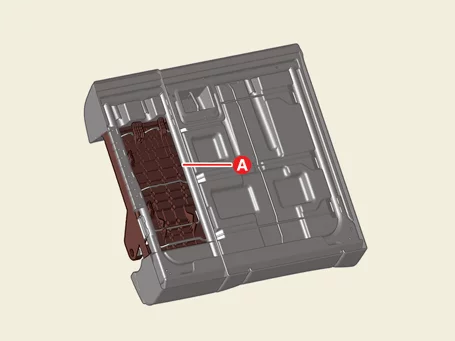
| 13.
|
Remove the armrest garnish (A).
|
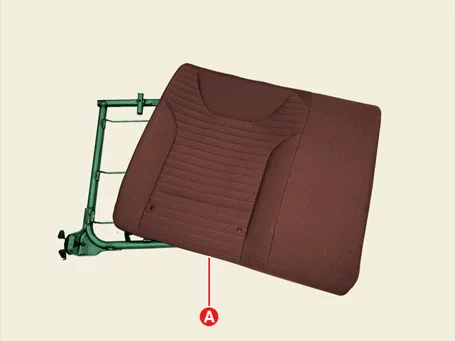
| 14.
|
Remove the seat back cover assembly (A) front the frame.
|
| 1.
|
Install in the reverse order of removal.
|
Rear Seat Cushion Cover Removal and Installation
|
•
|
This video was created using 3D graphics to help understand the vehicle
maintenance manual.
|
|
•
|
There may be some differences from actual vehicles.
|
|
•
|
The location and repair procedures of the parts may vary depending on vehicle
model, model year,
region, and specifications.
|
|
•
|
Check the KDS Guide for detailed information on how to use the KDS.
|
|
•
|
Check the manual for detailed maintenance procedures.
|
|
•
|
Unauthorized reproduction, distribution, or sharing of this video is
prohibited.
|
|
Rear Seat Cushion Cover Removal
(Click to play)
Video: Rear Seat Cushion Cover Removal
| 1.
|
Remove the rear seat cushion assembly.
(Refer to Rear Seat - "Rear Seat Assembly")
|
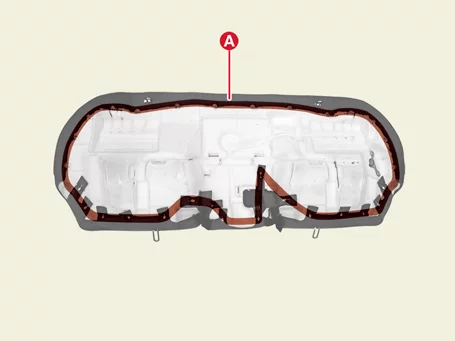
| 2.
|
Remove the hog-ring clips (A).
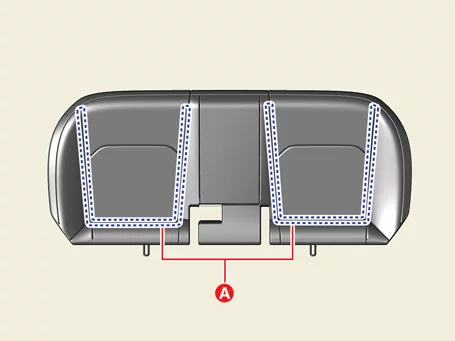
|
| 3.
|
Remove the rear seat cushion cover (A) and cushion pad.
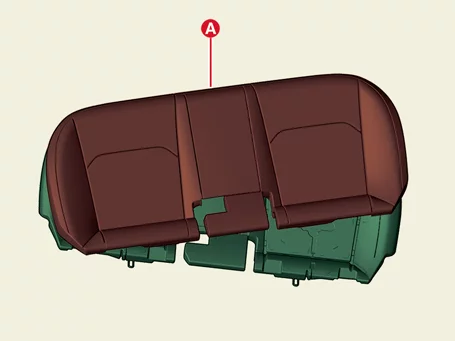
|
| 1.
|
Install in the reverse order of removal.
|
Rear Seat Frame Assembly Removal and Installation
|
•
|
This video was created using 3D graphics to help understand the vehicle
maintenance manual.
|
|
•
|
There may be some differences from actual vehicles.
|
|
•
|
The location and repair procedures of the parts may vary depending on vehicle
model, model year,
region, and specifications.
|
|
•
|
Check the KDS Guide for detailed information on how to use the KDS.
|
|
•
|
Check the manual for detailed maintenance procedures.
|
|
•
|
Unauthorized reproduction, distribution, or sharing of this video is
prohibited.
|
|
Rear Seat Back Cover Removal (Driver's Side)
(Click to play)
Video: Rear Seat Back Cover Removal (Driver's
Side)
Rear Seat Back Cover Removal (Passenger's Side)
(Click to play)
Video: Rear Seat Back Cover Removal
(Passenger's
Side)
6:4
| 1.
|
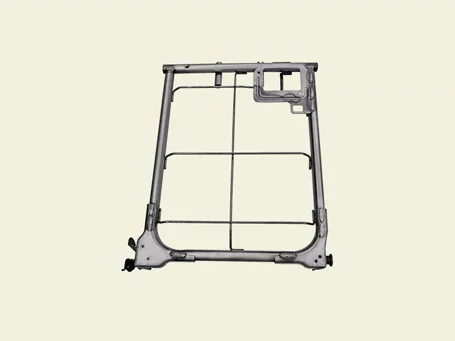
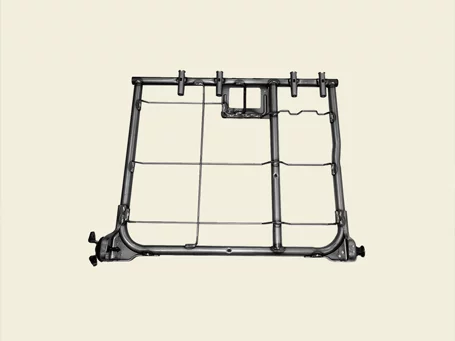
Remove the seat back cover assembly.
(Refer to Rear Seat - "Rear Seat Back Cover Assembly")
Driver's Side
Passenger's Side
|
| 1.
|
Install in the reverse order of removal.
|
Rear Seat Latch Removal and Installation
| 1.
|
Remove the rear seat back assembly.
(Refer to Rear Seat - "Rear Seat Assembly")
|
| 2.
|
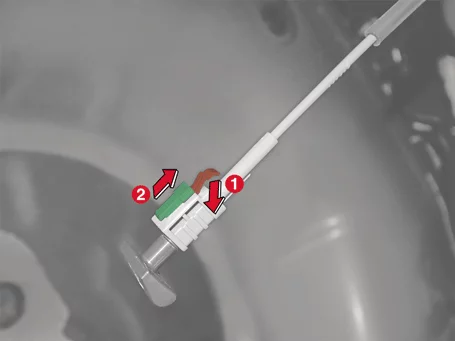
Separate the latch cable (A).
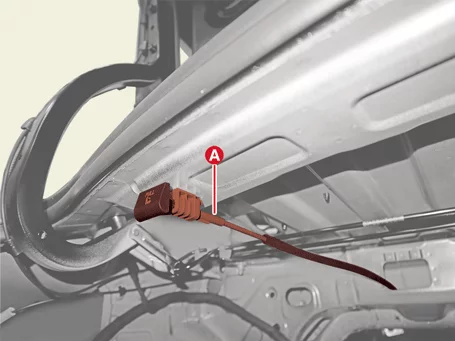
| 1) |
Press the hook in the direction of the arrow.
|
| 2) |
Pulling the cable in the direction of the arrow.
|
|
|
| 3.
|
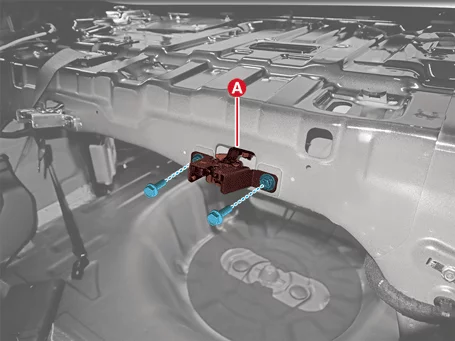
Remove the latch (A) after removing the bolts.
|
Tightening torque:
16.7 - 25.5 N·m (1.7 - 2.6 kgf·m, 12.3 - 18.8 lb·ft)
|
|
| 1.
|
Install in the reverse order of removal.
|
Other information:
Kia K4 (CL4) 2025-2026 Service Manual: Inside rearview mirror
Adjust the inside rearview mirror so that you can view the entire rear window clearly from your driving position. Ensure this adjustment is finalized before you begin your journey in the Kia K4.
To maintain a clear view, avoid placing bulky items, boxes, or passengers in the rear seat or cargo area that could obstruct the rear window visibility.
WARNING
Mirror adjustment
For your safety, never attempt to adjust the rearview mirror while the Kia K4 is in motion.
Kia K4 (CL4) 2025-2026 Service Manual: Airbag Module Disposal Procedure
Airbag Module Disposal Procedure
When scrapping a vehicle equipped with an airbag system such as an airbag or seat Belt Pretensioner (BPT), the
airbag must be deployed first. When deploying the airbag, it must be deployed by a skilled technician, and the
used
airbag cannot be reused, so it must not be installed in another vehicle.