Contents:
Components and Components Location
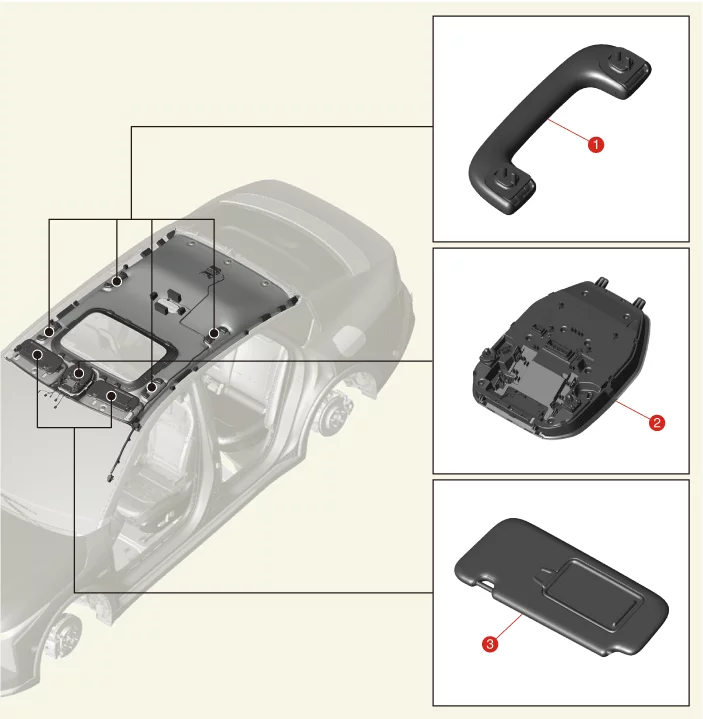
1. Assist Handle
2. Overhead Console
Lamp
|
3. Sunvisor
|
Assist Handle Removal and Installation
| 1.
|
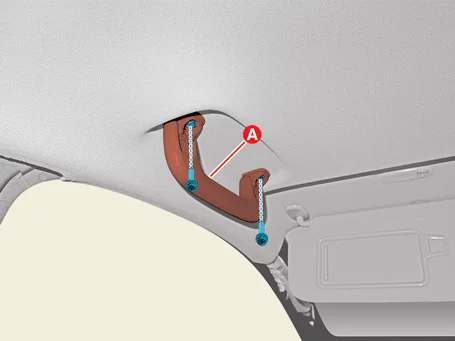
Remove the assist handle (A) after removing the screws.
|
| 1.
|
Install in the reverse order of removal.
|
Multi Sensor Cover Removal and Installation
|
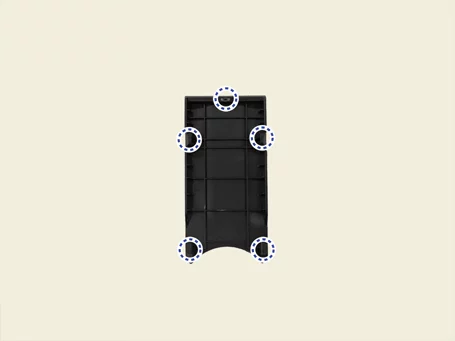
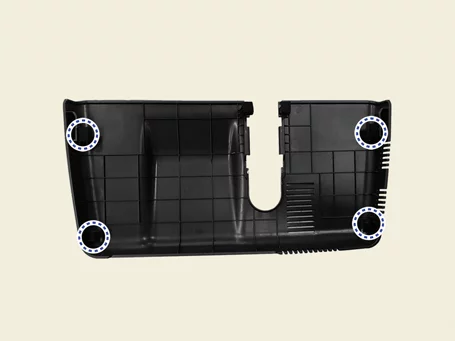
The indication below represents the location of a clip or fastener.

|
| 1.
|
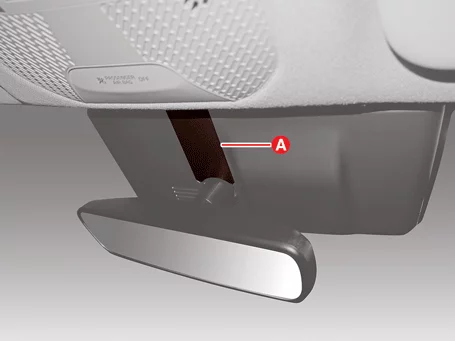
Remove the multi sensor blanking cover (A).
|
| 2.
|
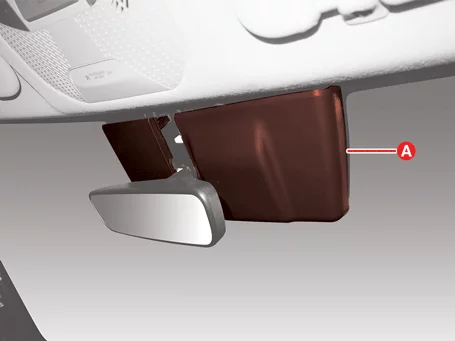
Remove the multi sensor cover (A).
|
| 1.
|
Install in the reverse order of removal.
|
Roof Trim Assembly Removal and Installation - 4DR
|
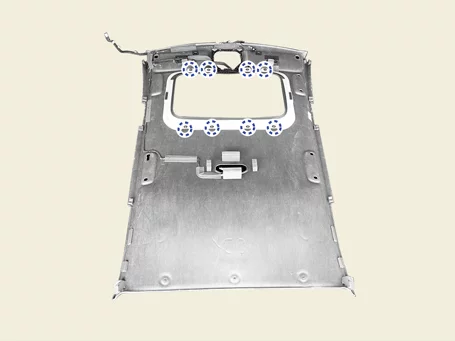
The indication below represents the location of a clip or fastener.
|
| 1.
|
Remove the rear seat back assembly.
(Refer to Rear Seat - "Rear Seat Assembly")
|
| 2.
|
Remove the front pillar trim. [Both side]
(Refer to Interior Trim - "Front Pillar Trim")
|
| 3.
|
Remove the center pillar upper trim. [Both side]
(Refer to Interior Trim - "Center Pillar Trim")
|
| 4.
|
Remove the rear pillar trim. [Both side]
(Refer to Interior Trim - "Rear Pillar Trim")
|
| 5.
|
Remove the sunvisor or retainer.
(Refer to Roof Trim - "Sunvisor")
|
| 6.
|
Remove the assist handle.
(Refer to Roof Trim - "Assist Handle")
|
| 7.
|
Remove the overhead console lamp assembly.
(Refer to Light & Vision System - "Overhead Console
Lamp")
|
| 8.
|
Remove the room lamp.
(Refer to Light & Vision System - "Room Ramp")
|
| 9.
|
Remove the vanity lamp.
(Refer to Light & Vision System - "Vanity Lamp")
|
| 10.
|
Remove the multi sensor cover.
(Refer to Roof Trim - "Multi Sensor Cover")
|
| 11.
|
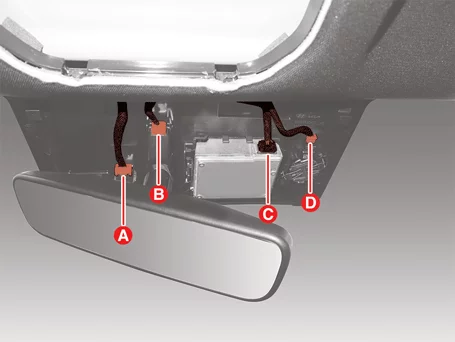
Disconnect the connectors (A, B, C, D).
A : Auto defogging sensor connector
B : Inside mirror connector
C : Front camera connector
D : Rain sensor connector
|
| 12.
|
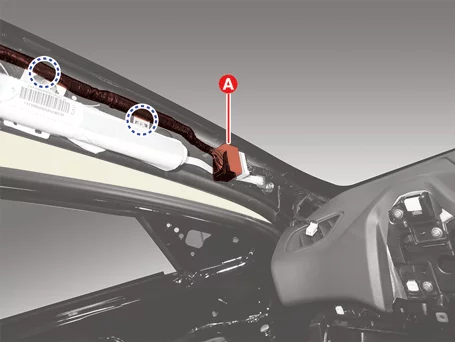
Disconnect the roof trim wiring connector (A).
|
| 13.
|
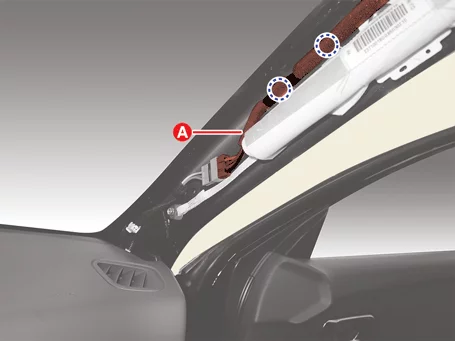
Disconnect the roof shark fin antenna connector (A).
|
| 14.
|
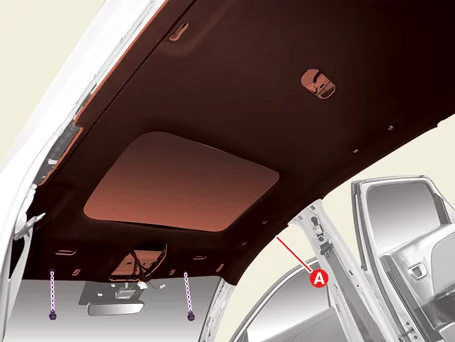
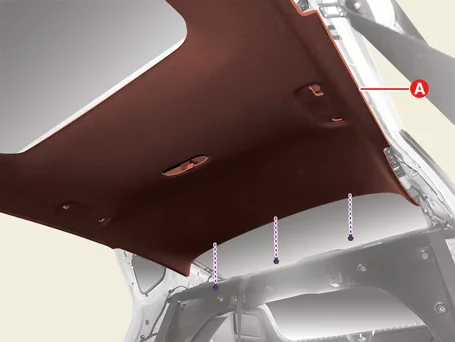
Remove the roof trim assembly (A) after removing the fasteners.
|
| 1.
|
Install in the reverse order of removal.
|
Roof Trim Assembly Removal and Installation - 5DR
|
The indication below represents the location of a clip or fastener.
|
| 1.
|
Remove the rear seat back assembly.
(Refer to Rear Seat - "Rear Seat Assembly")
|
| 2.
|
Remove the front pillar trim. [Both side]
(Refer to Interior Trim - "Front Pillar Trim")
|
| 3.
|
Remove the center pillar upper trim. [Both side]
(Refer to Interior Trim - "Center Pillar Trim")
|
| 4.
|
Remove the rear pillar trim. [Both side]
(Refer to Interior Trim - "Rear Pillar Trim")
|
| 5.
|
Remove the sunvisor or retainer.
(Refer to Roof Trim - "Sunvisor")
|
| 6.
|
Remove the assist handle.
(Refer to Roof Trim - "Assist Handle")
|
| 7.
|
Remove the overhead console lamp assembly.
(Refer to Light & Vision System - "Overhead Console
Lamp")
|
| 8.
|
Remove the room lamp.
(Refer to Light & Vision System - "Room Ramp")
|
| 9.
|
Remove the vanity lamp.
(Refer to Light & Vision System - "Vanity Lamp")
|
| 10.
|
Remove the multi sensor cover.
(Refer to Roof Trim - "Multi Sensor Cover")
|
| 11.
|
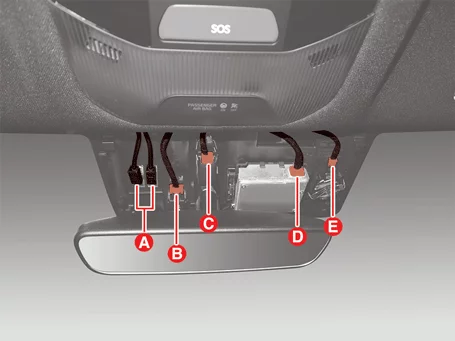
Disconnect the connectors (A, B, C, D, E).
A : Heated wire connector
B : Auto defogging sensor connector
C : Inside mirror connector
D : Front camera connector
E : Rain sensor connector
|
| 12.
|
Disconnect the roof trim wiring connector (A).
|
| 13.
|
Remove the roof trim assembly (A) after removing the fasteners.
|
| 1.
|
Install in the reverse order of removal.
|
Sunvisor Removal and Installation
| 1.
|
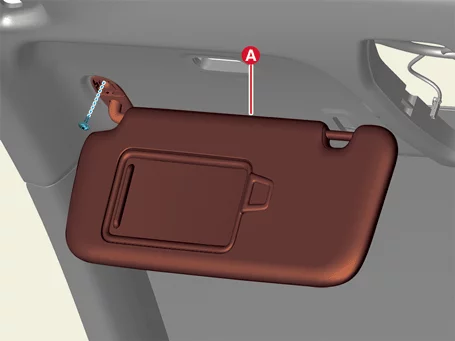
Remove the sunvisor (A) after removing the screw.
|
| 2.
|
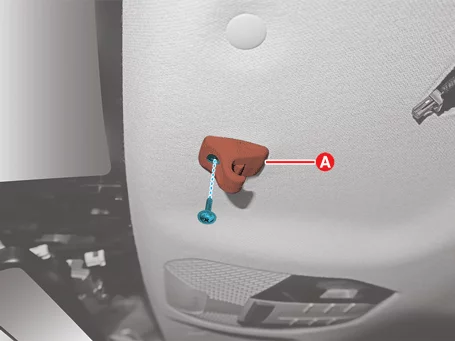
Remove the sunvisor retainer (A) after removing the screw.
|
| 1.
|
Install in the reverse order of removal.
|
Other information:
Kia K4 (CL4) 2025-2026 Service Manual: Interior lights
Your Kia K4 is thoughtfully equipped with a variety of interior lights to ensure cabin visibility for all occupants.
CAUTION
To prevent the Kia K4 12V battery from discharging, avoid using interior lights for extended periods while the engine is not running.
WARNING
Never operate interior lights while driving in darkness. The reflection of these lights on the windows can significantly obscure your view of the road, potentially leading to accidents, serious injury, or death.
Kia K4 (CL4) 2025-2026 Service Manual: Headrest (for front seat)
The driver and front passenger seats of your Kia K4 are engineered with adjustable headrests to provide vital support and comfort during your journeys.
The headrest serves as a crucial safety component, designed to mitigate head and neck movement in the event of a rear-end collision.