Contents:
Components and Components Location
| Components and Components Location |
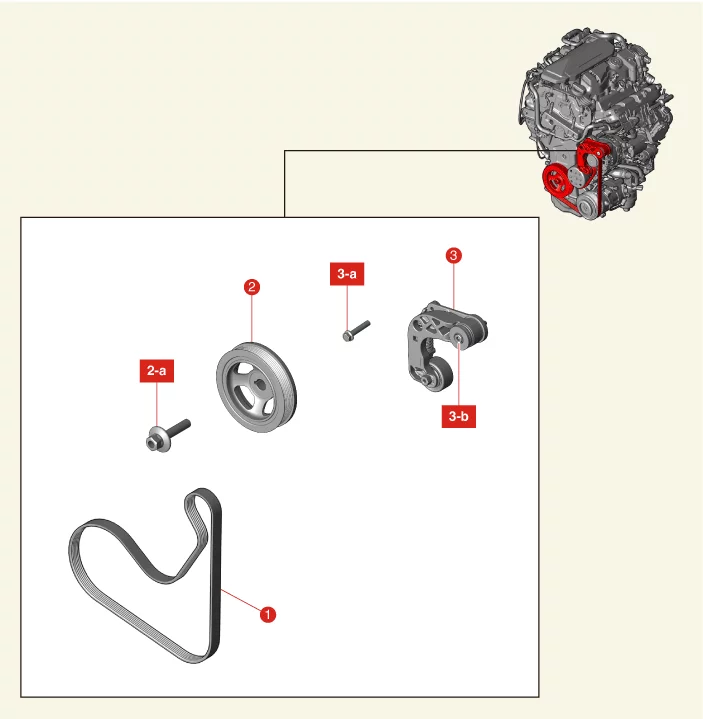
1. Drive Belt
2. Crankshaft Damper
Pulley
2-a.
Step 1 : 66.7 - 70.6 N·m (6.8 - 7.2 kgf·m, 49.2 - 52.1 lb·ft)
2-a. Step 2 : 98 - 102°
|
3. Drive Belt Tensioner
3-a. 18.6 - 23.5
N·m (1.9 -
2.4 kgf·m, 13.7 - 17.4 lb·ft)
3-b. 34.3 - 41.2 N·m (3.5 - 4.2 kgf·m, 25.3 - 30.4 lb·ft)
|
Drive Belt Removal and Installation
There are two ways to remove the drive belt.
| [When removing the drive belt from the upper of the
vehicle] |
| 1.
|
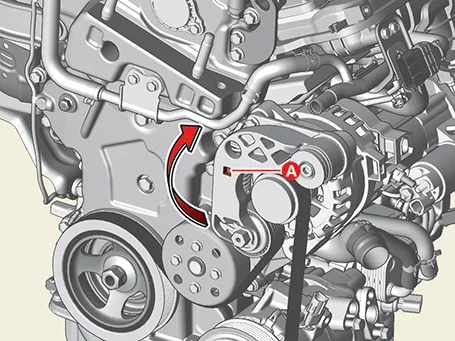
After installing the wrench in the drive belt tensioner maintenance hole (A), turn it
clockwise.
|
•
|
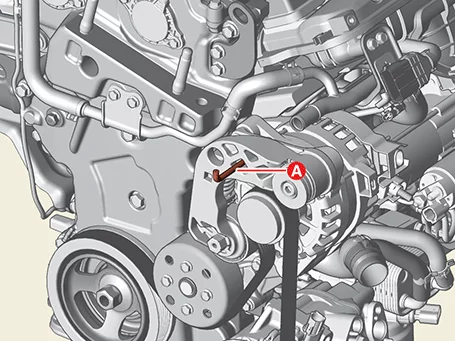
After turning the drive belt tensioner clockwise, install the
retaining pin (A) to secure
the drive belt tensioner.
|
|
•
|
For the fixing pin, use a 6mm hexagon wrench or a pin with the
same outer diameter as a
6mm hexagon wrench.
|
|
|
| 2.
|
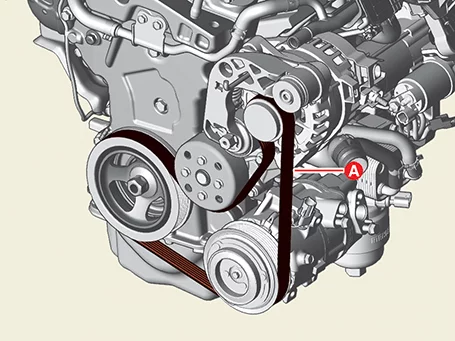
Remove the drive belt (A).
|
When removing the drive belt, remove the drive belt from the water pump pulley.
|
|
| 3.
|
Install in reverse order of removal.
|
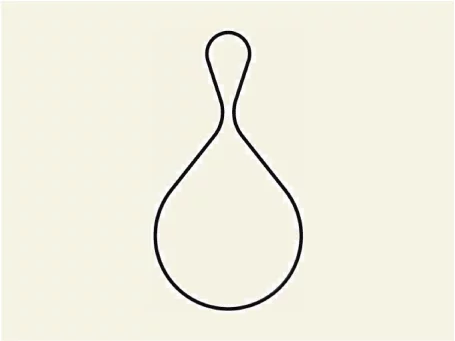
When installing the drive belt, make the drive belt into a larger circular ring
shape than the
alternator pulley as shown in the figure below, and then install the alternator
→ air conditioner
compressor → crankshaft damper pulley → water pump → drive belt tensioner.
|
|
| [When removing the drive belt from the Lower of the
vehicle] |
| 1.
|
Remove the engine compartment under cover.
(Refer to Engine and Transaxle Assembly - "Engine Room Under
Cover")
|
| 2.
|
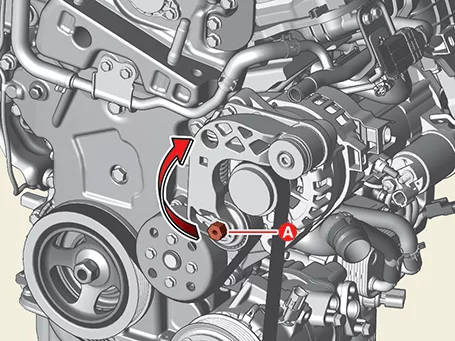
Install the spanner on the drive belt tensioner arm boss (A) and turn it clockwise.
|
•
|
After turning the drive belt tensioner clockwise, install the
retaining pin (A) to secure
the drive belt tensioner.
|
|
•
|
For the fixing pin, use a 6mm hexagon wrench or a pin with the
same outer diameter as a
6mm hexagon wrench.
|
|
|
| 3.
|
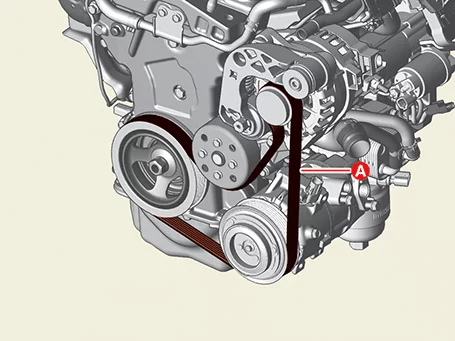
Remove the drive belt (A).
|
When removing the drive belt, remove the drive belt from the water pump pulley.
|
|
| 4.
|
Install in reverse order of removal.
|
When installing the drive belt, make the drive belt into a larger circular ring
shape than the
alternator pulley as shown in the figure below, and then install the alternator
→ air conditioner
compressor → crankshaft damper pulley → water pump → drive belt tensioner.
|
|
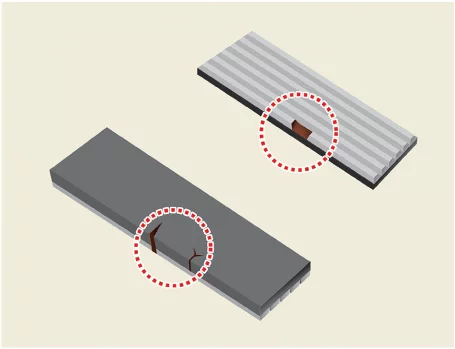
Drive Belt Inspection
Visually check the belt for excessive wear, frayed cords etc.If any defect has been found, replace the drive
belt.
Drive Belt Tensioner Removal and Installation
| 1.
|
Remove the drive belt.
(Refer to Drive Belt System - "Drive Belt")
|
| 2.
|
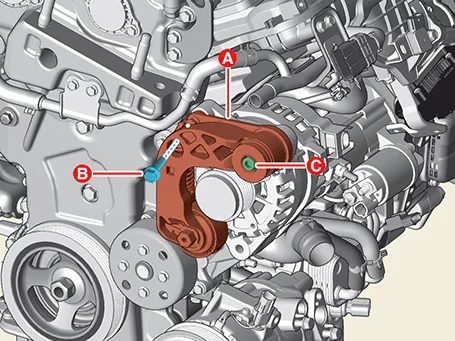
Remove the drive belt tensioner (A) after removing the bolt.
|
Tightening torque
B : 18.6 - 23.5 N·m (1.9 - 2.4 kgf·m,
13.7 - 17.4 lb·ft)
C : 34.3 - 41.2 N·m (3.5 - 4.2 kgf·m,
25.3 - 30.4 lb·ft)
|
|
| 1.
|
Install in reverse order of removal.
|
Install to the specified torque.
|
|
Drive Belt Tensioner Inspection
| 1.
|
Check the drive belt tensioner for excessive dust, crack, and damage. Replace if necessary.
|
Crankshaft Damper Pulley Removal and Installation
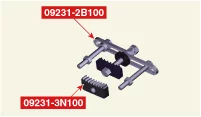
Tool Name / Number
|
Illustration
|
Description
|
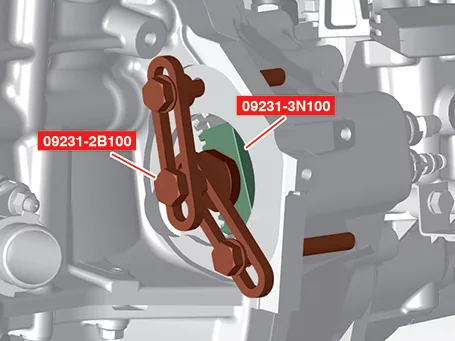
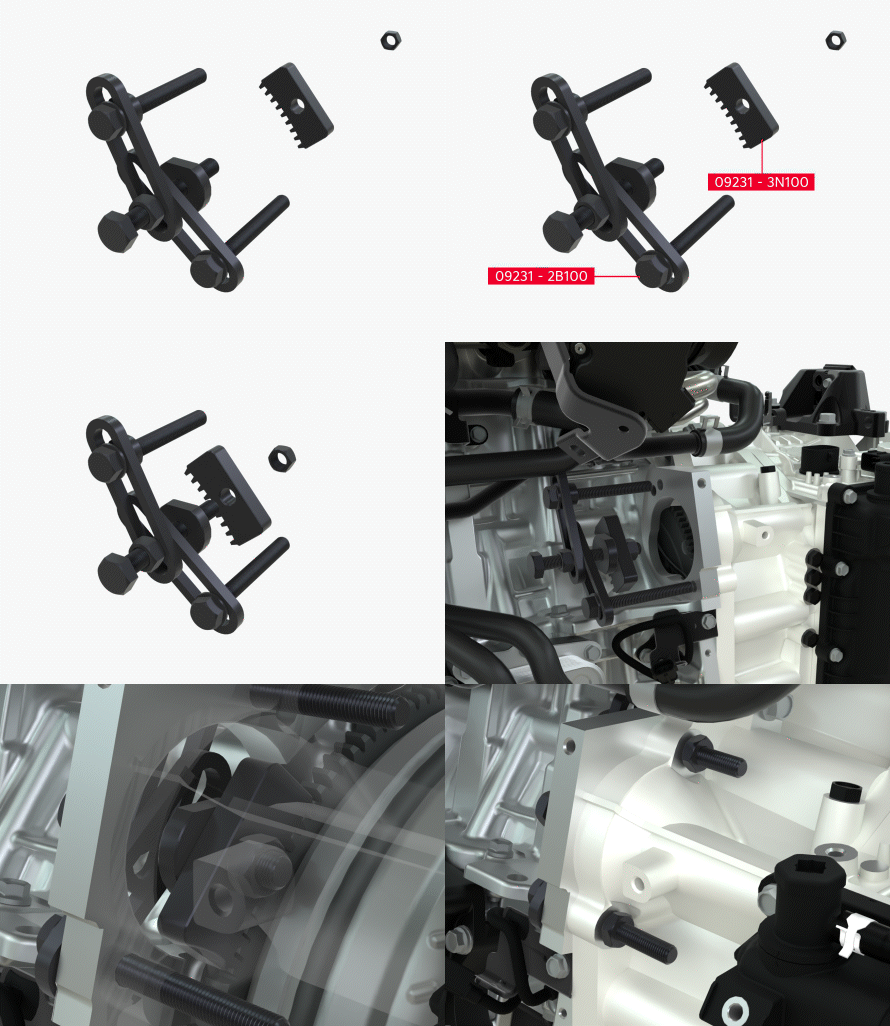
Ring gear stopper
09231 - 2B100
09231 - 3N100
|
|
Used for removing / installing crankshaft damper pulley
|
| 1.
|
Remove the RH front wheel and tire.
(Refer to Suspension System - "Wheel")
|
| 2.
|
Remove the engine room under cover.
(Refer to Engine and Transaxle Assembly - "Engine Room Under
Cover")
|
| 3.
|
Remove the drive belt.
(Refer to Drive Belt System - "Drive Belt")
|
| 4.
|
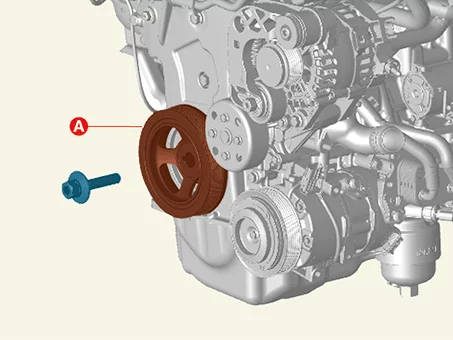
Remove the crankshaft damper pulley (A), after removing the bolt.
|
Tightening torque :
Step 1 : 66.7 - 70.6 N·m (6.8 - 7.2 kgf·m, 49.2 - 52.1 lb·ft)
Step 2 : 98 - 102°
|
|
•
|
To prevent deformation of the rubber part on the crankshaft
damper pulley side, do not
apply pressure to the pulley part or apply excessive external
force.
|
|
•
|
When removing / installing crankshaft damper pulley bolt, after
removing the starter and
using special tool (09231-2B100, 09231-3N100) to fix the ring
gear
(Refer to Engine Electrical
System - "Starter")
|
|
|
| 1.
|
Install in reverse order of removal.
|
Install to the specified torque.
|
|
Other information:
Kia K4 (CL4) 2025-2026 Service Manual: Precautions
WARNING
To reduce the likelihood of serious or fatal injuries and to ensure you receive the maximum safety benefit from the advanced restraint system in your Kia K4, please adhere to these critical guidelines:
Never place a child in any child restraint system (CRS) or booster seat in the front passenger seat of your Kia K4.
Kia K4 (CL4) 2025-2026 Service Manual: Troubleshooting
Troubleshooting
•
Be careful not to short-circuit the wiring by the vehicle body or other wiring.