
Kia K4: Engine Mechanical System
Kia K4 (CL4) 2025-2026 Service Manual / Engine Mechanical System
Contents:
- Specification
- Compression Pressure Inspection
- Troubleshooting
- Special Service Tools
- Cooling System
- Cylinder Block
- Cylinder Head Assembly
- Drive Belt System
- Engine and Transaxle Assembly
- Intake and Exhaust System
- Lubrication System
- Timing System
Specification ➤
Compression Pressure Inspection
| Compression Pressure Inspection |
|

| 1. | Start the engine, run it so that the coolant temperature is 80 - 95°C (176 - 203°F), then stop. |
| 2. | Remove the engine cover. (Refer to Engine and Transaxle Assembly - "Engine Cover") |
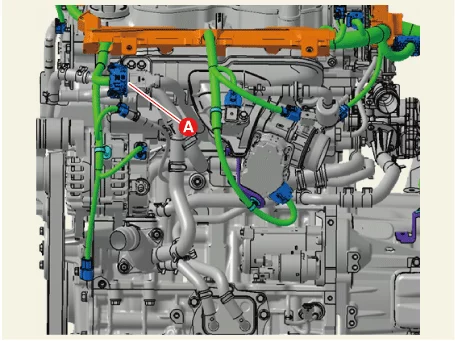
| 3. |
Disconnect the injector extension connector (A).
|
| 4. | Remove the spark plug. (Refer to Engine Electrical System - "Spark Plug") |
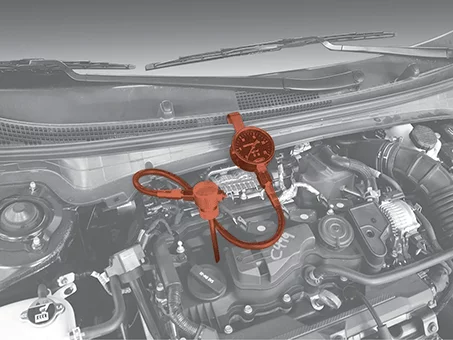
| 5. |
Check the cylinder compression pressure.
|
| 6. | Install the spark plug. (Refer to Engine Electrical System - "Spark Plug") |
| 7. | After the above verification, some DTC codes may occur. In this case, the DTC code will be erased as KDS. |
| 8. | Install the engine cover. (Refer to Engine and Transaxle Assembly - "Engine Cover") |
Troubleshooting
| Troubleshooting |
|
Suspected Cause |
Correction |
|
Worn bearings due to shortage or excessive oil. |
Replace the crankshaft and connecting rod bearings as required. |
|
Improper installed of drive plate. |
Repair or replace the drive plate as required. |
|
Worn piston rings. (Oil consumption may or may not cause the engine to misfire.) |
Compression Pressure Inspection Repair or replace as required. |
|
Worn crankshaft thrust bearings. |
Replace the crankshaft and bearings as required. |
Engine Misfire With Abnormal Valve Train Noise.
|
Suspected Cause |
Correction |
|
Stuck valves. (Carbon buildup on the valve stem can cause the valve not to close properly.) |
Repair or replace as required. |
|
Excessive worn or miss-aligned timing chain. |
Replace the timing chain and sprocket as required. |
|
Worn camshaft lobes. |
Replace the camshaft and swing arm. |
|
Swing arm wear. |
Check and replace swing arm or HLA if necessary. |
Engine Misfire With Coolant Consumption
|
Suspected Cause |
Correction |
|
Faulty cylinder head gasket and/or cracking or other damage to the cylinder head and engine block
cooling
system. |
Inspect the cylinder head and engine block for damage to the coolant passages and/or a faulty head
gasket. |
|
Coolant consumption may or may not cause the engine to overheat. |
Check for coolant leaks and consumption and replace related parts if necessary. |
Engine Misfire With Excessive Oil Consumption
|
Suspected Cause |
Correction |
|
Wear of valves, valve guides and valve stem seals |
Repair or replace as required. |
|
Worn piston ring (Oil consumption may or may not cause the engine to misfire.) |
Replace piston, piston ring and cylinder block after checking compression pressure or measuring oil
consumption. |
Engine Noise On Start-Up, But Only Iasting a Few Seconds.
|
Suspected Cause |
Correction |
|
Incorrect oil viscosity. |
Refill with the correct viscosity oil. |
|
Worn crankshaft thrust bearings. |
Inspect the crankshaft thrust bearings. Repair or replace as required. |
Upper Engine Noise, Regardless Of Engine Speed.
|
Suspected Cause |
Correction |
|
Low oil pressure. |
Repair or replace as required. |
|
Broken valve spring. |
Replace the valve spring. |
|
Excessive wear of the outer ring and body of the swing arm bearing. |
Swing arm assy replace. |
|
Stretched or broken timing chain and/or damaged sprocket teeth. |
Replace the timing chain and sprockets. |
|
Worn timing chain tensioner. |
Replace the timing chain tensioner as required. |
|
Worn valve or faulty Hydraulic Lash Adjuster (HLA). |
Replace the valve or HLA. |
|
Worn camshaft lobes. |
Inspect the camshaft lobes. Replace camshaft and swing arm if necessary. |
|
Worn valve guides or valve stems. |
Inspect the valves and valve guides, then repair or replace as required. |
|
Stuck valves. (Carbon on the valve stem or valve seat may cause the valve to stay open.) |
Inspect the valves and valve guides, then repair as required. |
|
Worn drive belt, idler, tensioner and bearings. |
Replace the drive belt and related parts as required. |
Lower engine noise, regardless of engine speed
|
Suspected Cause |
Correction |
||||||||
|
Low oil pressure. |
Repair or replace as required. |
||||||||
|
Loosened or damaged torsion damper. |
Check or replace torsion damper and torque converter bolts. |
||||||||
|
Damaged oil pan, oil pump screen contacts. |
Inspect the oil pan. Inspect the oil pump screen. Repair or replace as required. |
||||||||
|
Oil pump screen loose, damaged or restricted. |
Inspect the oil pump screen. Repair or replace as required. |
||||||||
|
Excessive piston-to-cylinder bore clearance. |
Inspect the piston and cylinder bore. Repair or replace as required. |
||||||||
|
Excessive piston pin-to-piston clearance. |
Inspect the piston, piston pin and the connecting rod. Repair or replace as required. |
||||||||
|
Excessive connecting rod bearing clearance. |
Inspect the following components and repair as required.
|
||||||||
|
Excessive crankshaft bearing clearance. |
Inspect the following components and repair as required.
|
||||||||
|
Incorrect piston, piston pin and connecting rod installation. |
Verify the piston pins and connecting rods are installed correctly. maintenance as required. |
Engine Noise Under Load.
|
Suspected Cause |
Correction |
||||||
|
Low oil pressure. |
Repair or replace as required. |
||||||
|
Excessive connecting rod bearing clearance. |
Inspect the following components and repair as required.
|
||||||
|
Excessive crankshaft bearing clearance. |
Inspect the following components and repair as required.
|
Engine will not crank. (crankshaft will not rotate)
|
Suspected Cause |
Correction |
||||||||||||
Hydraulically locked cylinder.
|
Remove spark plugs and check for fluid.
|
||||||||||||
|
Broken timing chain and/or timing chain sprocket. |
Inspect timing chain and sprocket. Repair or replace as required. |
||||||||||||
Foreign material in cylinder.
|
Check for damaged parts and foreign substances Repair or replace as required. |
||||||||||||
|
Seized crankshaft or connecting rod bearings. |
Inspect crankshaft and connecting rod bearing. Repair or replace as required. |
||||||||||||
|
Bent or broken connecting rod. |
Inspect connecting rod. Repair or replace as required. |
||||||||||||
|
Broken crankshaft. |
Inspect crankshaft. Repair or replace as required. |
Special Service Tools
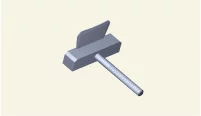
| Special Service Tool |
|
Tool Name / Number |
Illustration |
Description |
|
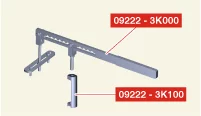
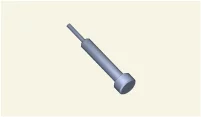
Valve spring compressor 09222 - 3K000 Valve spring compressor adapter 09222 - 3K100 |
|
Removal and installation of the intake or exhaust valve spring & retainer lock |
|
Valve stem seal installer 09222 - 2B100 |
|
Used for installing valve stem seal |
|
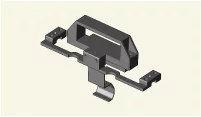
Oil pan remover 09215 - 3C000 |
|
Removal of oil pan |
|
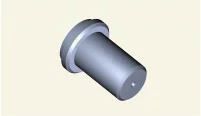
Crankshaft front oil seal installer 0K231 - 2C200 |
|
Used for installing crankshaft front oil seal |
|
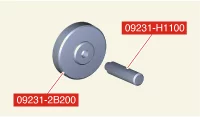
Crankshaft rear oil seal installer 09231 - 2B200 Handle 09231 - H1100 |
|
Used for installing crankshaft rear oil seal |
|
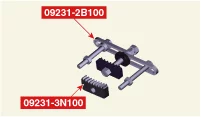
Ring gear stopper 09231 - 2B100 09231 - 3N100 |
|
Used for removing / installing crankshaft damper pulley |
|
Steel ball installer 0K221 - 2M100 |
|
Used for installing steel ball |
|
CVVD fixing jig 0K240 - P4100 |
|
For CVVD assembly removal and install |
|
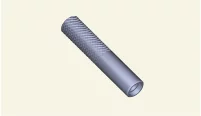
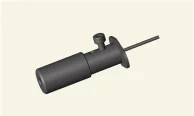
HLA air bleed tool 0K246 - L8000 |
|
Used to air bleed HLA |
Cooling System ➤
Cylinder Block ➤
Cylinder Head Assembly ➤
Drive Belt System ➤
Engine and Transaxle Assembly ➤
Intake and Exhaust System ➤
Lubrication System ➤
Timing System ➤


Other information:
Kia K4 (CL4) 2025-2026 Service Manual: How to use the Digital Key 2 (Card key)
Card Key Proximity and Touch Control Protocols The sleek, credit-card-sized physical NFC credential offers an exceptionally secure and lightweight alternative to traditional key fobs. The driver can effortlessly lock and unlock the passenger cabin by tapping the active card key surface against the integrated touch sensor located on the exterior door handle.Kia K4 (CL4) 2025-2026 Service Manual: Reverse Parking Collision-Avoidance Assist (PCA):
The Reverse Parking Collision-Avoidance Assist (PCA) system in your Kia K4 is designed to enhance safety during low-speed backing maneuvers. By utilizing advanced sensors, this system can detect pedestrians or obstacles located behind your Kia K4 and may provide audible alerts or automatic braking assistance to help you avoid a potential collision while reversing.
Contents
- Specification
- Compression Pressure Inspection
- Troubleshooting
- Special Service Tools
- Cooling System
- Cylinder Block
- Cylinder Head Assembly
- Drive Belt System
- Engine and Transaxle Assembly
- Intake and Exhaust System
- Lubrication System
- Timing System
Categories
- Manuals Home
- Kia K4 Owners Manual
- Kia K4 Service Manual
- Questions & Answers
- Video Guides
- Useful Resources
- New on site
- Most important about Kia K4
- Privacy Policy

Copyright © 2026 Kia K4 Manuals � 0.0104