Contents:
Tool Name / Number
|
Illustration
|
Description
|
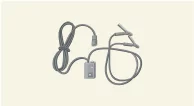
Airbag deployment tool
0957A - 34100A
|
|
Used to deploy the airbag
|
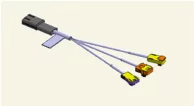
Deployment adapter
0K57A - 3U100A
|
|
Used to deploy the DAB, PAB, CAB, BPT
Used with the airbag deployment tool (9057A - 34100A)
|
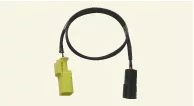
Deployment adapter
0957A - 2W100
|
|
Used to deploy the SAB
Used with the airbag deployment tool (9057A - 34100A)
|
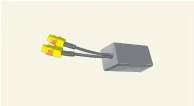
Dummy
0957A - 38200
|
|
Check the airbag resistance
|
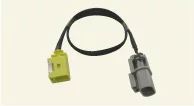
Dummy adapter
0957A - 2W200
|
|
Check the SAB resistance
Used with the dummy (0957A - 38200)
|
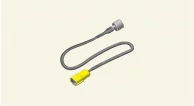
Dummy adapter
0957A - 2G000
|
|
Check the DAB, PAB, CAB, BPT resistance
Used with the dummy (0957A - 38200)
|
Name
|
Abbreviation
|
Curtain Airbag
|
CAB
|
Driver Airbag
|
DAB
|
Knee Airbag
|
KAB
|
Passenger Airbag
|
PAB
|
Side Airbag
|
SAB
|
|
| Precautions when repairing the airbag system |
When repairing the SRS, pay attention to the following items.
|
If the items below are not observed, there is a possibility of serious injury due to unexpected
airbag
deployment, and the airbag may not operate.
|
| 1.
|
After disconnecting the battery negative (-) terminal, wait at least 3 minutes and 30 seconds.
|
| 2.
|
Failure symptoms of the airbag system are difficult to identify. When troubleshooting, the DTC
provides
the most important information.
|
| 3.
|
When repairing an airbag system fault, always inspect the DTC before removing the battery.
|
| 4.
|
Do not measure the resistance of the airbag squib connector. (It is very dangerous because the
airbag can
be activated.)
|
Squib : It is an ignition device installed in the inflator of the electric
airbag module.
|
|
| 5.
|
Be careful not to damage the airbag module by oil, grease, cleaner and water.
|
| 6.
|
Do not use airbag components from other vehicles.
|
| 7.
|
When replacing components, replace them with new ones.
|
| 8.
|
Do not disassemble or repair to reuse for all airbag system components.
|
| 9.
|
When installing the airbag system, be careful not to impact around the airbag control unit and
impact
sensor. The airbag may be suddenly deployed, which may cause damage and injury.
|
| 10.
|
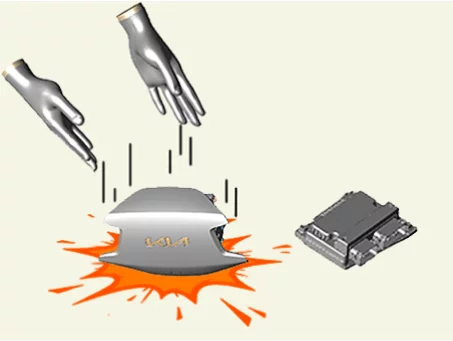
If the airbag module is dropped or other defects such as cracks, dents on the case, the bracket
and the
connector are occurred, replace them with new ones.
|
| 11.
|
After completing the airbag system repair, check the warning lamp and delete the DTC.
|
The operation of the airbag warning lamp may be blocked by other circuit
faults. Therefore, when
the airbag warning lamp turns on, the DTC is deleted by using the KDS.
|
|
| 12.
|
After completing the repair and inspection of the SRS, be sure to initialize the system. (Keep
IG ON for
more than 7 seconds → Keep IG OFF for more than 3 minutes and 30 seconds → Keep IG ON for more
than 7
seconds)
|
Airbag Handling and Storage
| 1.
|
Do not disassemble the airbag.
|
| 2.
|
The deployed airbags cannot be reused.
|
| 3.
|
Be sure to observe the following precautions when storing the airbag.
|
•
|
Store the airbag module with the top side of the cover facing upward.
|
|
•
|
The double locking connector lever must be locked, and positioned so that the
connector is not
damaged.
|
|
•
|
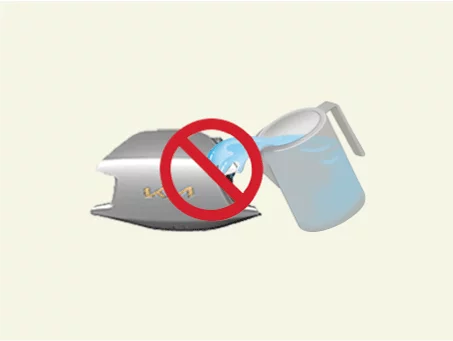
Be careful not to damage the airbag module by oil, grease, cleaner and water.
|
|
•
|
Store in a place where the ambient temperature is below 60°C (140°F), humidity
is not high, and
there is no electrical noise.
|
|
•
|
Follow the disposal procedure for the damaged airbags.
(Refer to Airbag Module - "Airbag Module
Disposal
Procedure")
|
|
Wiring Precautions
Observe the precautions described below.
|
•
|
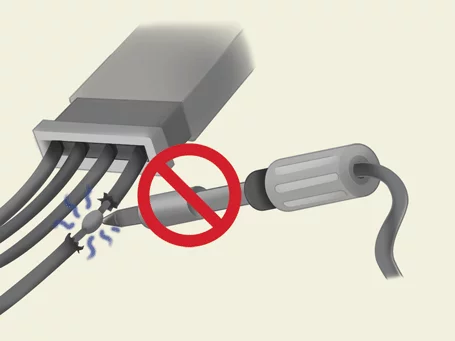
Never reconnect or repair the damaged airbag wiring. If the airbag wiring is damaged, replace
the
harness.
|
|
•
|
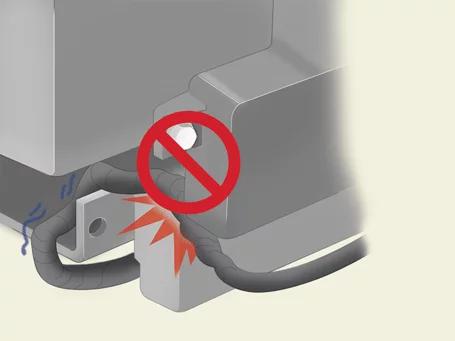
Make sure the wiring is not interfered with other components.
|
|
•
|
Make sure that there are no foreign substances on the connector surface of the airbag module.
Poor
grounding can cause problems that are difficult to diagnose.
|
Precautions for Inspections
When using the tester, insert the tester probe into the connector wire side. Do not insert the tester probe
into
the terminal side of the connector.
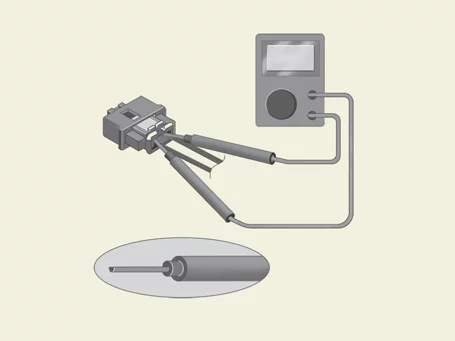
Use a U-shaped probe and do not forcefully insert the probe.
Airbag Connector Precautions
| 1.
|
Disconnect the connector.
To disconnect the connector, remove the connector by holding the connector and pulling the
spring loaded
sleeve (A) and slider (B) from the opposite side. Be careful to pull the sleeve, not the
connector.
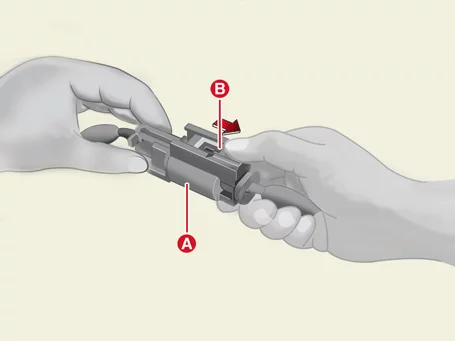
|
| 2.
|
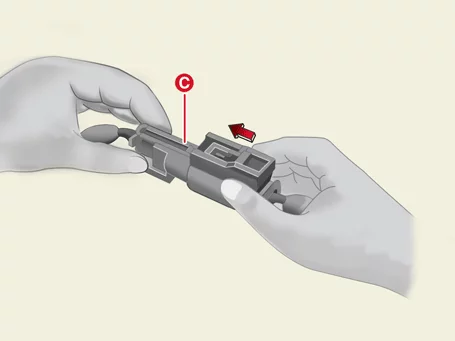
Connect the connector.
Hold both connectors and push firmly until the protrusion (C) of the connector on the sleeve
side clicks
into place.
Abbreviation
Abbreviation
|
Name
|
DAB
|
Driver Airbag
|
PAB
|
Passenger Airbag
|
SAB
|
Side Airbag
|
CAB
|
Curtain Airbag
|
KAB
|
Knee Airbag
|
ACU
|
Airbag Control Unit
|
FIS
|
Front Impact Sensor
|
P-SIS
|
Pressure type Side Impact Sensor
|
A-SIS
|
Acceleration type Side Impact Sensor
|
|
Description and Operation
|
•
|
The airbag system is a supplemental restraint system to protect the driver and passengers from
injuries
by operating the airbags and seat belt pretensioner installed on the driver's and front
passenger's seats in
the event of a vehicle collision.
|
|
•
|
The airbag system is configured as follows.
Name
|
Abbreviation
|
Airbag and seat belt warning light
|
-
|
Airbag Control Unit
|
ACU
|
Clock spring
|
-
|
Curtain Airbag
|
CAB
|
Driver Airbag
|
DAB
|
Front Impact Sensor
|
FIS
|
Knee Airbag
|
KAB
|
Passenger Airbag
|
PAB
|
Seat Belt Pretensioner
|
BPT
|
Side Airbag
|
SAB
|
Side Impact Sensor
|
Acceleration type Front
|
A - FSIS
|
Acceleration type Rear
|
A - RSIS
|
Pressure type
|
P - SIS
|
|
The airbag control unit turns on the airbag warning lamp by detecting whether there is an abnormality in the
airbag system when the power is applied.
| 1.
|
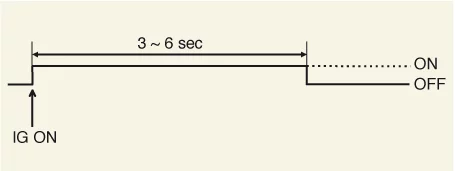
When the airbag system is normal.
|
–
|
When the airbag system is normal, the airbag warning lamp turns on for 3 to 6
seconds and turns
off.
|
|
| 2.
|
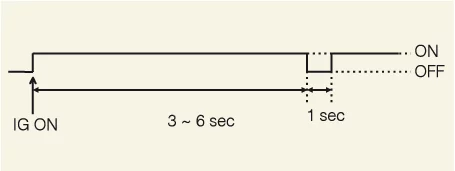
If there is any problem with the airbag system.
|
–
|
If there is a problem with the airbag system, the warning lamp will be on for 3
to 6 seconds,
then go off for 1 second, then come back on and stay on.
|
|
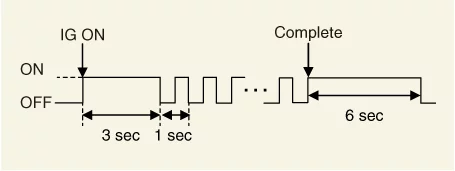
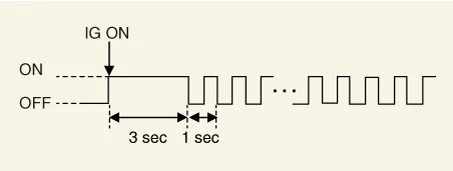
| 3.
|
When in the variant coding (EOL) mode.
|
–
|
When the IG is ON, the airbag warning lamp turns on for 3 seconds.
|
|
–
|
The airbag warning lamp blinks at 1 second intervals until the variant coding
(EOL) is normally
completed.
|
|
–
|
When variant coding (EOL) is normally completed, the airbag warning lamp turns
on for 6 seconds
and then turns off.
|
|
–
|
When variant coding (EOL) is not normally completed, the airbag warning lamp
continues to blink
at 1 second intervals.
|
| (1)
|
When variant coding (EOL) is normally completed.
|
| (2)
|
When variant coding (EOL) is not normally completed.
|
|
|
•
|
If there is a failure of the airbag system or an internal failure of the airbag
system control
module, variant coding (EOL) should be re-performed after confirming the cause
of failure and
completing the action using the KDS.
|
|
•
|
In the following cases, the airbag warning light continues to illuminate.
|
|
–
|
If there is a failure of the airbag system or an internal failure of the airbag
control unit.
|
|
–
|
If there is a Diagnostic Trouble Code (DTC).
|
|
•
|
If a failure occurs in which the airbag control module cannot operate, the
operation of the
airbag warning lamp cannot be controlled normally.
|
|
Repair Procedures
| Replacement of components after deploying the SRS |
|
•
|
Be sure to keep the torque specifications presented in shop manuals. Otherwise,
it could lead to
the malfunction of airbag system.
|
|
•
|
Before the work related to the airbag, Check the Diagnosis Trouble Code (DTC)
with the KDS.
|
|
| 1.
|
When the airbags deployed after a collision, replace the following items.
| 1) |
Airbag Control Unit (ACU)
|
| 2) |
Replace the clock spring if there is any problem after checking the clock
spring for damage when
the driver airbag is deployed.
|
|
| 2.
|
Check that the airbag system operates normally after repairing the vehicle.
|
When the IG is on, the airbag warning lamp should turns off after turning on
for 3 - 6 seconds.
|
|
Other information:
Kia K4 (CL4) 2025-2026 Service Manual: Over-The-Air (OTA) software update
The Over-The-Air (OTA) software update feature provides a seamless way to keep your Kia K4 performing at its peak. By wirelessly downloading the latest firmware and system improvements, this feature ensures that your Kia K4 always benefits from the most recent technological enhancements without requiring a visit to a service center. To utilize these convenient remote updates, you must maintain an active Kia Connect subscription.