Contents:
Tool Name / Number
|
Illustration
|
Description
|
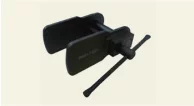
Piston expander
09581 - 11000
|
|
Spreading the front brake caliper piston.
|
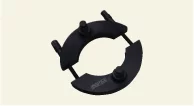
Sensor cap remover
0K583 - R0400
|
|
Used for removal of wheel sensor cap
|
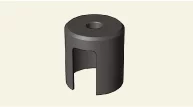
Sensor cap installer
09527 - AL200
|
|
Used for installing of wheel sensor cap (O.D : Φ65.3)
(Used with 09231 - 93100)
|
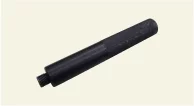
Handle
09231 - 93100
|
|
Handle
(Used with 09527 - AL200)
|
Troubleshooting
| 1.
|
The brake system can be more quickly diagnosed for problems by using the KDS (Refer to "DTC
guide").
| (1)
|
Self diagnosis : Inspection and display fault code (DTC)
|
| (2)
|
Data analysis : Checking the system input/output data state
|
| (3)
|
Actuation test : Checking the system operation condition
|
| (4)
|
S/W Management : Controlling other features including system option setting and
zero point
adjustment.
|
|
The table below shows the most common defects and repair remedies in the brake system. each number indicates
the
priority of the likely cause of the defects.
| Brake Warning Lamp Illuminated |
Suspected causes
|
Correction
|
1. Brake fluid level sensor (not connected securely)
|
Reconnect or replace
|
2. Low brake fluid level
|
Fill and leak check
|
3. Parking brake (set)
|
Release
|
| Lower Pedal or Sponge Pedal |
Suspected causes
|
Correction
|
1. Brake system (oil leakage)
|
Repair
|
2. Brake system (air inflow)
|
Perform air bleeding procedure
|
3. Piston seal (Wear or damage)
|
Replacement
|
4. Brake booster (fault)
|
Replacement
|
Suspected causes
|
Correction
|
1. Brake pedal free separation (minimum)
|
Adjustment
|
2. Pad (twisted or cracked)
|
Replacement
|
3. Piston (stuck)
|
Replacement
|
4. Piston (frozen)
|
Replacement
|
5. Anchor or return spring (malfunction)
|
Replacement
|
6. Brake Booster (fault)
|
Replacement
|
Suspected causes
|
Correction
|
1. Piston (stuck)
|
Replacement
|
2. Pad (oil stain)
|
Replacement
|
3. Piston (frozen)
|
Replacement
|
4. Disc (scratches)
|
Replacement
|
5. Pad (cracked or twisted)
|
Replacement
|
| Heavy Pedal and Brake Trouble |
Suspected causes
|
Correction
|
1. Brake system (oil leakage)
|
Repair
|
2. Brake system (air inflow)
|
Perform air bleeding procedure
|
3. Pad (worned out)
|
Replacement
|
4. Pad (cracked or twisted)
|
Replacement
|
5. Pad (oil stain)
|
Replacement
|
6. Pad (slippery)
|
Replacement
|
7. Disc (dent or scratch)
|
Replacement
|
8. Booster system (leakage of vacuum)
|
Replacement
|
Suspected causes
|
Correction
|
1. Pad (cracked or twisted)
|
Replacement
|
2. Mounting bolt (loose)
|
Retighten
|
3. Disc (dent or scratch)
|
Replacement
|
4. Sliding pin (wear)
|
Replacement
|
5. Pad (dirty)
|
Cleaning
|
6. Pad (slippery)
|
Replacement
|
7. Anchor or return spring (faulty)
|
Replacement
|
8. Brake pad shim (damaged)
|
Replacement
|
| Poor Braking Performance (at High Speed) |
Suspected causes
|
Correction
|
1. Pad (worned out)
|
Replacement
|
2. Brake booster (fault)
|
Replacement
|
| Abnormal Vibration When Braking. |
Suspected causes
|
Correction
|
1. Booster system (leakage of vacuum)
|
Replacement
|
2. Excessive free play of the brake pedal
|
Adjustment
|
3. Brake booster (fault)
|
Replacement
|
4. Brake caliper
|
Replacement
|
5. Reservoir tank cap seal
|
Replacement
|
6. Damaged brake line
|
Replacement
|
7. Disc juddering
|
Perform brake judder inspection and resurface or replace the disc
|
Brake Bleeding
|
•
|
This video was created using 3D graphics to help understand the vehicle
maintenance manual.
|
|
•
|
There may be some differences from actual vehicles.
|
|
•
|
The location and repair procedures of the parts may vary depending on vehicle
model, model year,
region, and specifications.
|
|
•
|
Check the KDS Guide for detailed information on how to use the KDS.
|
|
•
|
Check the manual for detailed maintenance procedures.
|
|
•
|
Unauthorized reproduction, distribution, or sharing of this video is
prohibited.
|
|
Brake Bleeding
(Click to play)

Video: Brake Bleeding
| Brake System Bleeding Procedures |
|
Be careful not to brake fluid contact with vehicle paint or human skin. if the brake fluid
spilled, wipe
it with a clean cloth or water immediately. if it touches the body take medical action quickly.
|
Air Bleeding Procedure
This repair is to be performed by two people.
|
–
|
Main worker : Bleeds the system by manually opening and closing the bleed screw
and detecting air
coming out of brake lines.
|
|
–
|
Assistant : Brake pedal operation and scanner operation inside the vehicle.
|
|
|
•
|
Do not reuse the drained brake fluid.
|
|
•
|
Always use genuine DOT4 brake Fluid, Using a non-genuine DOT4 brake fluid can
cause corrosion and
decrease the life of the system.
|
|
•
|
Make sure that no dirt or other foreign matter is allowed to contaminate the
brake fluid.
|
|
•
|
Before air bleeding, check all the brake lines for leakage.
|
|
•
|
Check the installation of ABS and ESC control unit.
|
|
| 1.
|
The main worker connects the clear hose to the wheel bleeder screw (A) and sends a signal to
assistant to
depress the brake pedal.
|
| 2.
|
The assistant to pump the brake pedal 2 times with normal brake force and then keep the brake
pedal
depressed.
|
| 3.
|
While the assistant is depressing the brake pedal, remove the bleed screw (A) momentarily to
remove the
air, and then fasten it again.
|
The bleed screw should open and close only 1/4 turn.
|
[Front]
|
Tightening torque :
13.7 - 19.6 N·m (1.4 - 2.0 kgf·m, 10.1 - 14.5 lb·ft)
|
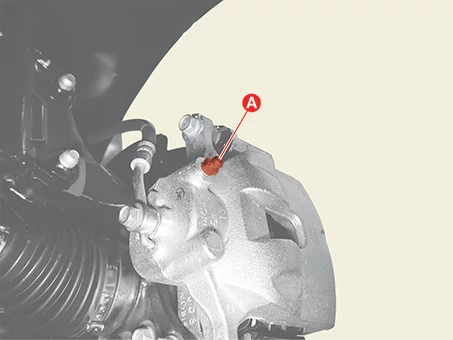
[Rear]
|
Tightening torque :
6.9 - 12.7 N·m (0.7 - 1.3 kgf·m, 5.1 - 9.4 lb·ft, 60.8 - 112.8 lb·in)
|
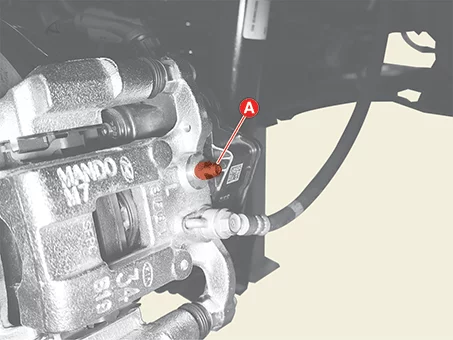
|
| 4.
|
Repeat the above procedure until no air bubbles appear in the brake fluid.
|
| 5.
|
Perform air bleeding in the following sequence.
 Rear RH →  Rear LH →  Front RH →  Front LH |
| 6.
|
Repeat the procedure one more time.
|
The work order is the same, but the pedals with a very strong and quick
momentary force.
|
|
| 7.
|
Release the brake pedal.
|
| 8.
|
Check the brake pedal stroke.
|
Pedal Stroke :
137.95 mm (5.43 in.)
|
|
Air Bleeding Procedures (For ABS / ESC System)
This procedure should be followed to ensure adequate bleeding of air and filling of the ESC unit, brake lines
and
master cylinder with brake fluid.
This repair is to be performed by two people.
|
–
|
Main worker : Bleeds the system by manually opening and closing the bleed screw
and detecting air
coming out of brake lines.
|
|
–
|
Assistant : Brake pedal operation and scanner operation inside the vehicle.
|
|
| 1.
|
Install a tool that can continuously supply brake fluid to the master cylinder reservoir, or
supply brake
fluid so that the reservoir is always full during operation.
|
•
|
Do not reuse the drained brake fluid.
|
|
•
|
Always use genuine DOT4 brake Fluid, Using a non-genuine DOT4
brake fluid can cause
corrosion and decrease the life of the system.
|
|
•
|
Make sure that no dirt or other foreign matter is allowed to
contaminate the brake fluid.
|
|
•
|
Before air bleeding, check all the brake lines for leakage.
|
|
•
|
Check the installation of ABS and ESC control unit.
|
|
|
| 2.
|
Perform in the below procedure with KDS.
(S/W Management → ABS/ESC → HCU Air Bleeding Mode)
|
Refer to the KDS screen for operating conditions and details.
|
|
Other information:
Kia K4 (CL4) 2025-2026 Service Manual: Finish damage repair
If you identify chips, deep scratches, or other damage to the paint finish of your Kia K4, address these areas promptly to prevent the onset of corrosion. Small surface imperfections can often be repaired using genuine touch-up paint specifically formulated for your vehicle's color code. For larger areas of paint damage or structural bodywork issues, we recommend visiting an authorized Kia dealer to ensure the repair matches the factory standards and preserves your vehicle's long-term protection.
Kia K4 (CL4) 2025-2026 Service Manual: Airbag Module Disposal Procedure
Airbag Module Disposal Procedure
When scrapping a vehicle equipped with an airbag system such as an airbag or seat Belt Pretensioner (BPT), the
airbag must be deployed first. When deploying the airbag, it must be deployed by a skilled technician, and the
used
airbag cannot be reused, so it must not be installed in another vehicle.